|
In the previous sections, I showed how easy it is to install the complete Lazarus development environment on Windows (just running the installer, that
includes everything you need) and on Ubuntu (using the command line tool AptGet that installs everything you need). On macOS, things are a little bit more
complicated: There are prerequisites to be installed manually before installing Free Pascal; Lazarus/ Free Pascal itself is three files; the debugger
has to be manually re-configured to make it work. The tutorial is about installing fpc 3.2.2 and Lazarus 2.2.0 on macOS BigSur.
For older versions of Lazarus/Free Pascal or older versions of macOS, the procedure, described here, may not apply.
|
|
Step 1: Installation of XCode (optional).
|
XCode is the software development suite for Mac that allows developers to build apps for macOS, iOS, tvOS, and watchOS. It's very
huge: for XCode 13.2, a 8GB download file and using more than 36GB of disk space when installed. Thus, only install it if you need it, and that's not the case
in order to build Free Pascal applications for macOS. The actual version of XCode may be installed from App Store, but I suggest to
download XCode from Apple Developer Connection (you'll have to log in using your Apple ID
and maybe you'll be asked to enter the Apple ID code, they send to you, to access the site). This has two advantages:
- The installation of the 10GB XCode from the store takes lots of time and if your Internet connection is interrupted, you'll have
to start over. Going to the developers site, is a regular (and very fast) HTTP download, that you can (probably) resume, if it is interrupted.
- If you use the developer site, you can choose the XCode version, that you want. This is for example interesting, if you have a slower Internet connection
and perhaps prefer to install one of the previous XCode versions, some GB smaller. Notice however, that a minimum version of XCode is required for a given
version of macOS, iOS, etc.
|
|
The download from the developer site is a XIP (.xip) file. These are archives that are similar to zip, except that they include a digital
signature that can be verified on the operating system before the archive is expanded. Double-clicking the .xip file will open it in the Archive
Utility, the signature is verified and the archive is expanded (on my virtual Mac book, this took an endless time). I'm using computers for over 40 years, but
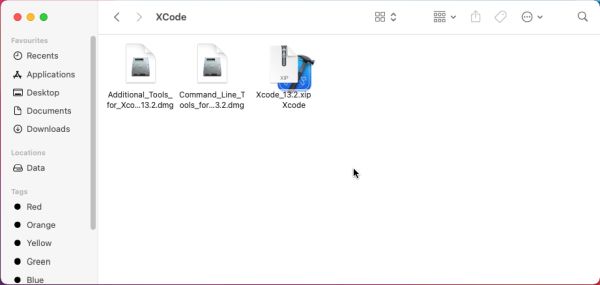
it's the first time that I work with a Mac, so, the first time that I saw this kind of "double-icon" shown on the screenshot below. The gray icon is the XIP archive,
the blue one is the result of the archive extraction, i.e. the XCode application. As my knowledge concerning macOS is not lots more than zero,
I'm not sure if this is the correct way to do, but it' what I actually did: right-click the XCode application icon and moving the app to the Applications folder.
|
|
|
|
Step 2: Installation of the XCode command line tools.
|
|
This is mandatory, independently if you installed XCode or not! As for XCode, I suggest to download the tools from Apple Developer Connection. The download is a DMG (.dmg) file. These are disk images, that you can open by
double-clicking them (beside extracting the image content, double-clicking a .dmg file will create a disk icon on the desktop, that you may use to access the
extracted files). The image contains one single file, a PKG (.pkg) file. These are software packages, that, when double-clicked, are
opened with the Installer application. Wizard-guided, installation of a Mac package is essentially the same as
running a setup program on Windows. The XCode command line tools will use some 3.4GB of disk space (the disk image extraction and the installation were very fast on my
virtual Mac book).
|
|
Step 3: Downloading Lazarus/Free Pascal.
|
You can find the official Lazarus/Free Pascal repository on Source Forge and the packages needed may be downloaded from the Lazarus IDE file area. Important to note:
- You must use the correct version for the macOS, you are actually using. Normally, you'll choose the
64 bit packages in the Sourceforge Lazarus macOS x86-64 directory (all newer Macs are 64bit). When choosing the version of Lazarus, be aware that not all
versions of Lazarus or FPC are compatible with all versions of macOS. FPC 3.x and Lazarus 2.x should work correctly on macOS 10 and 11 (and probably 12, too).
- As a difference with Windows and Linux, there are several packages, that have to be installed separately. In my case (macOS BigSur):
- fpc-3.2.2.intelarm64-macosx.dmg: the Free Pascal compiler.
- fpc-src-3.2.2-20210709-macosx.dmg: the Free Pascal sources.
- Lazarus-2.2.0-0-x86_64-macosx.pkg: the Lazarus IDE.
It is mandatory to install these 3 files and in the correct order. Please, note, that none of these packages includes a debugger (cf.
step 5 for details).
|
|
Step 4: Installing Lazarus/Free Pascal.
|
|
The compiler and the sources download files are disk images (.dmg files). You have to extract their content first. Both contain a package file
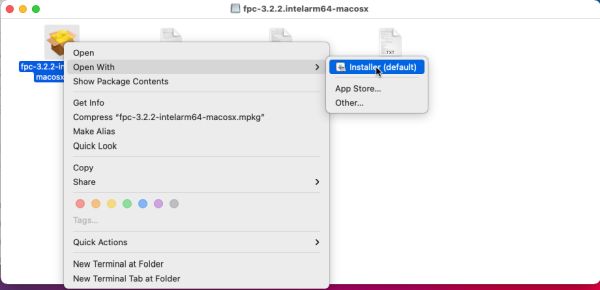
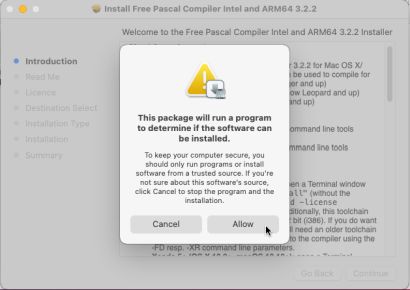
(.pkg) that will be used to actually start the installation. Important: As the Lazarus/Free Pascal installation packages are not approved
by Apple, you need to hold down the Control key, right-click the package and choose Open, then confirm that you want to install software from an unknown
developer.
|
|
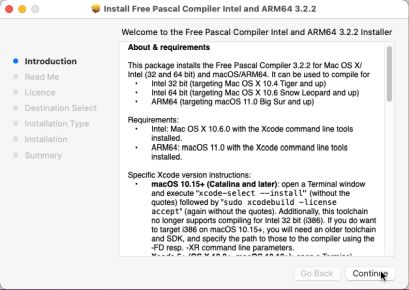
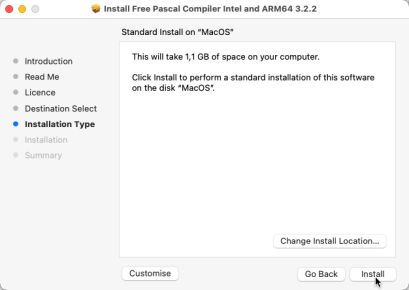
The first package to be installed is the Free Pascal compiler.
|
|
|
|
Installation is wizard-guided, fast and uses some 1.1GB of disk space.
|
|
|
|
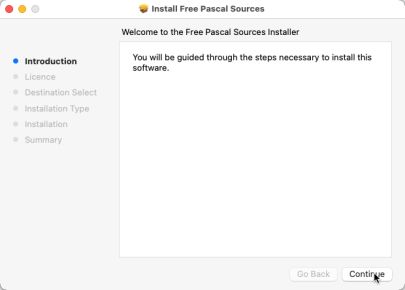
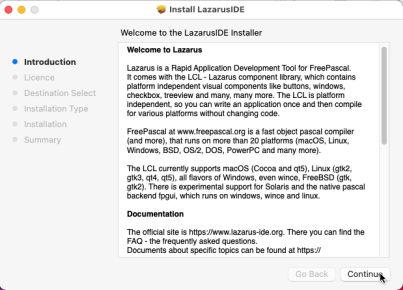
Continue with the installation of the Free Pascal sources. And, finally, install the Lazarus IDE.
|
|
|
|
When the installation is completed, a Lazarus folder is added to your Applications directory. You'll find there
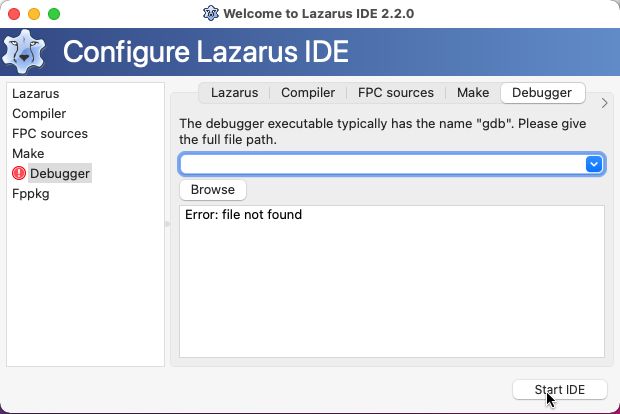
the blue icon of the Lazarus application. Double-click the icon to start the IDE. As for Windows and Ubuntu, the configuration window opens.
A problem, however, on macOS: No debugger found!. What's the reason for this and what to do to get debugging working, is explained in the next
step. For now, just start the IDE (confirming to ignore the missing debugger).
|
|
|
|
As a difference with Ubuntu 20, where (at least on my machine) the IDE takes lots of time to show up, startup is immediate on my Mac. The author of the article Installing Lazarus on macOS on the official Free Pascal site, suggests to check
(and change if necessary) some settings in order to ensure that the code produced is 64bit code, and that the Cocoa framework is used to
build the application. In Preferences > Environment > Files, make sure that Compiler Executable is set to
"/usr/local/bin/fpc". In Preferences > Compiler Options > Config and Target, set Target CPU family to x86_64.
It's also here, where you can check if Current LCL Widgetset is set to Cocoa. On my system, only the Target CPU
family had to be changed, the other options were already as wanted. If you have some Free Pascal code, you can try to build and run it now. The build shouldn't
be a problem, but when trying to run the application, you'll get an error message concerning the missing debugger. If you normally don't use a debugger, this isn't a
problem: Just use Run without debugging instead of Run.
|
|
Step 5: Configuring the debugger.
|
|
As a difference with Windows and Linux, Lazarus/Free Pascal on Mac never included a debugger, because GDB was already present, as having been installed with the XCode
command line tools. With the latest versions of XCode, this is no more true, because Apple now uses LLDB. This means that, first, if you use an older version of XCode,
the debugger error, described here, possibly not occurs, because GDB actually is present, and, second, if you use an older version of Lazarus, it may not be ready
to use LLDB and you'll have to upgrade your Lazarus installation. The following was tested successfully on macOS BigSur with XCode 13.2, fpc 3.2.2
and Lazarus 2.2.0.
|
|
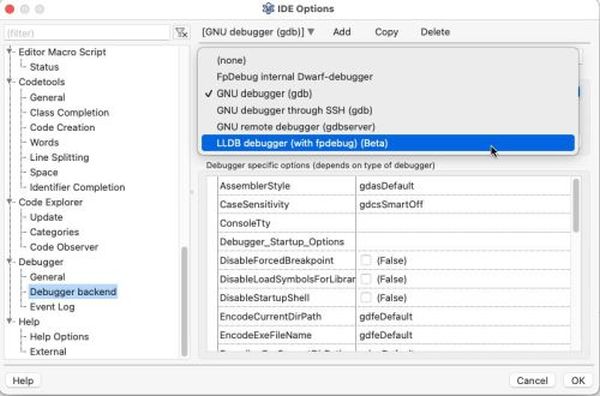
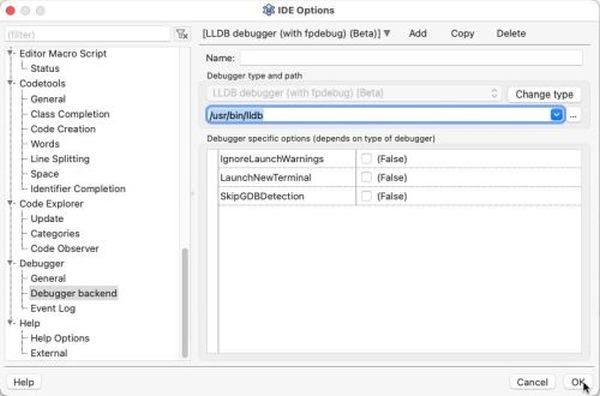
Go to Preferences > Debugger > Debugger backend. Have a look at the settings for Debugger type and path. "GNU
debugger (gdb)": this can't work with the latest version of XCode. Push the Change type button and in the drop-down list, choose LLDB debugger (with fpdebug) (Beta). If the path to the debugger executable is not filled in automatically, set it manually to /usr/bin/lldb.
|
|
|
|
Two important points to mention here. 1. Free Pascal debugging requires the fpdebug Lazarus package; thus, check if it is actually
installed (on my system, it was installed). 2. The Free Pascal debugger based on LLDB is only at beta state, thus there might be things
not working correctly or unexpected error messages.
|
|
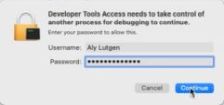
Launching Lazarus now directly starts the IDE and it's possible to use the Run command to run the application with debugger. However,
when you do so for the first time, a window pops up and ask you to choose the debug format. The author of the interface between Lazarus
and LLDB suggests to use dwarf3. You'll have to enter the root password to proceed. The message box to choose the debug format
and/or to enter the root password may or may not reappear when you run an application with debugging.
|
|
|
|
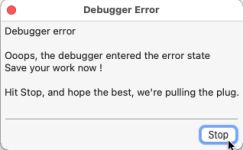
Did not work immediately on my system! Pop-up of a debugger error message box!
|
|
|
|
The Lazarus on macOS tutorial on the Free Pascal site doesn't mention this. So, I can't say what's really the reason of the error. But, it seems to be
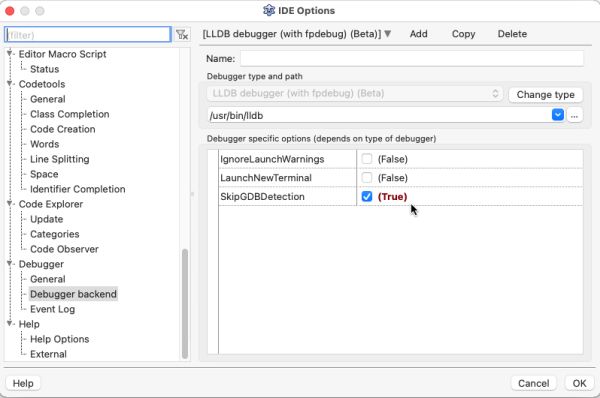
related to the original debugger configuration and even when LLDB is set as debugger, Lazarus searches for GDB. In fact, setting SkipGDBDetection = True in the Debugger backend configuration, resolved the problem on my system (!?).
|
|
|
|
As on Ubuntu, debugging command line programs seems not to work. No question concerning the debug format in this case, but immediate
pop-up of the debugger error message box. I guess, that as on Ubuntu, the only way to proceed is using the Run without debugging command.
|
|
A final note: When I searched the Internet for information how to install Lazarus/Free Pascal on macOS, I found several tutorials concerning the installation of the GNU debugger. So, installing GBD and debugging Free Pascal applications in Lazarus just as before, could be an alternative to
the usage of the actual beta (i.e. probably not bug-free) version of LLDB with fpdebug. Not sure, however, if this would really work...
|
