Installing Lazarus/Free Pascal on Void Linux.
| The tutorial applies to Void Linux 5.13, but most of what is said here should apply to other versions, too. | |
| Void Linux is an independently-developed, general-purpose operating system based on the monolithic Linux kernel. It seems terminal-oriented to me; installation to harddisk is done using a console script, there is no GUI application associated with archives, etc. So, software installation and update has to be done in a terminal, too. This might frighten Linux beginners, but it's really simple. The command line tool for package management on Void Linux is called xbps and here how to use it to install the Lazarus package (including the fpc compiler, the fpc sources, the debugger and Fppkg). | |
|
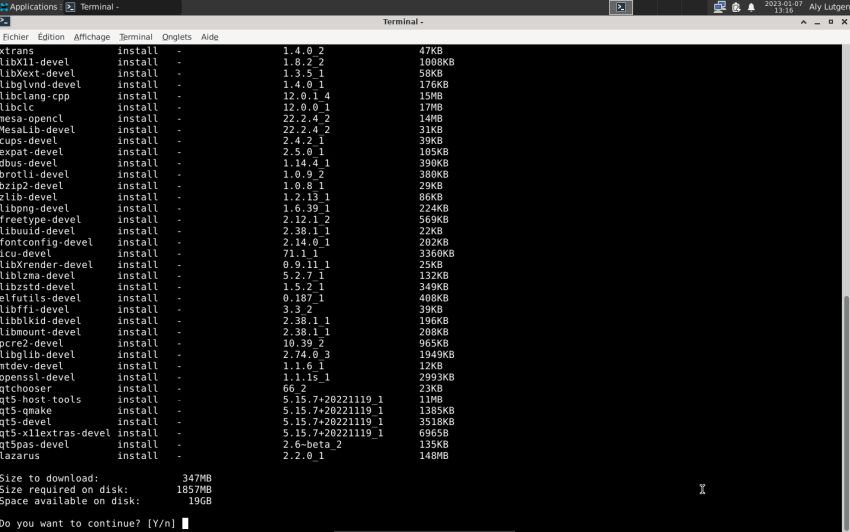
Open a terminal and type sudo xbps-query -Rs lazarus After you have entered your password, the utility displays the packages available, in my case a single one called lazarus-2.2.0_1, that you can install using the command sudo xbps-install -S lazarus-2.2.0_1 |
|
| The list of the changes to be made to your system (packages to be installed, packages to be updated, eventually packages to be removed) is displayed and you have to enter Y when the utility asks you if you want to continue. | |
|
|
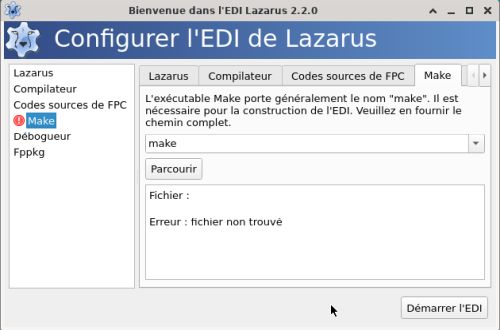
| Download and installation were fast and without any problems on my machine. The installation creates a launcher in the Development applications group (Void with xfce desktop). Starting Lazarus for the first time, the Configure Lazarus IDE window is displayed. As I actually run a French version of Void Linux, Lazarus has been installed in French, too. But, even if you have zero knowledge of this language, when looking at the screenshot below, you understand that things are fine for all Lazarus components, but that the Make utility is missing. | |
|
|
|
Using xbps to search for a make package, there is a whole list of different packages displayed, among them
make-4.3_3. Install it, using the command: sudo xbps-install -S make-4.3_3 |
|
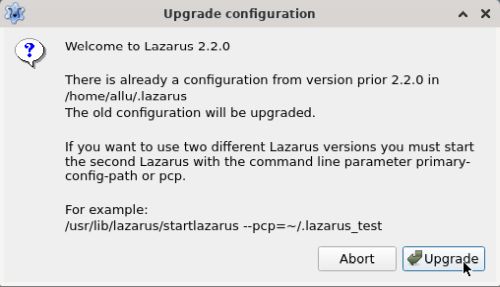
| When relaunching Lazarus, a window pops up telling you that there is already a configuration for Lazarus 2.2.0. That is because we already have launched Lazarus before. Push the Upgrade button to update the Lazarus configuration file (i.e. overwrite it with the new settings). | |
|
|
| The Configure Lazarus IDE window is displayed and this time, all is ok. Push the Start IDE button to start Lazarus. All fine and to notice that window rearranging and resizing works lots smoother than on most Linux distributions that I tried out. | |
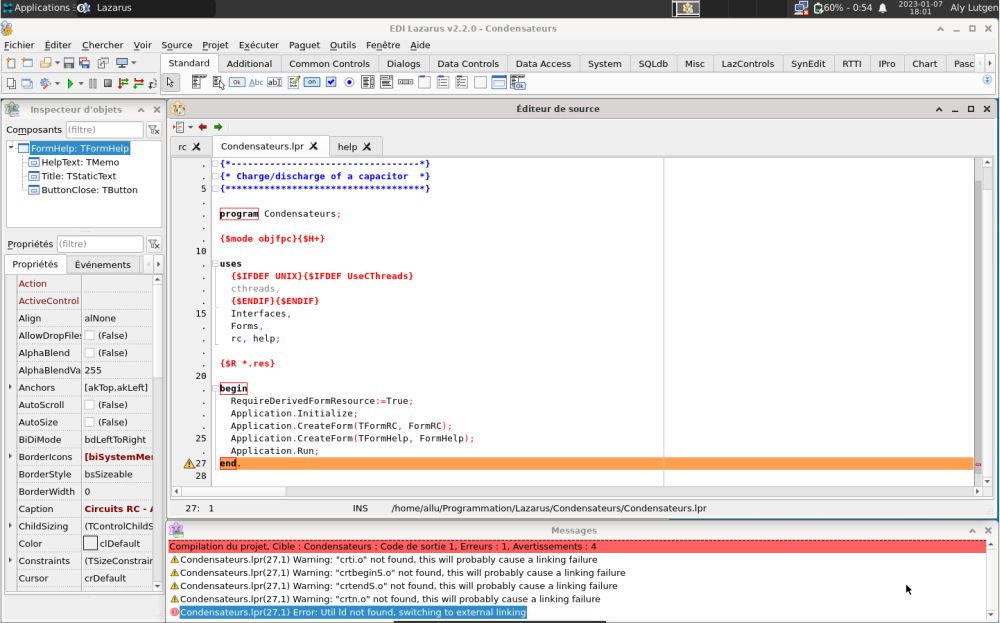
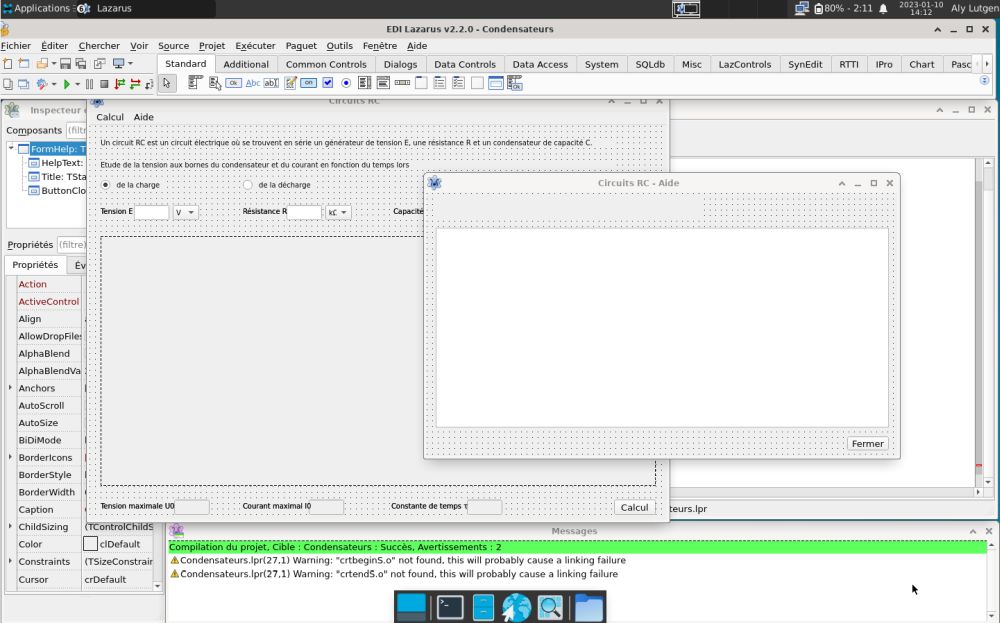
| However, far away from being ready to use the IDE! Trying to build one of my applications aborts with several warnings concerning the not found files crti.o, crtbeginS.o, crtendS.o and crtn.o. It is said that this will probably cause a linkage failure. I think that this isn't (at least normally) the case, and that you arrive to build a project despite these files being missing (anyway, we'll solve the problem further down in the text). But, there is also an error message, saying: Util ld not found. This is actually the reason, why the build failed. | |
|
|
|
With the knowledge that I acquired while encountering similar problems with other Linux distributions, I decided to install the gcc
package (gcc was obviously not present, as there wasn't any folder /usr/lib/gcc), that will also install binutils. To be sure to have
access to all available packages, I also decided, to add the non-free repository, by installing the package void-repo-nonfree. Here the
commands that I use to install these two packages: sudo xbps-install -S void-repo-nonfree sudo xbps-install -S gcc |
|
| Retrying the build of my application, it succeeded with two warnings. The executable was created and I could run it from the IDE as well as from the file system. | |
|
|
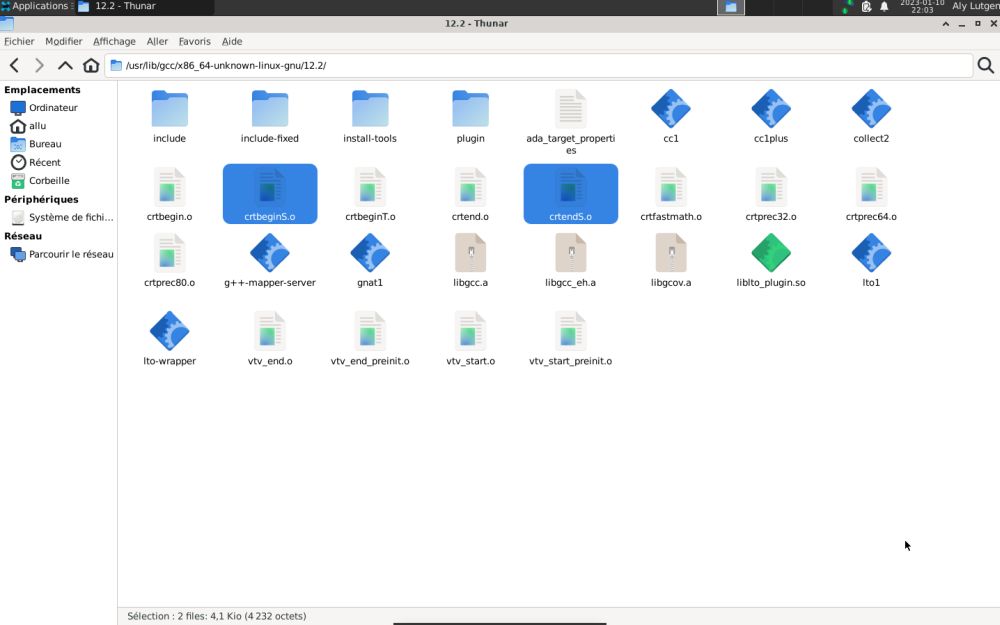
| This is an error that you encounter with lots of Linux systems. It is due to a not yet done update of fpc.cfg, where the path for gcc is still set to some old version. Browsing to /usr/lib/gcc, you'll find a directory called x86_64-unknown-linux-gnu with one single subdirectory called 12.2. This "12.2" is the actual version of gcc used and it's this folder that must be pointed to in fpc.cfg. If you have a look into this folder, you should find the not found files crtbeginS.o and crtendS.o. | |
|
|
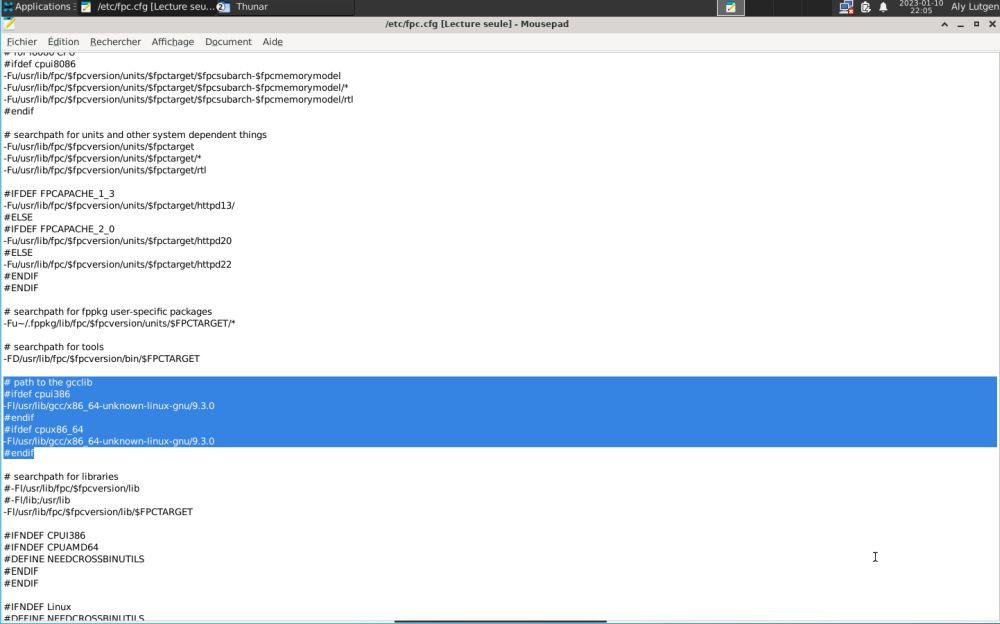
| If you open /etc/fpc.cfg in a text editor, you can see that the gcc version referenced here is 9.3.0. This reference being a non-existing path, the files Lazarus was looking for when building my application, couldn't, of course, be found! | |
|
|
|
So, all you have to do is correcting the mistake in fpc.cfg, indicating the correct folder name, i.e. the one of the gcc version that is actually used. Here the
correct settings in fpc.cfg (please be aware, that with another version of Void Linux and maybe depending on the date, where you install the gcc package, there
may be a different path to be set here!): # path to the gcclib #ifdef cpui386 -Fl/usr/lib/gcc/x86_64-unknown-linux-gnu/12.2 #endif #ifdef cpux86_64 -Fl/usr/lib/gcc/x86_64-unknown-linux-gnu/12.2 #endif |
|
| With these modifications made, my application was build without any error or warning messages... | |
| Note for Linux newbies: | |
|
Not sure how to do to save the modified fpc.cfg to the /etc directory? Because, as standard user, you can't write to system directories (that's why the file opens
as read-only in the editor). Here, how to proceed: Use the Save As... command to save the file to some location, where you have write
permission, e.g. into your home directory folder. Then open a terminal and being in the directory, where you saved the file, run the
following commands (as root): sudo cp /etc/fpc.cfg /etc/fpc.bak sudo cp fpc.cfg /etc The first of these commands makes a backup of the original file, the second one replaces the original file by the file with the new (correct) gcc settings. |
If you find this text helpful, please, support me and this website by signing my guestbook.
