Using VSCode as IDE for Rust development.
"A language empowering everyone to build reliable and efficient software", the developers of Rust describe this relatively new programming language on their website. And as major reasons why to use Rust, they mention performance and reliability. Not long ago, I have written a tutorial about another recent programming language: Using VSCode as IDE for Julia development. Both of these languages are open-source, have thriving developer communities, and constantly produce new libraries, tools, and frameworks. Both are high-performance languages. But, Julia and Rust are intended for different usages (different types of applications). Julia has been designed for scientific computing; it is adequate to be used if you want to build programs that emphasize calculations or data analysis. Basically, you can use Julia anywhere Python or MATLAB could be appropriate. Rust, on the other hand, has been designed for situations, where performance and memory utilization must be reliable. Developers use Rust to create programs with strict memory safety and security requirements. You can use it, for example, if you want to write code for tech infrastructures, games, or web servers.
The "normal" way to install Rust is to use Rustup, the Rust installer and version management tool. This requires an Internet connection and you’ll also need the MSVC build tools for Visual Studio 2013 or later. I did not try out the "normal" way, but downloaded the Rust Windows x64 standalone installer (GNU version) from the Rust Forge website. First, this is a typical Windows installer that includes all Rust components that you need. Second, as I intend to use VSCode as IDE, and MSYS2 (and not MSVC), the GNU version of the software is just what I need (concerning VSCode and MSYS2, cf. my tutorial Installing VSCode on Windows 10). I did the installation and sample builds on Windows 10; the Rust release that I used is Rust 1.77.1. Please, note that in order to use Rust with VSCode, the rust-analyzer extension is needed (cf. further down in the text).
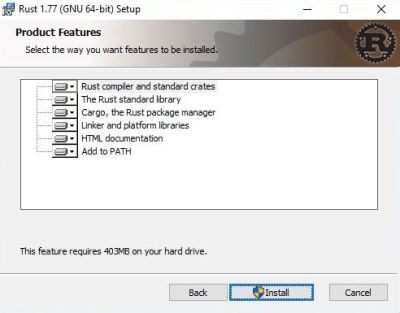
The installation is straight forward. I don't know which components are installed by default, so, to make sure that everything will well be copied to your local disk: In the Product Features window, select each component and choose Install entire feature to disk.
|
With rustc being the Rust compiler, we can check the installation running one of the commands
rustc --version
rustc --version --verbose
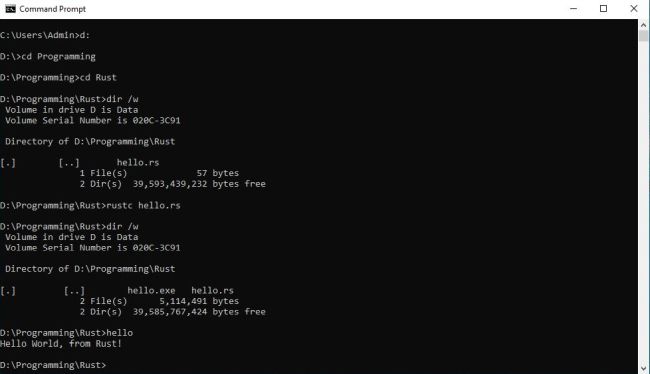
And we can try to build this simple "Hello World" program (hello.rs)
fn main () {
println!("HELLO WORLD from Rust!");
}
by running the command rustc hello.rs (creating the executable hello.exe).
|
VSCode, by Microsoft (in my case VSCode 1.82.2, x64), is a lightweight but powerful source code editor which runs on your desktop and is available for Windows, macOS and Linux. It comes with built-in support for JavaScript, TypeScript and Node.js and has a rich ecosystem of extensions for other languages and runtimes, among them a Rust extension. The IDE may be downloaded free of charge from the Visual Studio Code website. If you need help with the installation and/or usage, my tutorial Installing VSCode on Windows 10 (including details about how to build C and C++ applications) might be helpful.
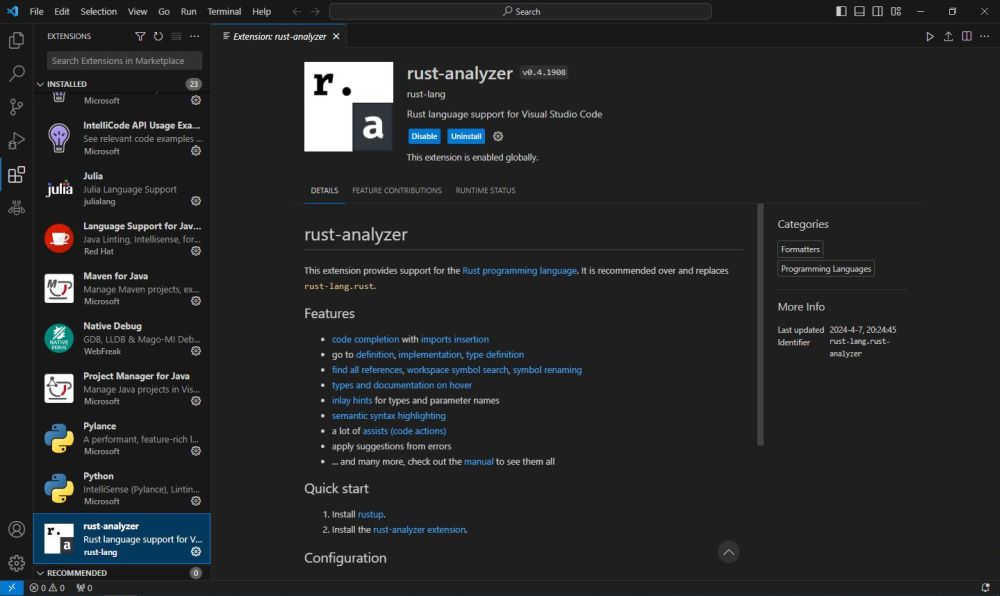
You can install the extension directly from the Internet, or download it and install it from the downloaded file. That is what I actually did. The file, that I downloaded and installed, being rust-lang.rust-analyzer-0.4.1908@win32-x64.vsix.
The screenshot below shows the description of the Rust extension for VSCode.
|
It is possible (at least in simple cases) to build a single Rust source file using the rustc compiler (and we did it before). However, the standard way to proceed is to create and build a Rust project. Rust projects are handled using Cargo, the Rust build tool and package manager. You can run Cargo in Command Prompt, or in the Terminal window of VSCode.
To create a new project, use the following command:
cargo new <project-name>
This creates a folder called <project-name> in the current directory and adds the required files, in particular a subdirectory called src,
where the Rust sources will be located.
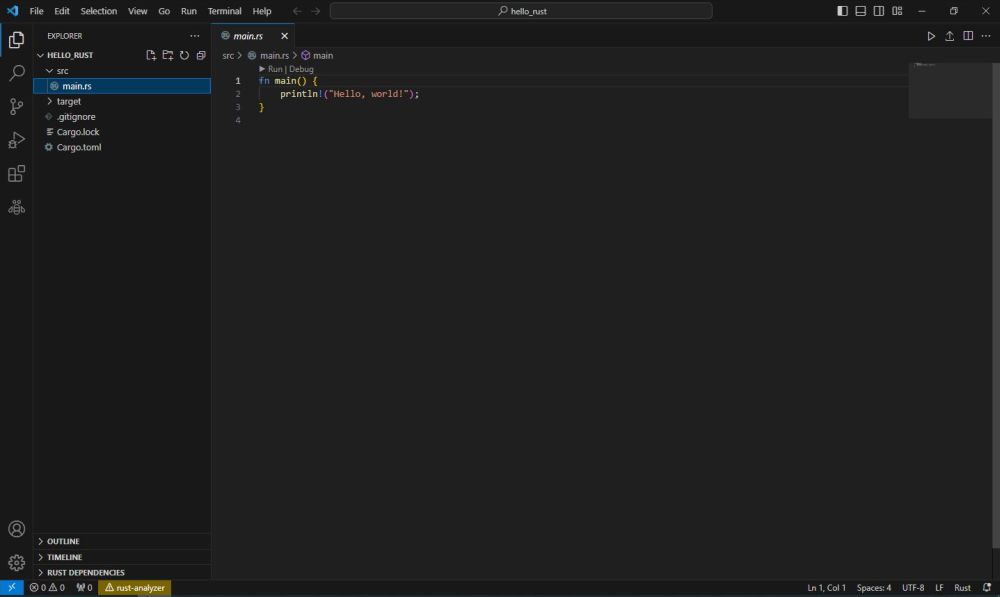
As it is Cargo that creates the project folder, the best is (probably) to run it in Command Prompt to execute this task. You can then start VSCode and in the Sidebar, choose Explorer (first icon on the bar), then push the Open Folder button. Browse to the newly created project folder to open it (you'll have to confirm to trust the authors of the files in this folder). If you open the src subdirectory (created by Cargo), you'll find a Rust source file, called main.rs, actually an elementary "Hello World" program (also created by Cargo), as shown on the screenshot below.
|
If you look at the screenshot, you can see in the left bottom corner a yellow warning triangle. Clicking it displays the warning message Can't load standard library from sysroot. I don't know why this message is displayed, nor how to make it disappear. Anyway, it seems that you can simply ignore it, because the standard library seems to be accessible and my Rust projects build without any problems.
To build a Rust project, with your project folder being open, in the VSCode Terminal window run the command:
cargo build
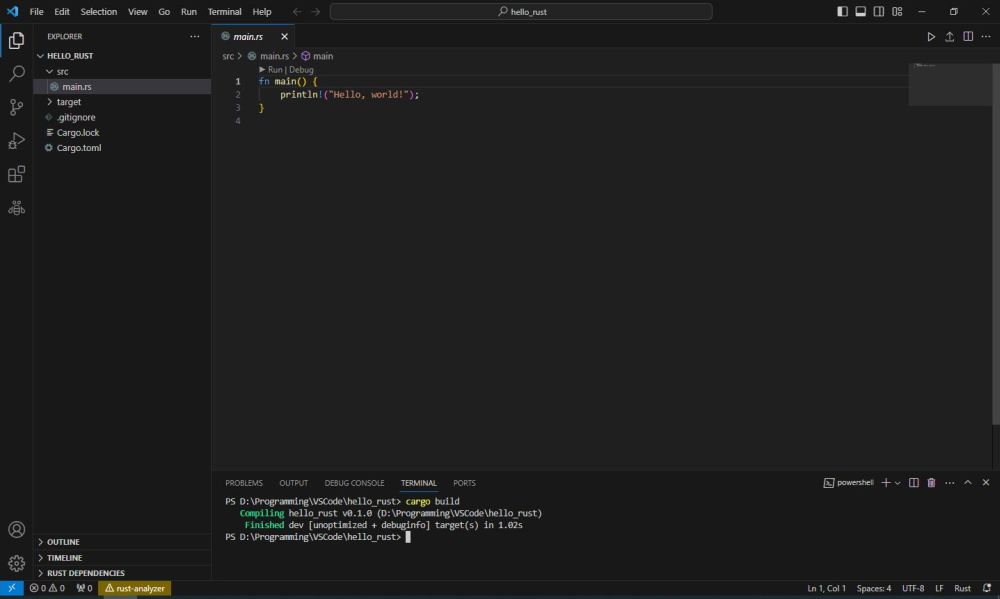
|
This creates a whole bunch of files. The resulting executable (same name as the Rust project) will be located in the target\debug subdirectory. The screenshot shows the directory listing of this folder and the output of the program execution in Command Prompt.
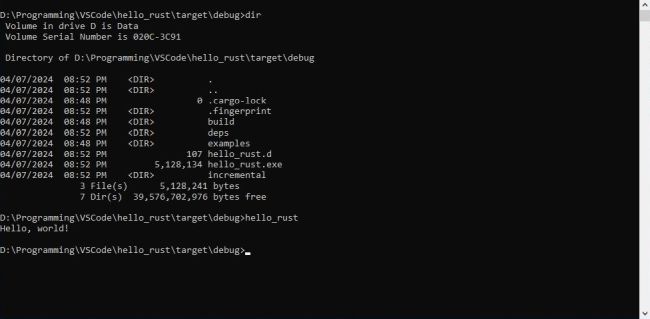
|
To run the executable created by the build in VSCode, in the Terminal window run the command:
cargo run
Here is the code of a simple "Guess the number" game, as published (with detailed explanations) in the book The Rust Programming Language, by
Steve Klabnik and Carol Nichols, with contributions from the Rust Community (available as PDF on the Internet).
use rand::Rng;
use std::cmp::Ordering;
use std::io;
fn main() {
println!("Guess the number!");
let secret_number = rand::thread_rng().gen_range(1..=100);
loop {
println!("Please input your guess.");
let mut guess = String::new();
io::stdin()
.read_line(&mut guess)
.expect("Failed to read line");
let guess: u32 = match guess.trim().parse() {
Ok(num) => num,
Err(_) => continue,
};
println!("You guessed: {guess}");
match guess.cmp(&secret_number) {
Ordering::Less => println!("Too small!"),
Ordering::Greater => println!("Too big!"),
Ordering::Equal => {
println!("You win!");
break;
}
}
}
}
As C, Rust functions are mostly part of some library, that has to be included at the program begin if we want to use the function. For example, to do keyboard input, the library std::io has to be included (we don't need to include std::io for screen output, that is handled by the macro println!). When trying to build our "guess" project, we'll get the error message unresolved import 'rand'. This means two things: First, the standard library has well been found; second, the "rand" library, on the other hand, has not been installed by our standalone installer program.
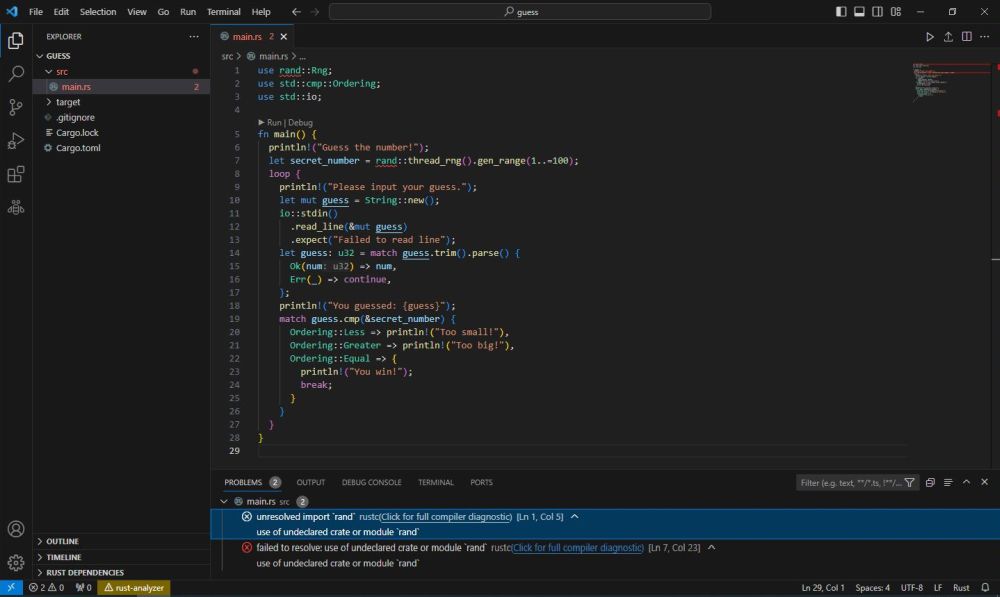
|
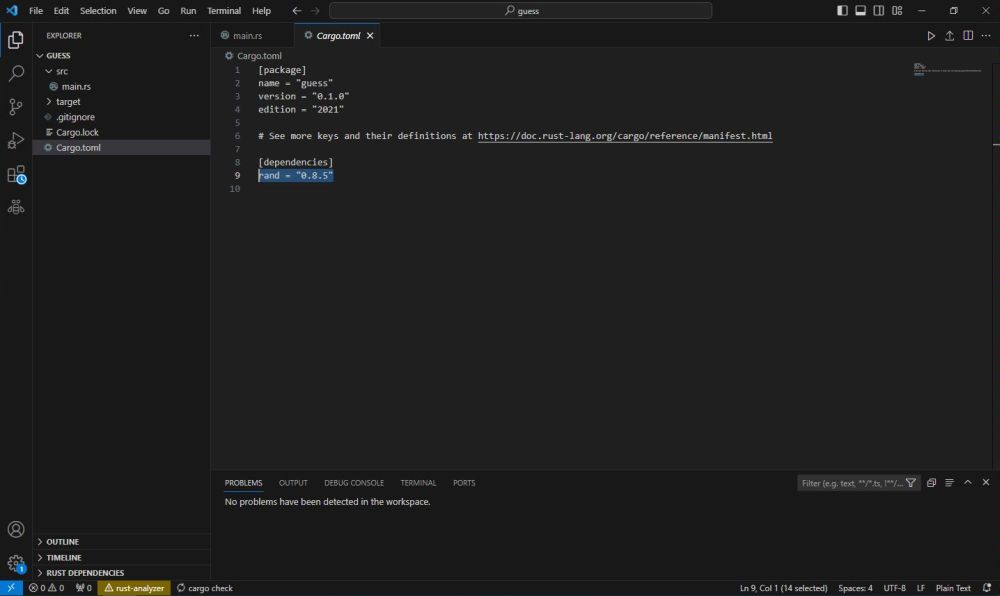
Rust libraries are available as packages and may be installed using Cargo. To install the "rand" package, run the command (Internet connection
required):
cargo add rand
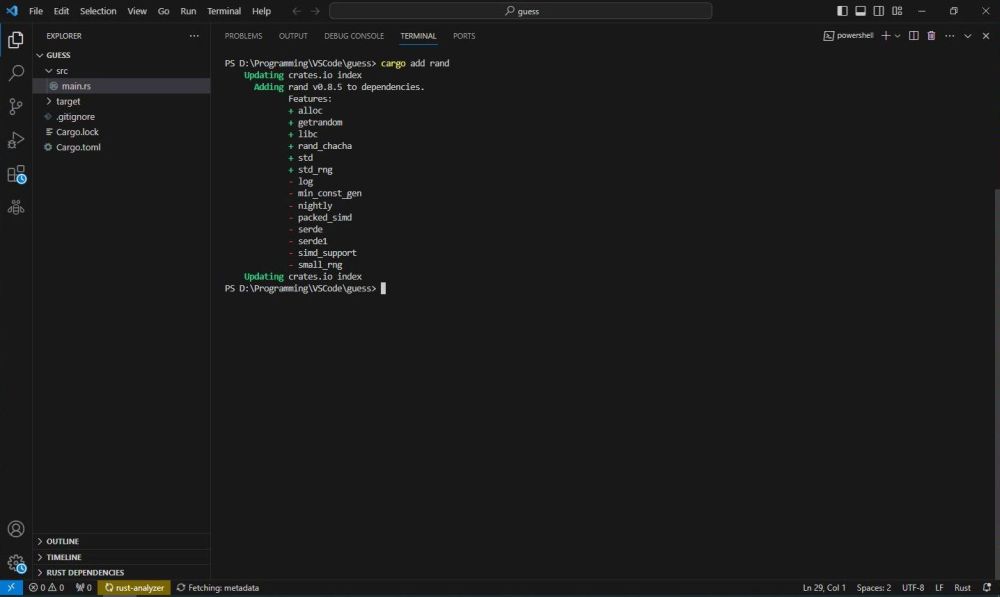
|
Adding a library is equivalent to adding a dependency in the project's Cargo.toml file.
|
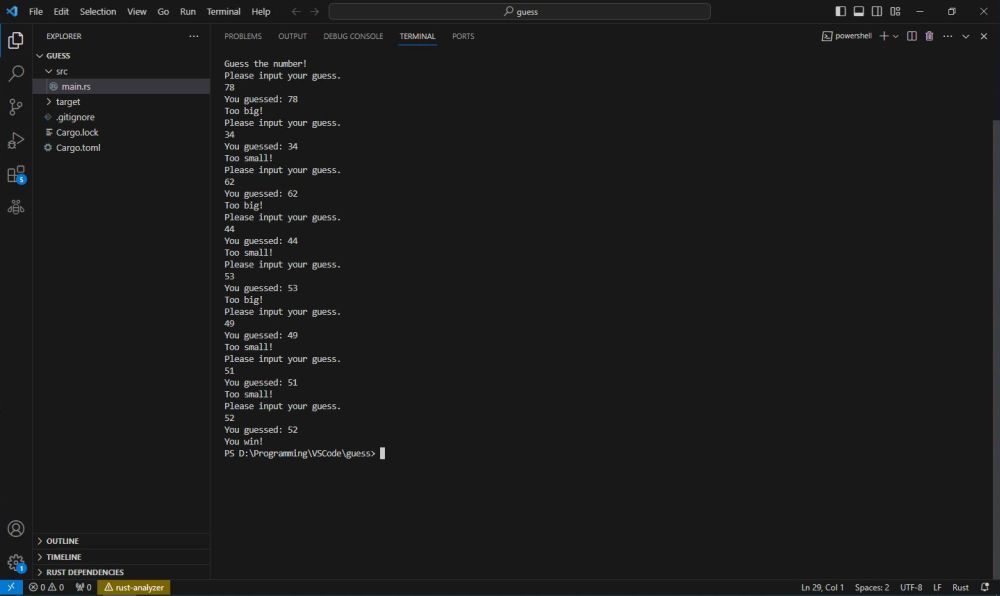
With the "rand" dependency added, the project builds successfully. The screenshot shows the execution of guess.exe in the VSCode Terminal window.
|
If you find this text helpful, please, support me and this website by signing my guestbook.