Installing Visual Studio 2022 on Windows 11.
"Visual Studio is a powerful developer tool that you can use to complete the entire development cycle in one place. It's a comprehensive integrated development environment (IDE) that you can use to write, edit, debug, and build code. Then deploy your app. Visual Studio includes compilers, code completion tools, source control, extensions, and many other features to enhance every stage of the software development process. With the variety of features and languages support in Visual Studio, you can grow from writing your first "Hello World" program to developing and deploying apps. For example, build, debug, and test .NET and C++ apps, edit ASP.NET pages in the web designer view, develop cross-platform mobile and desktop apps with .NET, or build responsive Web UIs in C#."
The paragraph above is how Visual Studio is described in the official Visual Studio documentation at learn.microsoft.com. What is not explicitly said here is that thanks to the .NET Core framework, it is possible to build applications that are portable to Linux and macOS.
Visual Studio Community Edition is free of charge. The actual version (February 2025) is Visual Studio 2022. I successfully installed it on my Windows 11 VMware Workstation 16 virtual machine. I suppose that it also works on Windows 10 (?). For Windows 8.1, cf. my article Installing Visual Studio 2019 on Windows 8.1.
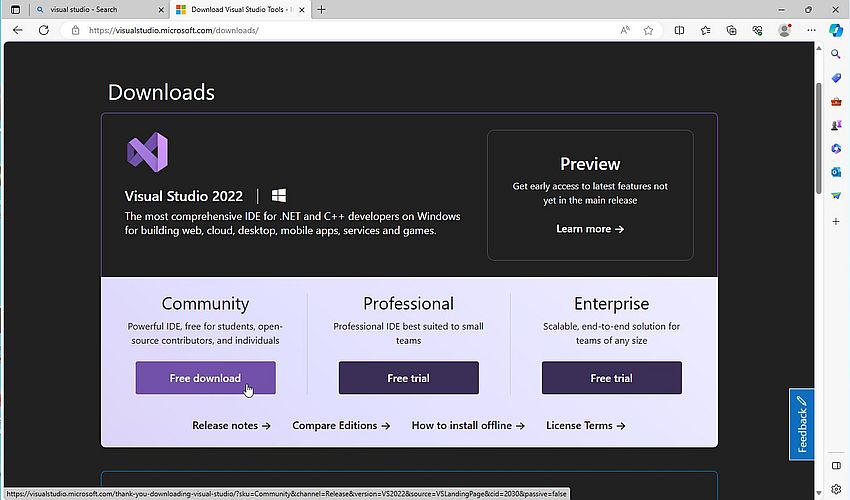
You can download Visual Studio Community Edition 2022 from the visualstudio.microsoft.com website.
|
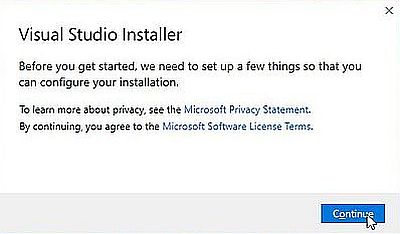
The download file is a web-setup program, that actually downloads Visual Studio Installer. This program will stay on your computer (and be available in Windows Start menu), allowing to update and modify your Visual Studio installation. In the first window of the web-installer, you have links to view the Microsoft privacy declaration and the license terms.
|
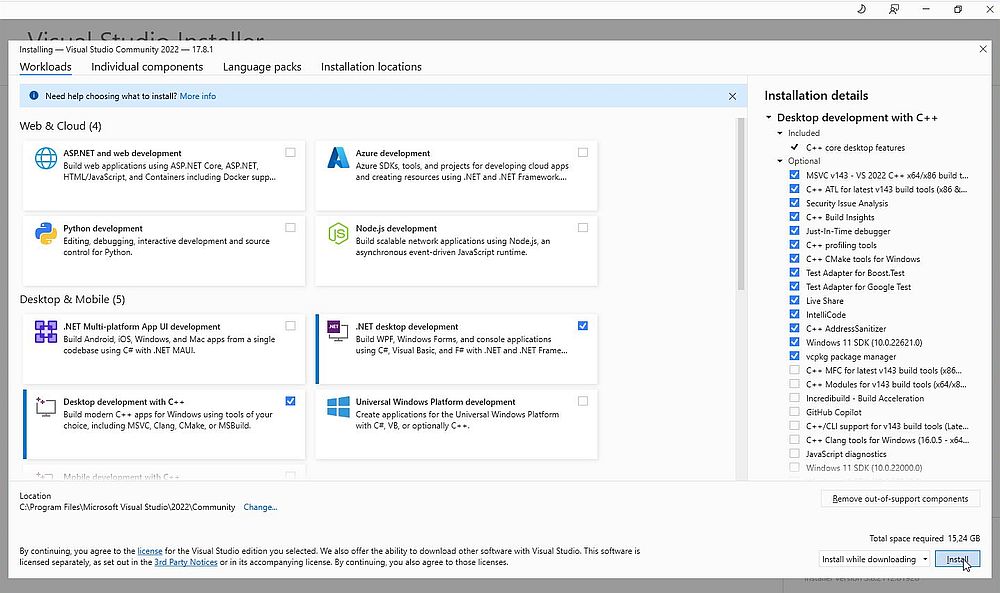
Microsoft Visual Studio as a whole is extremely huge, but you can limit the download and the installation, by choosing the components that you actually need resp. want to install. In the first tab of Visual Studio Installer, you can choose the workloads. The workloads .NET desktop development and Desktop development with C++ (that I actually installed) are intended for programming in C#, F#, and Visual Basic .NET, resp. C and C++. After having chosen the workloads, use the second tab to select (or unselect) individual components.
|
On the third tab, you can choose to include additional languages. And finally, on the fourth tab, you can choose the installation directories. Note the combobox at the left of the Install button: it allows the choice between downloading everything and then starting the installation, or starting to install while still downloading. This last option lets you win time, of course, but I think that you should only choose it if your computer has the necessary power.
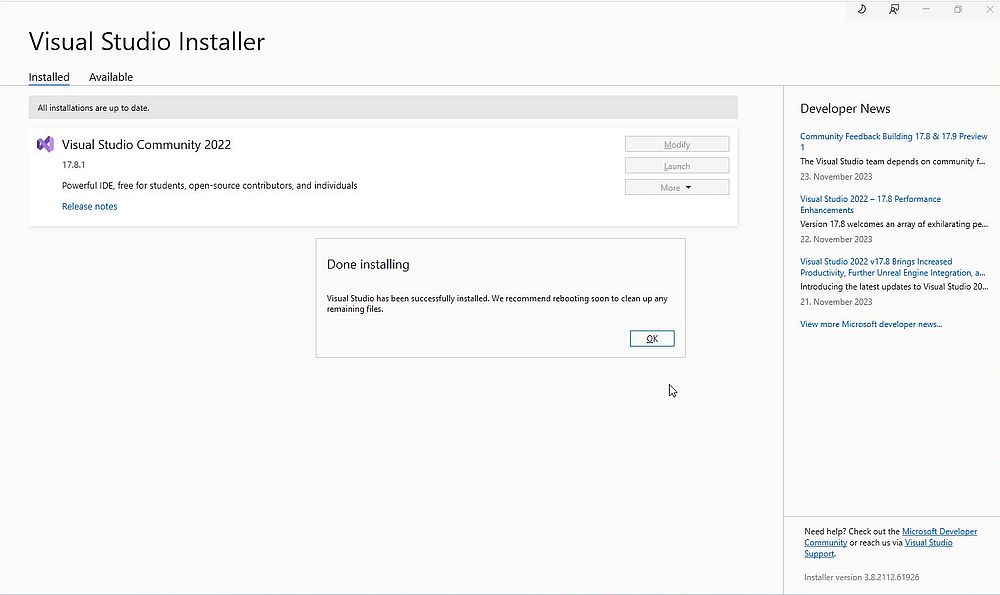
The screenshot below shows the last window of the setup program: Successful installation! It's recommended to reboot your computer before proceeding.
|
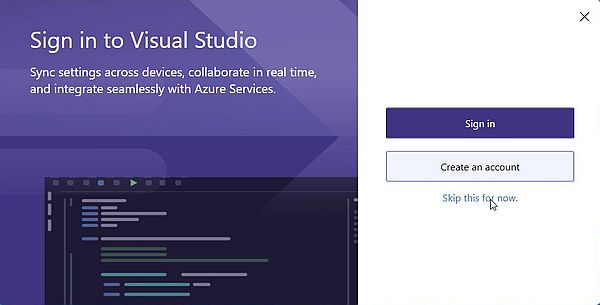
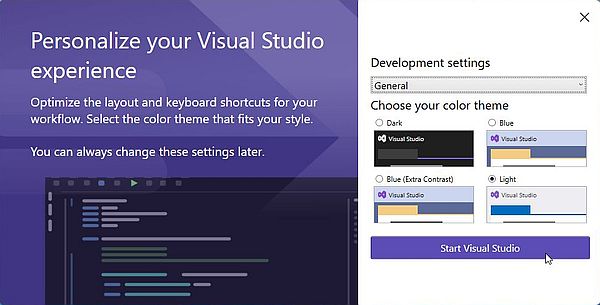
Besides local development, Visual Studio is ready for development in the cloud, allowing synchronization across devices, real time team collaboration, and integration with Azure services. I have no experience with this; also, I could imagine that this is not free of charge (?). The screenshot on the left shows the cloud login window, displayed when you start Visual Studio for the first time. I just clicked the Skip this for now link. Another window, that is displayed at the first usage of Visual Studio, concerns the personalization of the IDE. I let all defaults (screenshot on the right).
|
|
Updating and modifying Visual Studio.
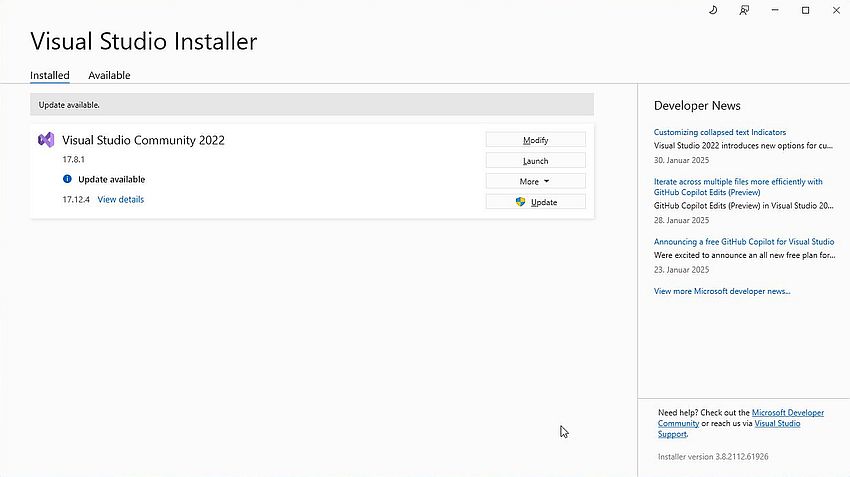
In Windows Start menu, you not not only find a shortcut to launch Visual Studio (the IDE), but also a launcher for Visual Studio Installer. You can use this application to update Visual Studio to the latest version
|
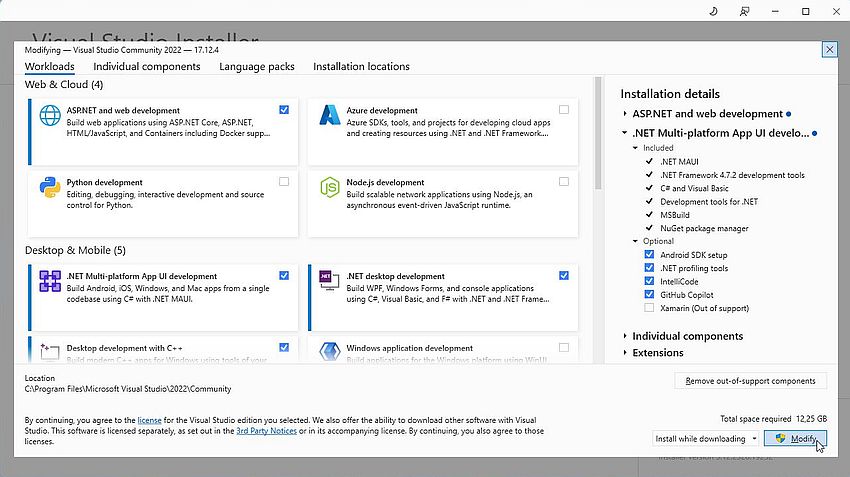
You can also use Visual Studio Installer to modify Visual Studio, i.e. to add new components (or remove existing ones). I actually added the workload ASP.NET and web development, as well as .NET Multi-platform App UI development.
|
Creating a simple "Hello World" project.
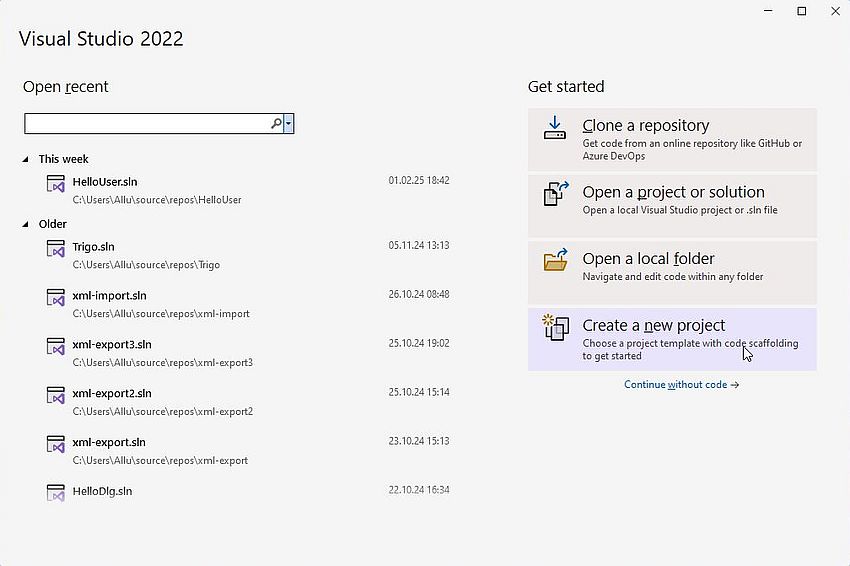
This part of the tutorial shows how to create a simple command line program, using Visual Basic. On the entry page of Visual Studio, choose Create a new project.
|
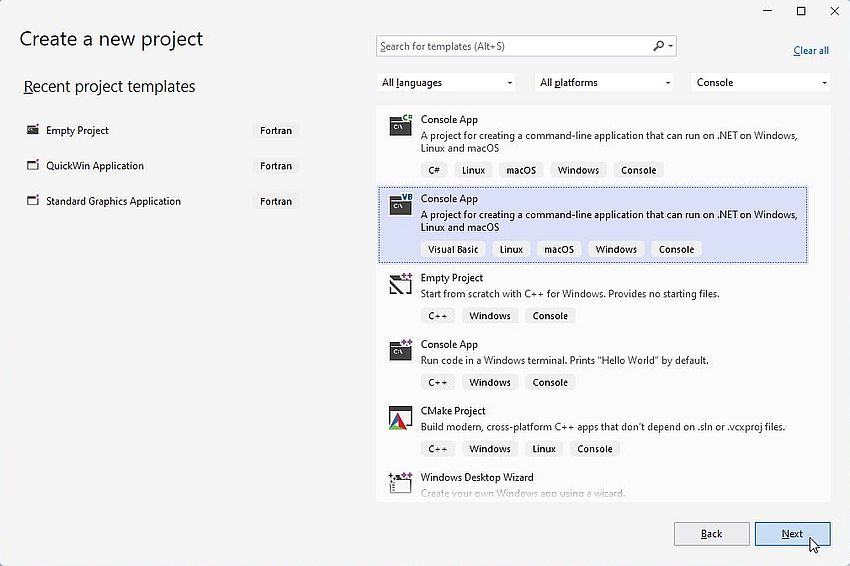
On the following page, you choose what type of project you want to create. Depending on the components, that you did install, the list of available project types may be very long; you can limit it by programming language, platform, and type. In our case, we have to choose Visual Basic Console App. This project will be build upon the .NET Core Framework, thus with this framework installed being portable to Linux and macOS.
|
The configuration of the project essentially consists in giving it a name and choosing a project directory. To note, that Visual Studio allows to group several projects as a so called solution. Normally, your project is the solution, thus the checkbox Place solution and project in the same directory should be selected. By default, Visual Studio solutions are created in the directory C:\Users\<user-name>\source\repos. The name of the solution folder will be the one that we give to the project on this page (I named my solution "HelloWorld3"). To note, that this will also be the name of the executable created by the build.
![Visual Studio 2022 on Windows 11 - Simple VB project: Configuring the new Visual Studio project []1 Visual Studio 2022 on Windows 11 - Simple VB project: Configuring the new Visual Studio project [1]](../screenshots/vs2022k.jpg)
|
In the case of our VB Console App, a supplementary configuration step is required: We have to select the .NET framework. On my system, two choices were available: .NET Core 8.0 and .NET Core 9.0. Concerning the option Enable native AOT publish, I think that this is primarily for ASP.NET Core applications (?). If you are interested in details, have a look at the article ASP.NET Core support for Native AOT at learn.microsoft.com.
![Visual Studio 2022 on Windows 11 - Simple VB project: Configuring the new Visual Studio project [2] Visual Studio 2022 on Windows 11 - Simple VB project: Configuring the new Visual Studio project [2]](../screenshots/vs2022l.jpg)
|
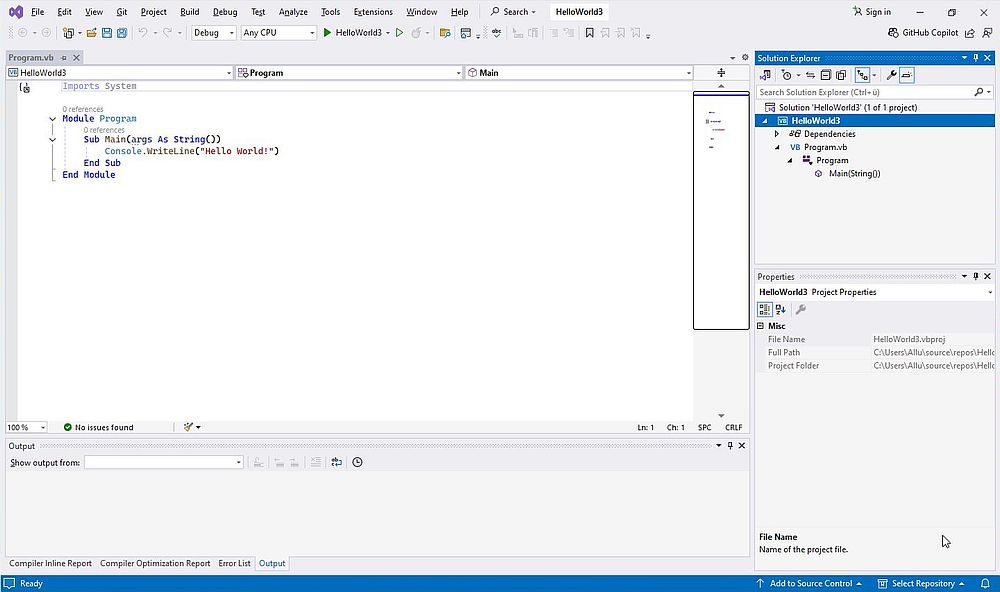
Visual Studio creates the project folders and files, including a VB template file, called Program.vb (this is actually a working "Hello World" program). As you can see on the screenshot, the Visual Studio GUI is rather simple and easy to use (similar to what we old people know from older IDEs, as a difference with the GUI of VSCode with its different views to be selected in the left pane). In Visual Studio, we have all we need in one window. The top-left pane is the editor with the source code. Below, you'll get the messages when building the solution. At the top-right corner, we have the solution explorer. In the pane below you can modify the properties of the item selected in solution explorer.
|
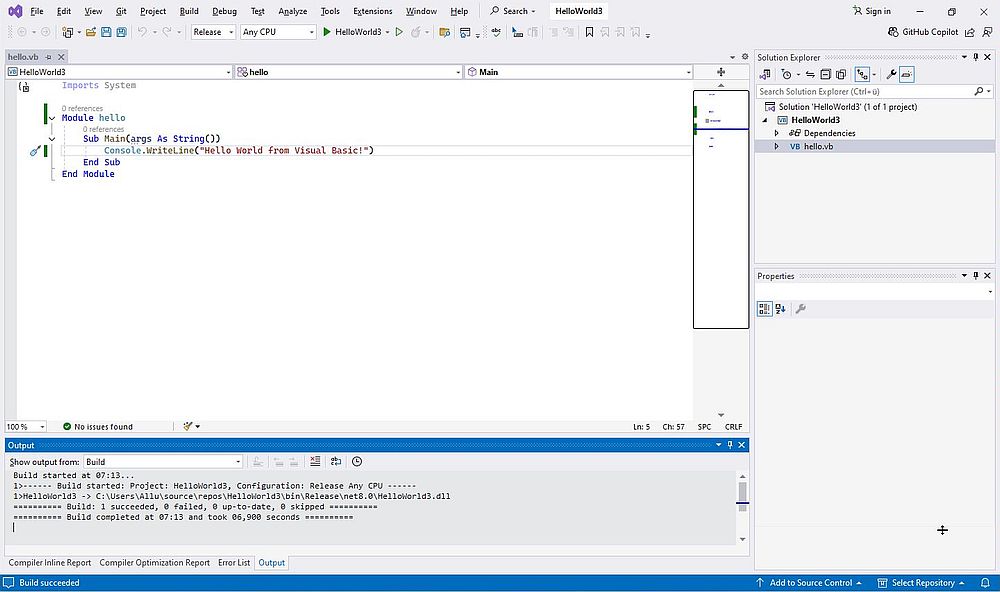
Two changes that you can make here if you want. First (when your program is executing correctly, what the template code will), change from Debug to Release. Second, you can give your source file another name. To do so, right-click "Program.vb" in the solution explorer, and from the opening context menu, choose Rename. The source file name becomes editable; I changed it to "hello.vb". When renaming the source, a dialog box pops up, asking if you want also to change all references in the project to "Program". Obvious, that this has to be done.
To build the solution, choose Build > Build Solution from the menu. If all goes well, the last line of the build output should contain something like "1 succeeded, 0 failed...".
|
To run the executable resulting form the build from within Visual Studio, choose Debug > Start Without Debugging from the menu. This opens the Visual Studio Debugging Console, where the program is executed.
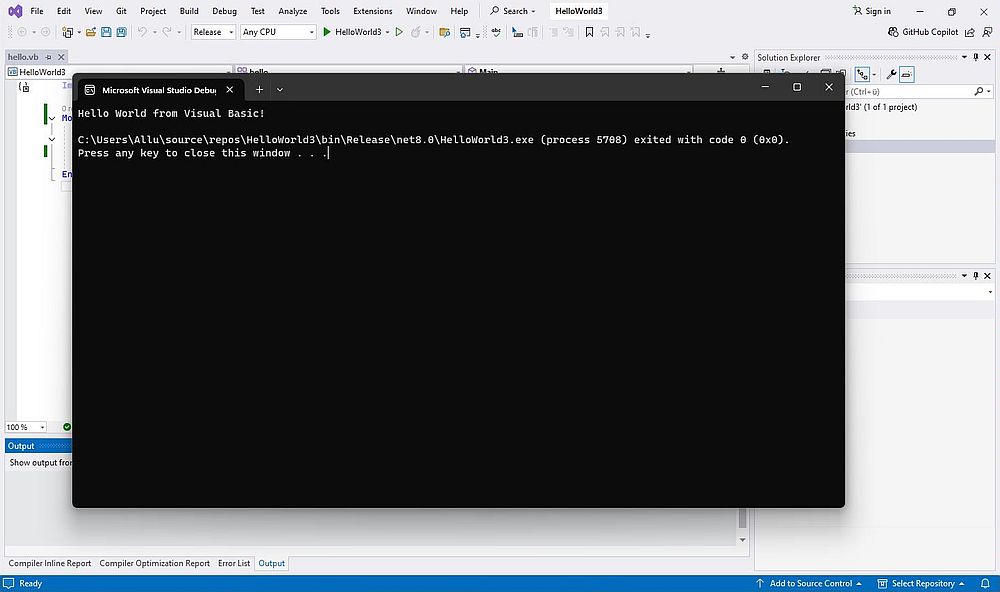
|
As I said, the solution directory has the name given to the solution/project when creating it, in our case "HelloWorld3". The VB source (in our case "hello.vb") can be found in this folder. The executable, with same name as the solution (in our case "HelloWorld3.exe") is somewhere in the "bin" folder, the exact location depending on the project configuration and build options. With the settings being those described in the previous paragraphs (Release built, .NET Core 8.0 framework), the executable will be created in the directory <project-directory>\bin\Release\net8.0.
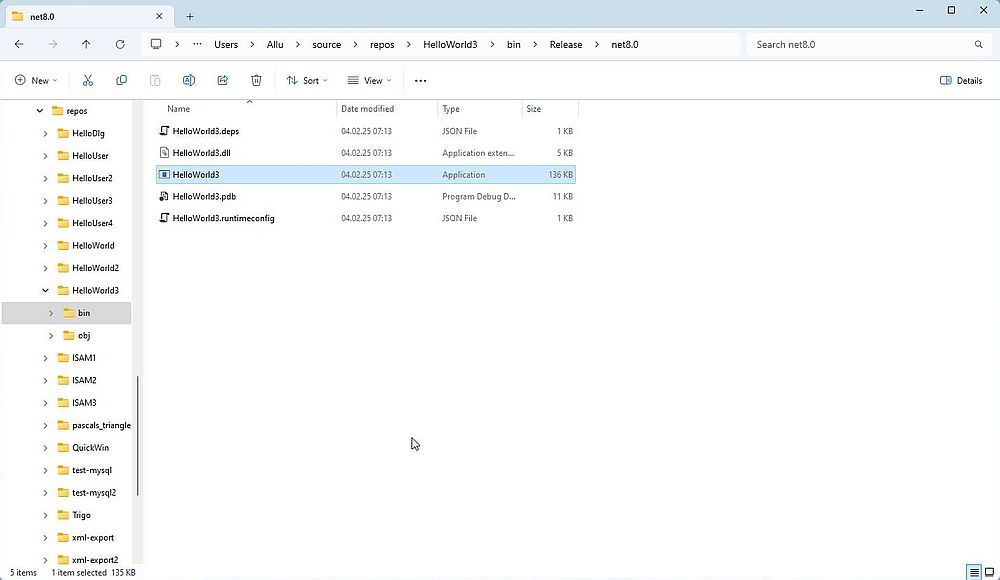
|
To run the executable in Command Prompt, cd to the directory, where it is located, and enter:
HelloWorld3
Copying the executable to another directory and trying to run it from there, fails with a not existing DLL error. Placing the file "HelloWorld3.dll" together with the executable results in another failure (missing configuration files), as shown with the second execution on the screenshot below.
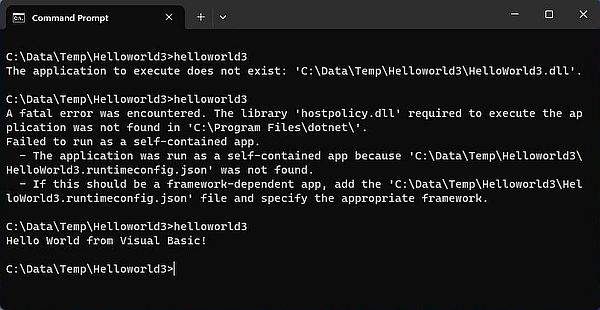
|
So, to run such programs from a custom directory (or another computer), all Visual Studio generated files located in the directory, where the executable is created, must be copied together with the executable (this was done before the third program execution on the screenshot above). If you want to run the program on another computer, this computer must have the .NET framework used for the build installed (what is the case on my Windows 10, where the program is executed without any issues).
If you find this text helpful, please, support me and this website by signing my guestbook.