Installing BeOS 5 Professional Edition.
"BeOS was an OS developed to run on the BeBox hardware, a PowerPC based machine. The OS was first released in October 1995 for use on the AT&T Hobbit, and
moved over to the PowerPC platform the next year. An Intel x86 port of the OS began in March 1998 with version R3. The last version released was R5.1 in
November 2001 for x86 only. This OS was meant to be used for multimedia applications. It is POSIX compatible but is not a UNIX derived operating system.
BeOS 5 The Professional Edition is installed from CD like other operating systems, and includes extras the Personal Edition does not include."
The paragraph above is how BeOS is described on the BeOS 5 page of the WinWorld website, from where you can download BeOS 5 Pro. The download archive contains well a CD image, but this one has been saved using the CCD image format. Extracting the image will not give you one, but 3 files: BeOS_5.0_Professional.ccd, BeOS_5.0_Professional.img, and BeOS_5.0_Professional.sub. The IMG file is the raw data and the CCD file contains information about where the various tracks are (the SUB file is not needed here). As this format is rather special, not all applications do understand it, and thus it is possible that you'll have to convert it to some other format in order to be able to use it within your virtualization software. On the other hand, CCD is perfectly recognized by the CD emulator software ImDisk, that mounts the image just as it mounts an ISO. The ImDisk virtual CD-drive is normally accessible in Windows File Explorer and can without any problem be used as ("physical") CD-drive in VMware.
Concerning the VMware virtual machine, I created a VM with operating system "Other > Other", with 1 CPU, 512 MB of RAM and an 8 GB buslogic, IDE harddisk. Network adapter and soundcard are not required, but I guess that you would like to use them. I also added (not yet tested if they work) a floppy drive, and an LPT and COM port. Adding an USB adapter may cause problems (?), so I didn't add one. Display cannot have 3D acceleration (for this type of machine on VMware), the boot method has to be "BIOS boot".
In order to make the VM boot from the BeOS CDROM, you'll have to change the boot order in BIOS Settings: CDROM > harddisk > removable devices.
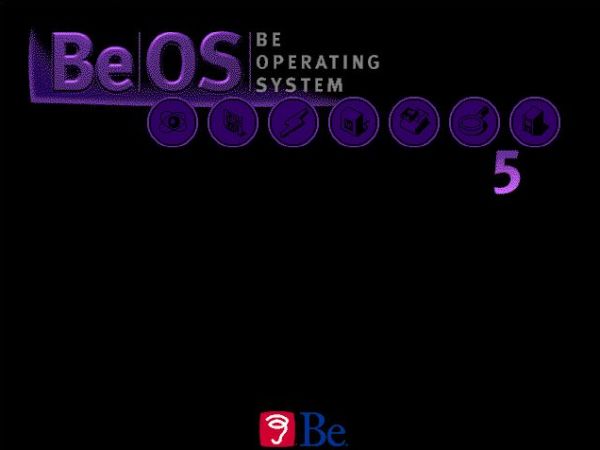
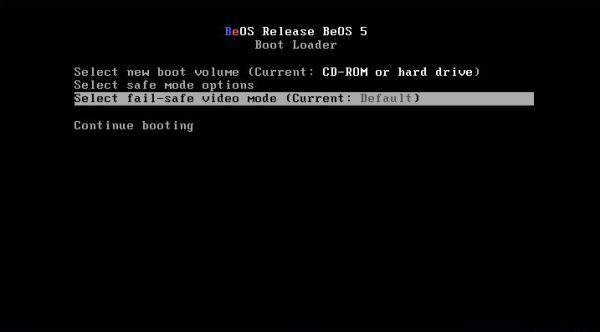
When booting the BeOS machine, as soon as you see the purple BeOS boot screen (screenshot on the left), press the space bar once. This will display a screen with advanced boot options: Choose Select fail-safe video mode (screenshot on the right) and hit ENTER.
|
|
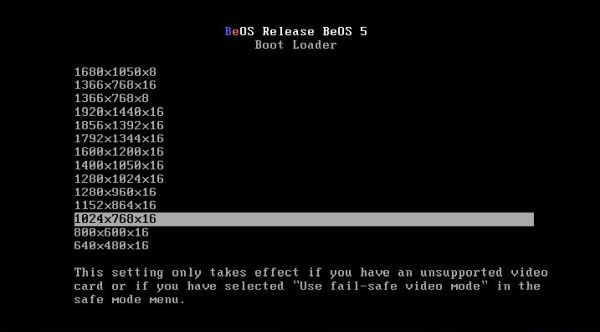
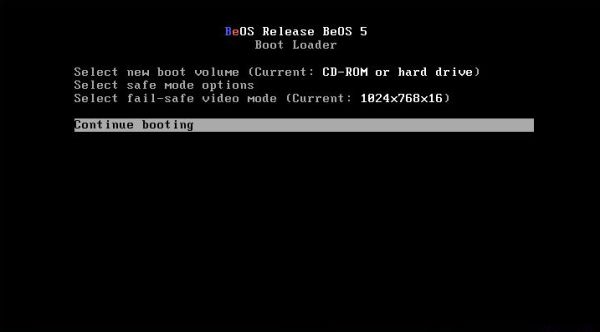
In the list of screen resolutions displayed, scroll down in order to select 1024×768×16 (screenshot on the left). Hitting ENTER returns you to the advanced boot options screen, where the screen resolution chosen will now be displayed as fail-safe video mode (screenshot on the right). Select Continue booting to proceed.
|
|
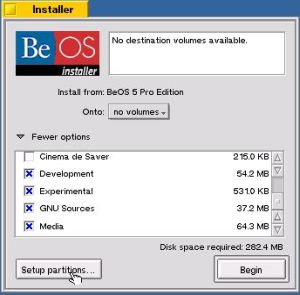
The next screen (license agreement) should have the new resolution and color display. Now, the BeOS Installer is started. Don't worry that the installer says that there is no volume to install BeOS onto. This does not mean that the harddisk isn't recognized, but simply that the new totally empty disk has no partitions. Click the More options link. A list with features that you can select or unselect as you want is displayed. At the bottom of the window, the button Setup partitions... appears. Push it to start the BeOS partitioning tool.
|
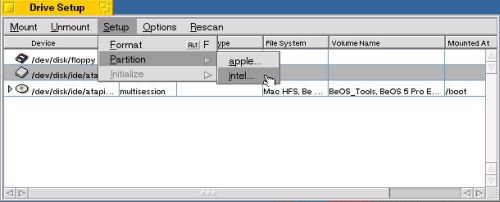
In the Drive setup window, choose Setup > Partition > intel...
|
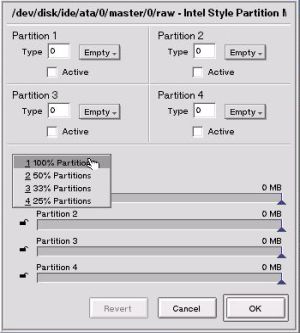
The Intel style partition layout (that what's usually called MS-DOS partition layout) is displayed: Four entries in the partition table, all empty for the moment. Push the Layout... button above the partition "bars" and choose to create one partition, using the entire disk (1 100% partition).
|
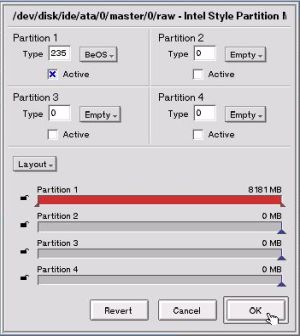
The "bar" of partition 1 appears now in red, indicating that this partition is to be used. A list with possible partition formats shows up; choose the first entry: BeOS file system. This sets the type of partition 1 to BeOS (type 235). Make sure that you set the partition active by selecting the corresponding checkbox. Push the OK button to write the partition table to disk (you'll have to confirm this action, that actually destroys everything that could be on the harddisk).
|
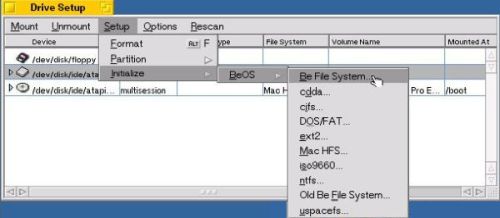
You are now back in the Drive setup window. With the harddisk selected (what you can't see on the screenshot is that its map style has changed from "unknown" to "intel"), choose Setup > Initialize > Be File System.
|
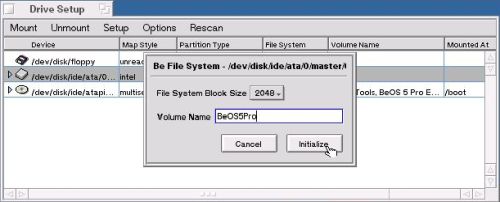
Two things remain to indicate in order to do the formatting: first, a volume name (I chose "BeOS5Pro") and a block size. Be sure to set the file system block size to 2048 (other block sizes may cause problems later)! Push the Initialize button to start formatting (again, you'll have to confirm the action before it is done).
|
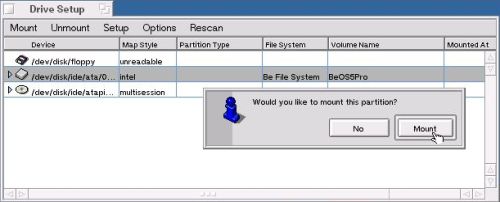
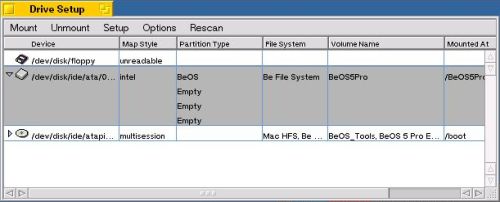
When you confirm to initialize the disk, the partitioning tool asks you if you want to mount the partition. Push the Mount button to do so (screenshot on the left). The Drive setup window looks now like on the screenshot on the right. All values are filled in for partition 1: map style = "intel", partition type = "BeOS", file system = "Be File System", mount point = "/BeOS5Pro" (what actually corresponds to the volume name that I chose).
|
|
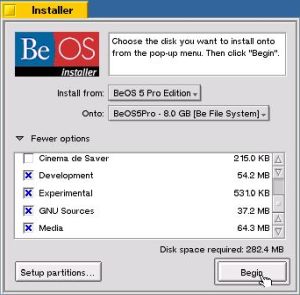
You can now quit the partitioning tool. This brings you back to the main Installer window, where "install onto" now has as (only) option the partition that we just have created (volume "BeOS5Pro"). Push the Begin button to start the installation.
|
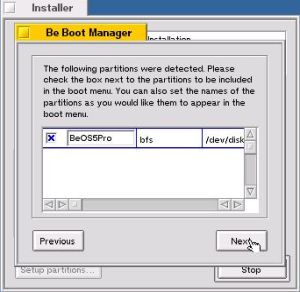
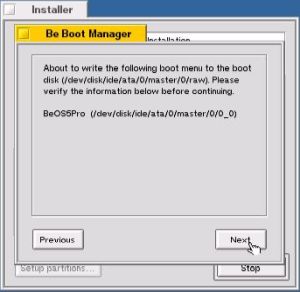
Files are copied and devices are installed. When done, you will be asked if you want to install the boot manager. Mandatory to do so (pushing the Yes button). In the next window, with the checkbox near "Install boot manager" selected, click Next to continue, then another time Next to save a copy of the MBR (the default save location should be ok), followed by No in order not to create a rescue diskette (BeOS does not recognize 3.5" 1.4kb floppies, at least if they are formatted using the FAT file system). When asked to select partitions to be included in the boot menu, check our (only one available) "BeOS5Pro" partition (screenshot on the left) and set a time out value (I chose 5 sec, what's enough time to prevent normal boot if needed). In the window, where you are told that setup is ready to write the boot menu to the disk, click Next to do so (screenshot on the right), then Yes to confirm.
|
|
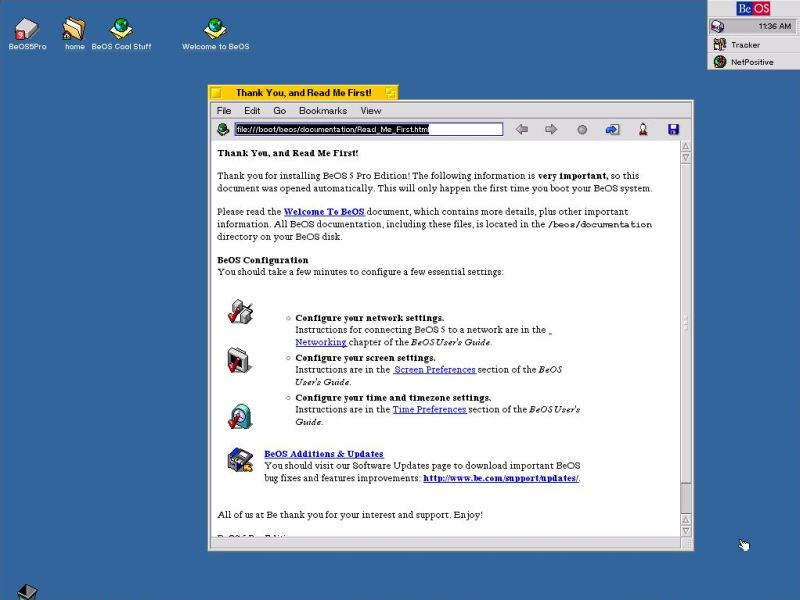
The caption of the button in the main Installer windows will change from "Begin" to "Done". Push the button to reboot the machine. As before, use the space bar to display the advanced boot options, and as before choose "fail-safe video mode" with a default resolution of 1024×768. The BeOS 5 Professional Edition desktop shows up. With a 1024×768 pixels resolution. And in full color...
|
We are now changing the BeOS configuration in order to boot with fail-safe video mode 1024×768×16 by default (so that we can let the system boot without having to make any manual adjustments). To do so we'll have to set our video mode in a file called vesa and being located in the "system drivers directory". Double-click the BeOS5Pro icon on the desktop to start File Explorer with the system root as current directory, then browse its subdirectories in order to get to /boot/home/config/settings/kernel/drivers/sample (/boot corresponds in fact to the BeOS5Pro folder). Right click the file vesa and from the opening context menu, choose the Copy to command to copy it to /boot/home/config/settings/kernel/drivers (that's the directory that I called "system drivers directory" above). To note that you can also copy files by opening the source and destination folders (e.g. by using "Find") and drag and drop the files from the source folder window to the destination folder window.
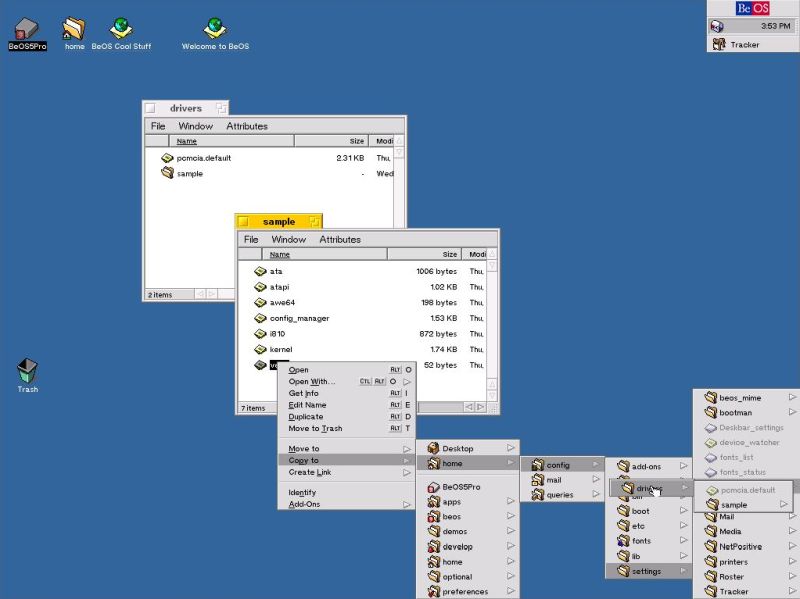
|
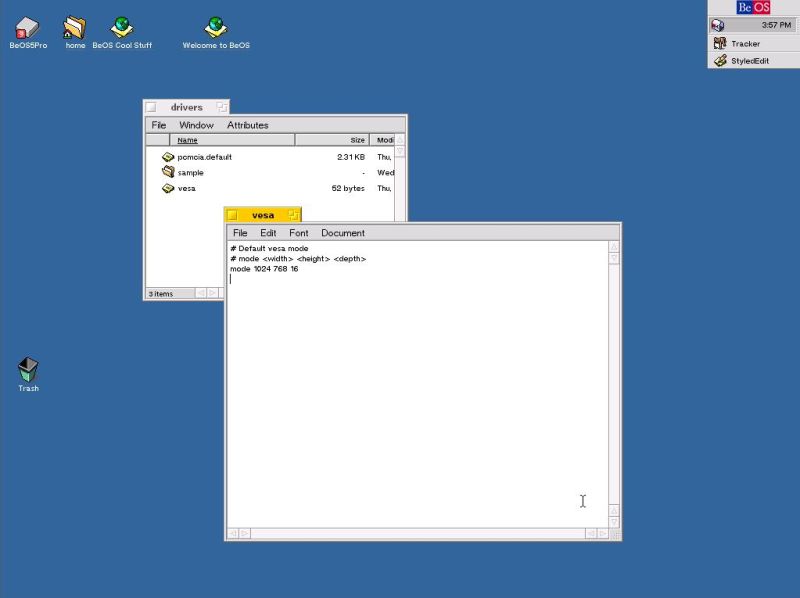
Open the file vesa with your text editor and add the following line:
mode 1024 768 16
|
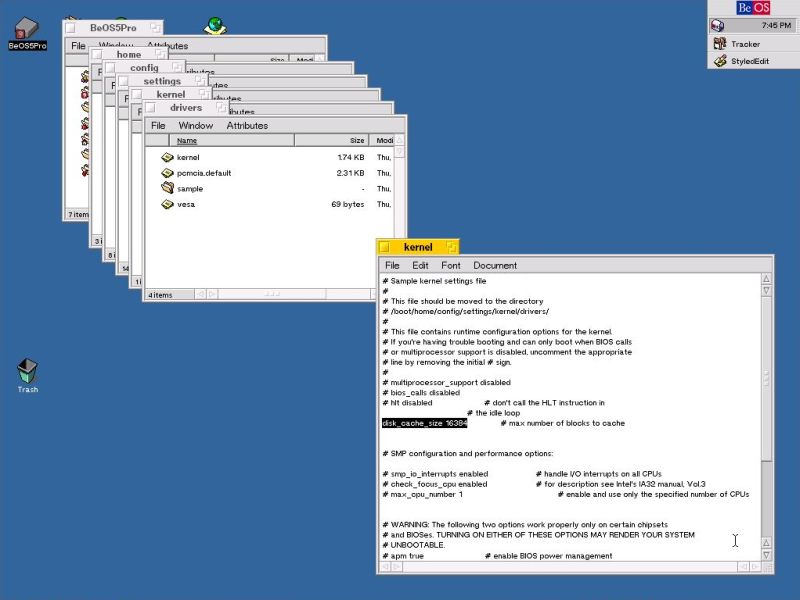
A second setting that we should change immediately is the disk cache size. To do so, copy the file kernel from
/boot/home/config/settings/kernel/drivers/sample to /boot/home/config/settings/kernel/drivers, find the corresponding line, uncomment it and replace the stated
value 2048 by 16384:
disk_cache_size 16384
|
If you find this text helpful, please, support me and this website by signing my guestbook.