BeOS 5 Personal Edition post-installation setup.
In my tutorial Installing BeOS 5 Personal Edition, I describe how to proceed to install BeOS 5 Personal Edition on Windows 95. This tutorial gives some details about common tasks to be done after the OS is installed, in particular setting up the graphics adapter (just a failure for me), the network card, playing audio files and further software installation.
To do these setup tasks, you'll have to transfer files from your computer to the BeOS machine. Beside allowing copy/paste between the host and the VM (what I never do, primarily because I always try to do as I would if I was working on a physical machine), there are two major possibilities to do so:
- Using a CDROM: Burn the files onto a CDROM or create an ISO that you mount in your virtualization software. On BeOS, mount the CD drive and access the files as you access those on your BeOS system.
- Transferring the files onto Windows (the Windows, where BeOS is installed on; Windows 95B in my case): This might be easier than transferring the files directly onto BeOS, in particular, for small files, you can use the floppy drive (that does not work on BeOS, where trying to mount the floppy fails). As the CD drive, the Windows drives may be mounted on BeOS, thus, you can access all files on the Windows C: partition (and I suppose on other partitions, if there are any, too) from within BeOS.
1. Configuring screen resolution.
When you install BeOS 5 Personal Edition, it will probably not recognize your graphics card and start with a resolution of 640×480 pixels and gray shades instead of colors. This should not be a major problem, because normally BeOS should be able to run at a higher resolution and with color display by a simple modification of the corresponding settings. However, on my VMware Workstation 16 virtual machine, this does not work, and all my efforts to get a higher resolution or a color output have failed!
Here, how the resolution and color issue due to an unknown graphics card should normally be fixed. Download VESAme 1.0 video driver for unsupported graphic cards. The download ZIP contains a script, that basically consists in creating a file called "vesa" in the directory /boot/home/config/settings/kernel/drivers, and that contains the resolution that BeOS will boot with the next time it is started.
You can't run a script in BeOS by simply double-clicking it (this just opens it in the text editor), but you have to do this using a terminal.
Supposing that you have created a subdirectory called "temp" in your "home" folder, and that this directory contains the folder "VESAme" from the download archive,
enter the following commands in the terminal:
cd temp/VESAme
ls
VESAme
where with the first of these commands, you browse to the "VESAme" folder, with the second one, you list this folder's content and with the last one, you execute the
script.
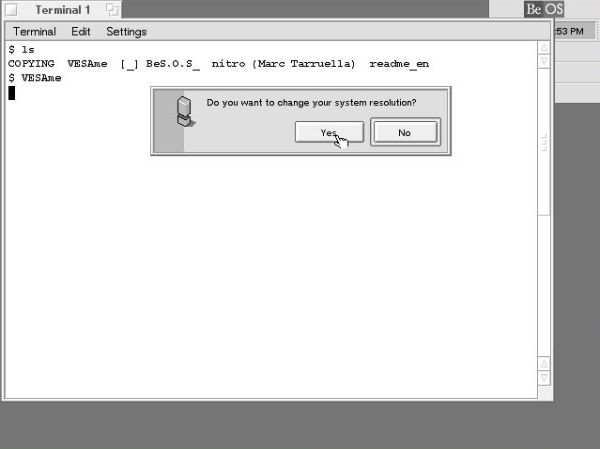
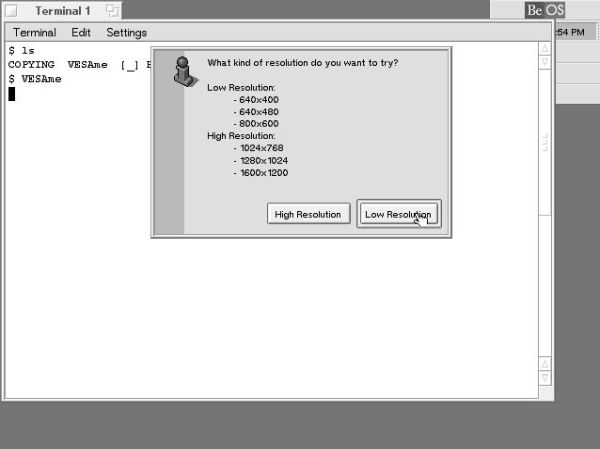
The screenshot on the left shows the content of the "VESAme" folder and the launching of the script; the screenshot on the right shows how you may choose between setting a low or a high screen resolution (low resolution in my case).
|
|
Then, you can choose the resolution and the color depth, the values shown on the screenshots below are what you could call "defaults". They do not work, as the others that I tried out. In all cases, when restarting BeOS, the boot screen showed up and that it was: An entirely black screen and all you can do is shutting down the machine. Thus: Be sure to take a snapshot or otherwise backup your VM before trying to change display settings!

|

|
Note: On a physical machine setting a resolution not supported by the graphics card may damage this one! And even in a virtual environment there may be serious problems. Thus when trying the values shown on the screenshots above, VMware did not succeed to shutdown the VM (and I had to close the VM window to power off the machine).
2. Configuring audio support.
The Sound Blaster 16, emulated by VMware, is recognized by default by BeOS, thus the machine has sound without that you have to do whatever configuration.
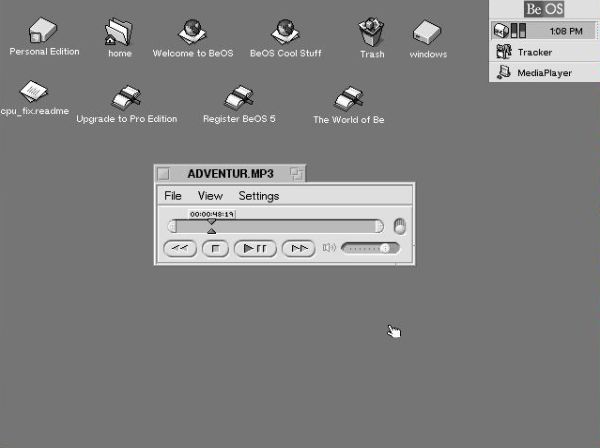
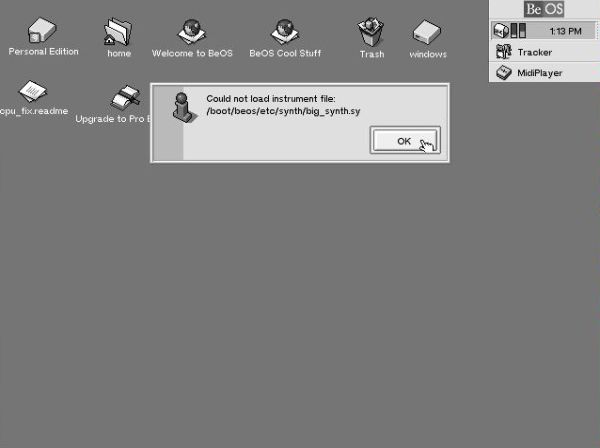
You can use the pre-installed application Media Player to play WAVE and MP3 files (screenshot on the left). Media Player cannot play MIDI files; if you try so, you'll get an "unsupported format" error (no screenshot). BeOS 5 PE includes the application Midi Player to play MIDI files; however, trying the application results in an error message as shown on the screenshot on the right.
|
|
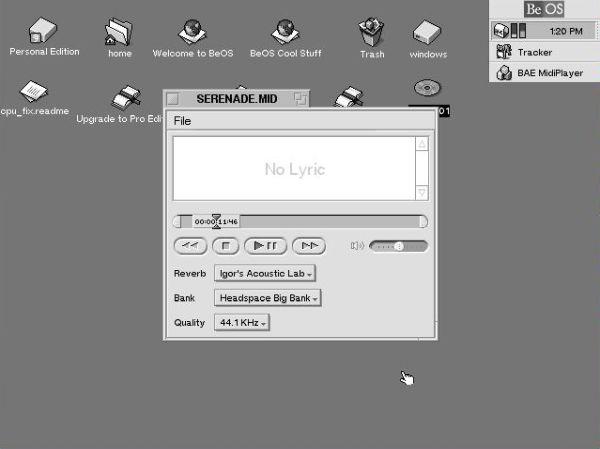
To be able to play MIDI files, you can download BAE MidiPlayer 1.0 from the Vetusware website. The download archive contains the application itself. On your BeOS machine, you should place it into the /boot/beos/apps (Desktop > Personal Edition > beos > apps) folder, and to easily access it create a symbolic link of the executable in /boot/apps (Desktop > Personal Edition > apps). Both the copy of the file from the media that you used to transfer it to your BeOS machine to the /boot/beos/apps folder, and the creation of the symbolic link in /boot/apps may be done using commands of the right-click context menu. The screenshot shows BAE MidiPlayer playing the file SERENADE.MID.
|
To note that audio quality in BeOS 5 Personal Edition is not the best, not reaching the one in Windows 3.1/3.11 for example.
3. Setting up the network.
Network cards need network drivers and so, the first thing to do is to find and to install one on our BeOS 5. I don't know if there exists a driver that works on physical hardware, nor if there is one for Virtual Box. Fortunately for me, there is one for VMware. You can download the BeOS Ethernet driver for VMware PCnet/PCI virtual network controller from the BeBytes website. There are several drivers available. I chose 0.6 Intel (BeOS 5) that works fine. You can transfer the package file to the BeOS machine using a CDROM or transferring it via floppy diskette to the Windows 95 filesystem, that you can mount on BeOS. Double-click vlance-0.6.pkg to start the installation.
![BeOS 5 Personal Edition post-installation setup: Network - Installing the vlance driver [1] BeOS 5 Personal Edition post-installation setup: Network - Installing the vlance driver [1]](../screenshots/beoswin_postinstall5a.jpg)
|
![BeOS 5 Personal Edition post-installation setup: Network - Installing the vlance driver [2] BeOS 5 Personal Edition post-installation setup: Network - Installing the vlance driver [2]](../screenshots/beoswin_postinstall5b.jpg)
|
Open Preferences > Network in order to configure the Ethernet connection. On the Identity tab, we can enter host name, domain name and DNS server(s). Not of interest here for me, because I haven't yet set up the machine with IP 192.168.41.100.
![BeOS 5 Personal Edition post-installation setup: Network - Network adapter configuration [1] BeOS 5 Personal Edition post-installation setup: Network - Network adapter configuration [1]](../screenshots/beoswin_postinstall6.jpg)
|
The VMware PCnet/PCI network controller should be shown in the network interfaces list. Click Settings to configure the adapter. In the opening window, you can
- Enable resp. disable the adapter.
- Choosing between automatic settings (DHCP) and manual settings.
- In the case of manual settings, enter IP address, subnet mask and default gateway.
![BeOS 5 Personal Edition post-installation setup: Network - Network adapter configuration [2] BeOS 5 Personal Edition post-installation setup: Network - Network adapter configuration [2]](../screenshots/beoswin_postinstall7.jpg)
|
On my network, the BeOS 5 PE machine is part of the 192.168.141.0/24 subnet and I gave it here the IP address 192.168.141.143. We'll need this IP further down in the text, when testing the network. The gateway doesn't matter here, because I haven't yet set up the machine with IP 192.168.41.100.
Push the Save button to save the adapter configuration, then the Restart network button to make the changes become active.
The simplest way to test network connectivity is to use a command line program called ping. This program, included with Windows, macOS, Linux and others sends an ICMP to a computer identified either with its IP address, or its DNS name. On Windows, the program sends 4 data packages, on Linux it continues sending packages until you cancel the program (CTRL+C). If for all packages send, you get a response (receive packages), your network configuration may be considered as correct. If you don't get any response, either you use bad network settings, or the pings are blocked (mostly by a firewall application running on the computer that you pinged).
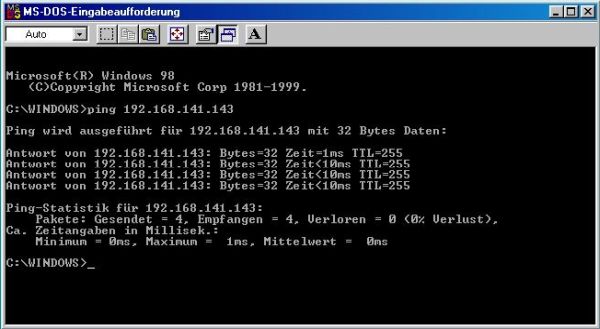
On my 192.168.141.0/24 network, there is a Windows 98 computer with IP address 192.168.141.103. To check if the BeOS machine can be reached from Windows 98, open
Command Prompt and run the command:
ping 192.168.141.143
|
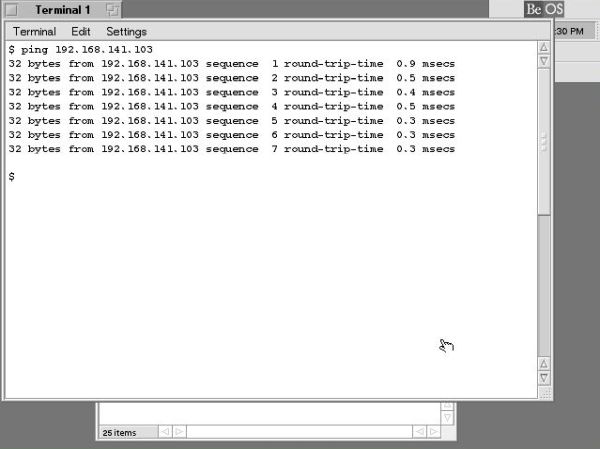
And now, testing if BeOS can reach the Windows 98 computer: Open a terminal and type (use CTRL+C to quit the ping program):
ping 192.168.141.103
|
If the machines are connected to an intranet DNS server (not yet the case on my network), you may use the computer
name instead of the IP address. Thus, to ping BeOS from Windows 98 (or other computer of this subnet), you can run the command:
ping wk-beosw.local
And if there is a router machine and the gateway is set to its IP (not yet the case on my network), then you can
ping Internet servers, by their IP and, if DNS is configured, also by their (full qualified) DNS name. Example (this server will always respond,
if the Internet connection is ok):
ping www.google.com
4. Changing the keyboard layout.
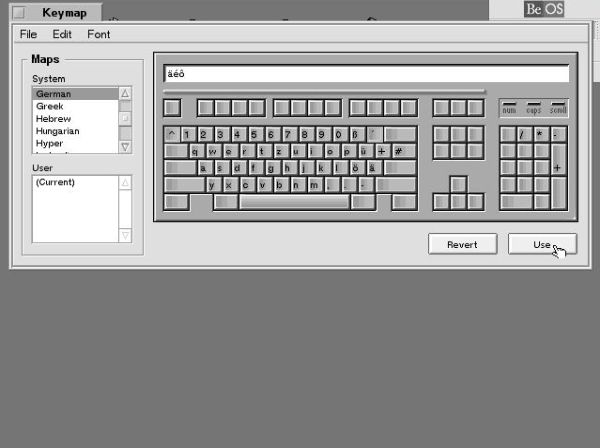
Open Preferences > Keymap and choose among the layouts available (German keyboard in my case) and push the Use button to make the new layout become active.
|
5. Changing the timezone.
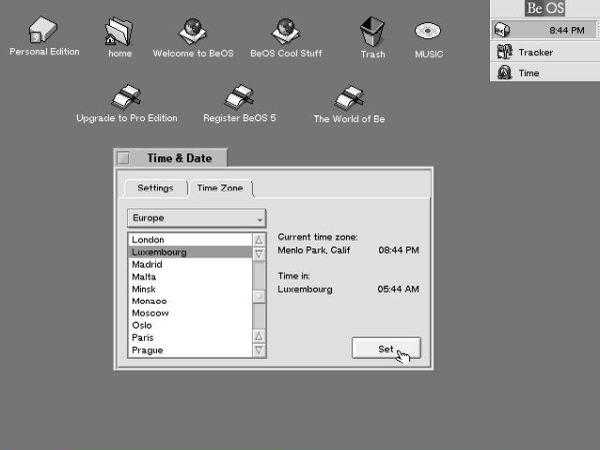
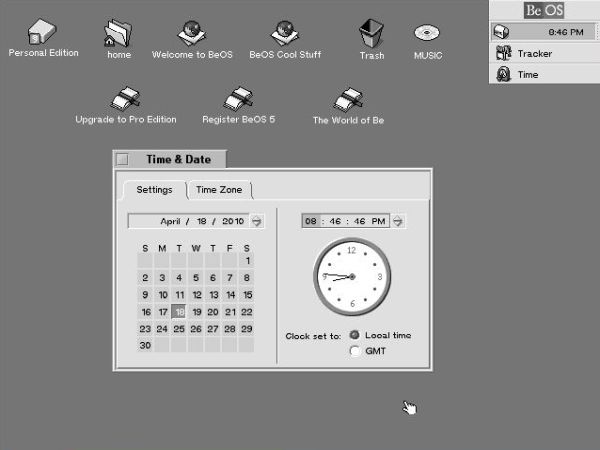
Open Preferences > Time. On the Timezone tab (screenshot on the left), choose your continent in the combo box and then your country/region among those available (Europe/Luxembourg in my case). After you have changed the timezone, you'll have to re-set date and time. On the Time & Date tab (screenshot on the right), change the date if necessary and enter the actual time. If you enter the actual time at your location, be sure to select the Local time checkbox.
|
|
6. Installing updates and patches.
There is an link to BeOS 5 Update3 available at http://www.rodpeterson.com/beos/Updates/BeOS5-Update3-Pro-x86.zip, but this update only applies to BeOS 5 Professional. BeOS 5 might have timing issues with the CPU and there is a patch to fix this; you can download it from www.rodpeterson.com/beos/ (http://www.rodpeterson.com/beos/Drivers/BeOS_CPU_Fix.pkg).
The download is a BeOS package (.pkg), that you can install by double-clicking it.
![BeOS 5 Personal Edition post-installation setup: Applying CPU_Fix patch [1] BeOS 5 Personal Edition post-installation setup: Applying CPU_Fix patch [1]](../screenshots/beoswin_postinstall12.jpg)
|
The setup wizard first asks if you have timing issues and that the patch could try to automatically fix them. I'm not sure if I did well when answering I have no timing issues (screenshot on the left). The wizard then asks if you want to patch the get_cpu_info function in order to correctly report CPU speeds above 2 GHz. Here I answered Yes, please, enable the patch (screenshot on the right).
![BeOS 5 Personal Edition post-installation setup: Applying CPU_Fix patch [2] BeOS 5 Personal Edition post-installation setup: Applying CPU_Fix patch [2]](../screenshots/beoswin_postinstall13a.jpg)
|
![BeOS 5 Personal Edition post-installation setup: Applying CPU_Fix patch [3] BeOS 5 Personal Edition post-installation setup: Applying CPU_Fix patch [3]](../screenshots/beoswin_postinstall13b.jpg)
|
7. Increasing the disk cache.
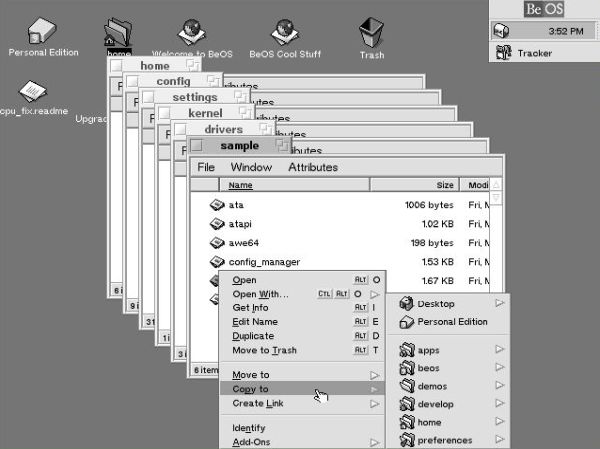
You can increase the performance of your BeOS 5 PE by increasing the disk cache size. This may be done in the file /boot/home/config/settings/kernel/drivers/kernel. This file doesn't exist with the original install of BeOS, but there is a template file located in /boot/home/config/settings/kernel/drivers/sample. So, the first thing to do is to copy the file kernel from the sample to the drivers directory. To copy a file on BeOS, right-click it and choose Copy to. This opens a kind of "directory structure pane", where you can browse to the directory, where you want the file to be copied to.
|
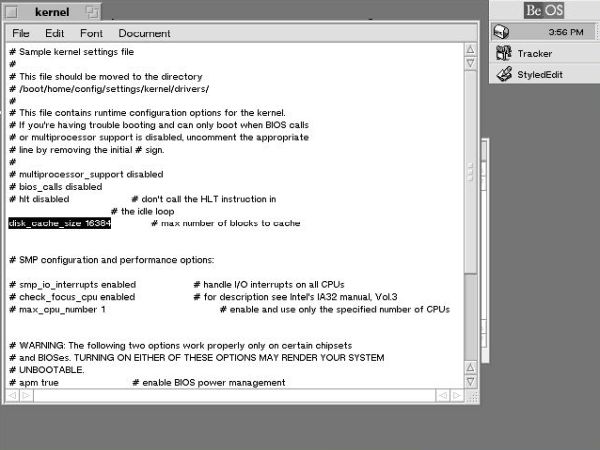
Then you can edit the file and replacing the corresponding line (actually: #disk_cache_size 2048) by this one: disk_cache_size 16384 (When doing these changes, be sure not to forget to uncomment the line, i.e. to remove the "#").
|
8. Installing software.
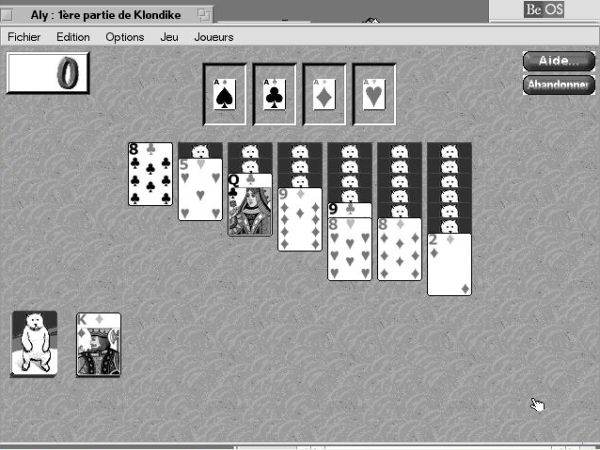
The BeOS 5 Personal CDROM contains some extra apps. Three of them are freeware: Becasso (drawing demo) and EUS (card solitaire game) are available as BeOS packages and can be installed the way as we saw before with other apps. Audio Browser is available as .zip archive. Open the ZIP and expand its content: a folder called "app" and another called "doc". Rename the "doc" folder to "Audio browser" and move it to /boot/beos/documentation. Move the content of the "app" folder (one single file called "Audi") to /boot/beos/apps. Right-click the file "Audi" in this folder and choose Create Link. This opens the same kind of "directory structure pane" as when copying or moving files. Browse to /boot/apps (in order to create the link, i.e. an app launcher, there.
|
If you search the Internet, you'll find lots of applications that run on BeOS. Two sites, in particular, to be mentionned: 1. The BeOS section of Vetusware, and 2. the BeOS Software Archive.
If you find this text helpful, please, support me and this website by signing my guestbook.