Setting up a FreeBSD workstation (on VMware).
To begin some personal considerations:
- FreeBSD is an operating system that is obviously not intended for mainstream users! It installs without a graphical desktop, thus either you run it as a text-based console OS, or you'll have to install the desktop manually. A simpler (and probably better alternative) is to use one of several available FreeBSD derivations that include the installation of the graphical environment.
- For myself, FreeBSD was nothing more that a lost of time. I spent hours and hours with a result of not lots more than nothing. Trying to install Lazarus/Free Pascal (as I do on all my virtual machines), I totally failed (as with other software): Using the ports, it ended up with errors, using the package manager, it seemed to install correctly, but after installation, the desktop environment was no more available.
- I posted at the FreeBSD forum, but this was not really helpful. FreeBSD users seem to me as a group of people with a high degree of computer knowledge and who expect this form others, too. A little bit like "if you aren't an IT pro, keep away from our OS!". My personal impression, of course. But, if I totally agree that refusing a post is their right, publishing only parts of what I initially posted (cutting out all critical observations) is like publishing, under my name, something that I didn't say, and that's never acceptable.
- If despite these considerations, you want give FreeBSD a try as a workstation with graphical desktop, please, note that this requires time and efforts, with a large part of work consisting in manually editing configuration files. So, if you are comfortable with doing this, or if you are willing to learn it, than this tutorial may be helpful. You'll get a FreeBSD workstation with KDE desktop (but, as I said above, with probable problems to install further software, whereas using some derivation distribution will work "out of the box", so to say).
The tutorial describes the installation of FreeBSD 13.0, 64bit, on VMware workstation 16. The installation on other virtualization software might be similar; the tutorial does not apply as such to the installation of the OS on a physical computer. Concerning my VMware virtual machine, I use the following settings: OS: Other > FreeBSD 12 64bit; processors: 1 CPU with 2 cores; Memory: 2 GB of RAM (if you have plenty of it, maybe 4 GB would be a better choice); hard drive: LSI logic, SCSI, 40 GB (20 or 25 GB should be enough, I would say). Important: the booting method has to be set to UEFI boot, with "secure boot" disabled.
Installing FreeBSD.
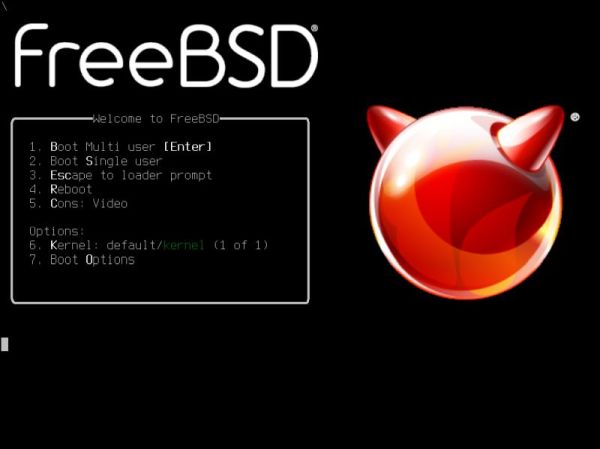
Boot the VM from the FreeBSD 13.0 DVD (aka the ISO). On the "Welcome to FreeBSD" screen, choose the default startup Boot Multi user by hitting ENTER.
|
Note: If it is globally recommendable to use one of the derivation distributions, these (maybe not all) have some serious disadvantage in comparison with FreeBSD concerning the installation: First, they directly boot into the Live DVD environment (whereas FreeBSD offers the option to launch the hard disk installer directly), what makes it necessary to have a machine with 4 GB of RAM in order to create the ramdisks. Second, their hard disk installer (maybe not for all distributions) gives no possibility to perform a manual partitioning (as the FreeBSD one does), but creates a ZFS pool on the whole harddisk (what makes, for example, a dual boot with one disk impossible).
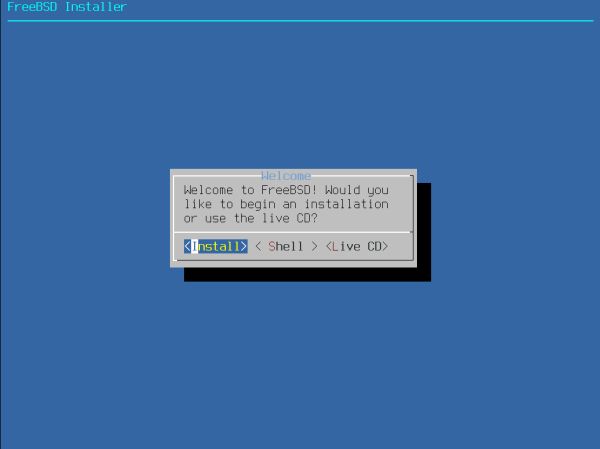
As said above, FreeBSD lets you choose to install the OS onto harddisk, to boot into the Live DVD (or to launch a shell). Choose Install to start installation.
|
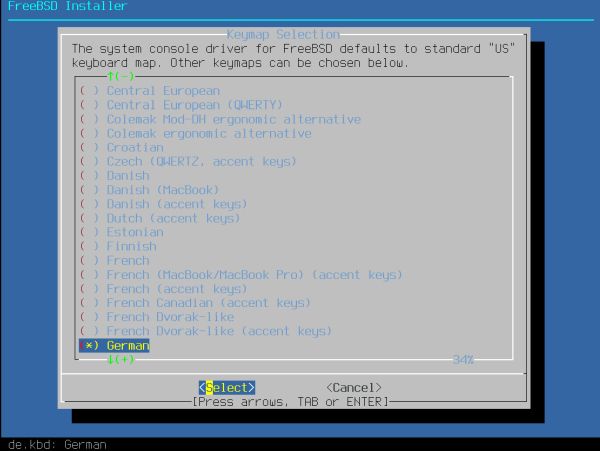
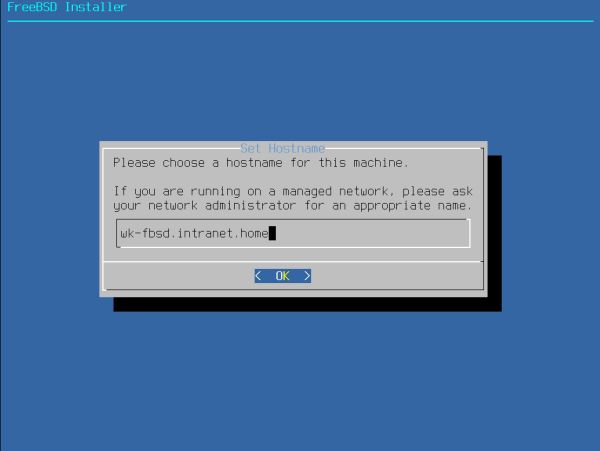
The first setup steps consist in choosing a keyboard layout (in my case: German) (screenshot on the left) and to set a hostname (I think that this one has to include the domain; in my case: wk-fbsd.intranet.home) (screenshot on the right).
|
|
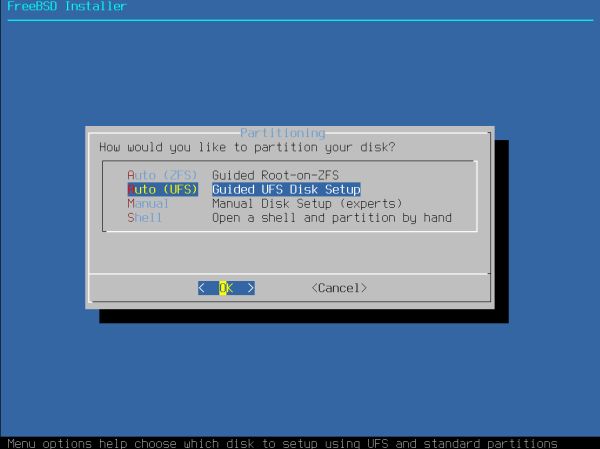
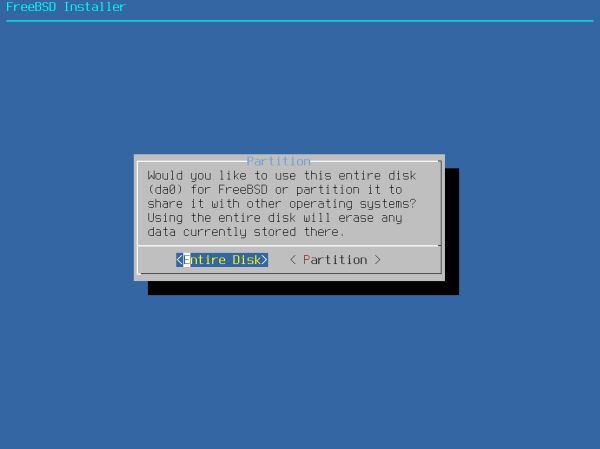
On the next screen, you can select some optional system components to be installed, then the harddisk partitioning process is started. I chose Auto (UFS), a guided setup of the disk, using the UFS filesystem (you can choose the newer ZFS if you like) (screenshot on the left). As said above, the FreeBSD installer offers the options to use the entire disk or a disk partition to create the UFS/ZFS pool. Choose Entire disk (screenshot on the right).
|
|
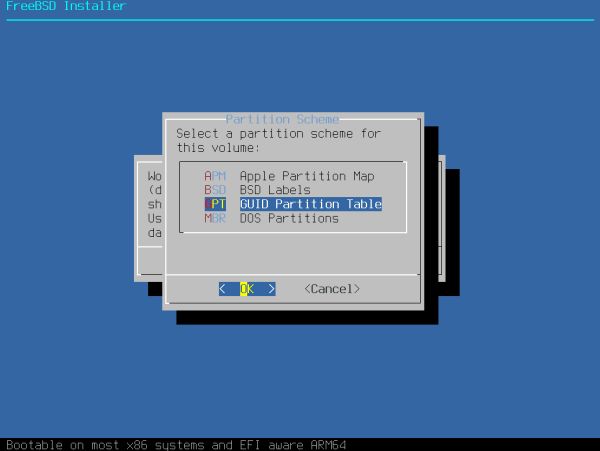
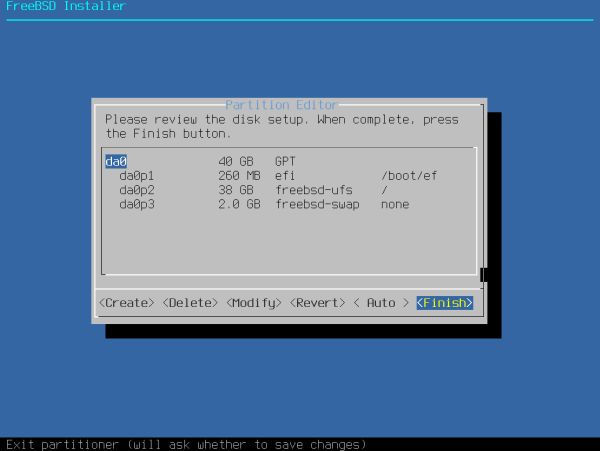
Now, we have a to select a partition scheme. As we want to boot, using the UEFI boot method, we have to select GPT (GUID partition table) (screenshot on the left). The partition editor displays the automatically chosen partition layout. Choose Finish to accept it (screenshot on the right). Note, that we'll have to confirm that the modifications should be written to the disk before this is actually done.
|
|
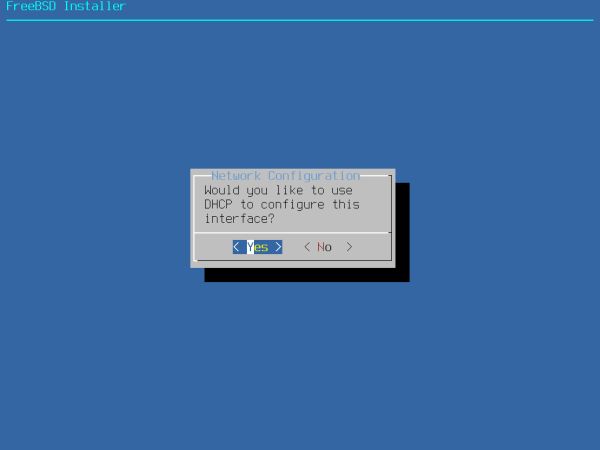
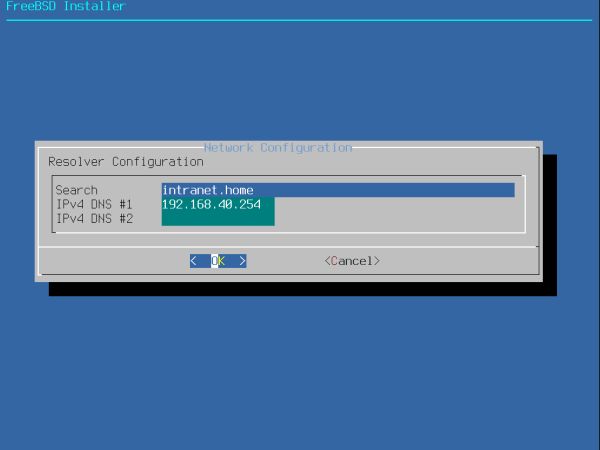
The setup program continues with copying the files from the DVD to the harddisk. After input of the root password, it continues with the network configuration. On the first screen, you have to select the network interface. The first network adapter (and probably only one in your VM) is called em0 in FreeBSD and corresponds to an Intel Pro/1000 card on VMware. On the second screen, you are asked if you want to configure IPv4 for this adapter; answer Yes to do so. If your VM is connected to a router that includes a DHCP server (i.e. if the VM will get an IP address from the router, thus the IP will not have to be configured manually), answer Yes when you are asked on the third screen, if you would like to use DHCP to configure the interface (screenshot on the left). IPv6 is normally not needed, so you can answer No, when you are asked on the forth screen if you want to configure it. And finally, on the fifth screen, you can set a search path (normally identical to the domain name that you used when setting the host name) and enter one or two DNS servers; normally you'll enter a single one, being the IP of your router (screenshot on the right).
|
|
The network being configured, the installer continues with asking for the time zone (Europe/Luxembourg in my case, what corresponds to CET = Central European Time). Then, you can set date and time; these are normally ok, thus, use the Skip button to let them as they are.
Setup continues with asking you which servers you would like to start at boot and gives you the opportunity to select security hardening options. Select as it suits best for you; I let all as it was set by default.
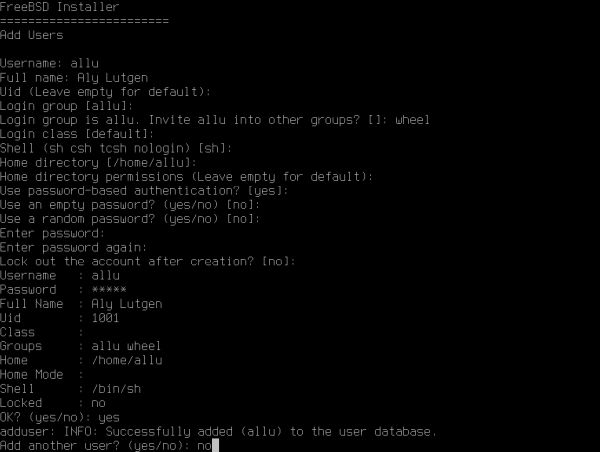
Last step to take: Addition of a user. User name ("allu" in my case) and full name have to be entered, of course. For most other values, you may accept the defaults, in particular for the Uid (that will be set to 1001). Concerning the group, there is automatically a group with the same name as the user name created (group "allu"). Be sure to add the new user to the group "wheel"; probably a good idea to add it to the group "video", too (note that if you enter several groups, they have to be separated by a space, not by a comma or semicolon). Normally, you would want to log in your user with a password, that you can set here. No reason to change the home directory. If you are an experienced Linux user, you might want to select your favorite shell instead of sh.
|
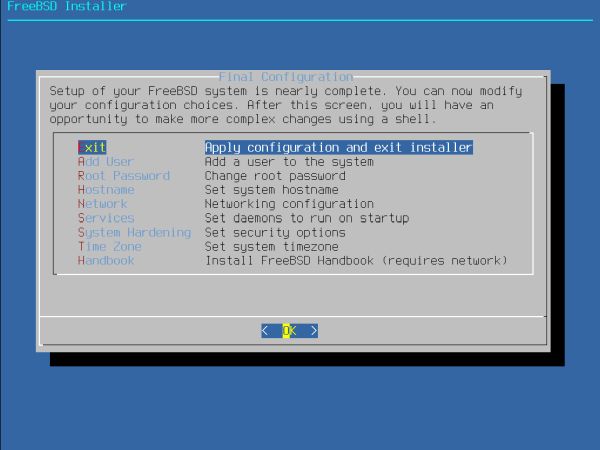
The Final Configuration screen shows up, giving you the possibility to make changes to the network, the hostname, the root password and other users, etc. If you are connected to the Internet, you can also download the FreeBSD Handbook from this screen. If everything is ok, select "Apply configuration and exit installer" .
|
Finally, you are given the possibility to launch a shell in order to make some manual modifications to the system. Then, you can either go to the Live DVD, or reboot the system.
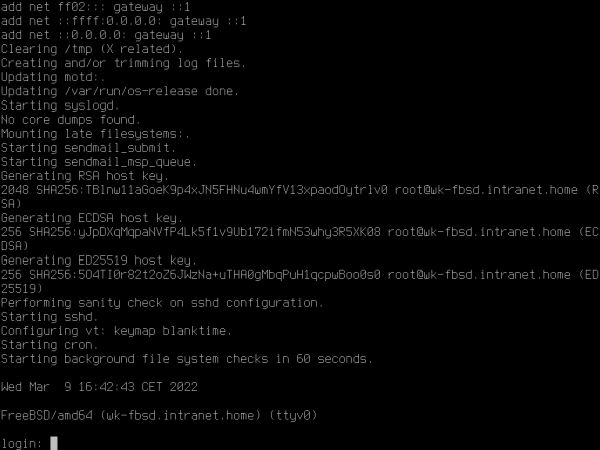
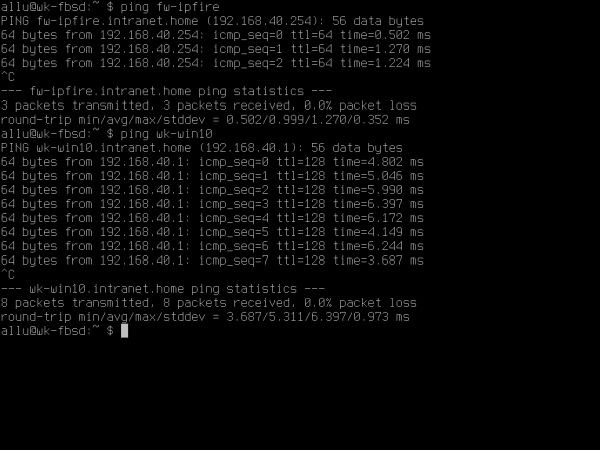
As said above, the FreeBSD installation DVD sets up a command line operating system, i.e. an OS without a graphical desktop. At the login prompt (screenshot on the left), enter your username, then your password (nothing will be displayed while you are typing). The OS appears as a black box, similar to DOS, or a Linux terminal. The screenshot on the right shows how my user "allu" pings the router/firewall and a Windows 10 machine on my VMware virtual network.
|
|
Installing Open VM Tools.
We will now install Open VM Tools. This is a rather heavy procedure with several files having to be manually edited. As I succeeded to get my FreeBSD workstation with KDE desktop running, I suggest that you follow the tutorial step by step as described here; this should result in a success for you, too. Note, that this part of my tutorial is based on the article How to install vmware tools freebsd? on the Twise Random website.
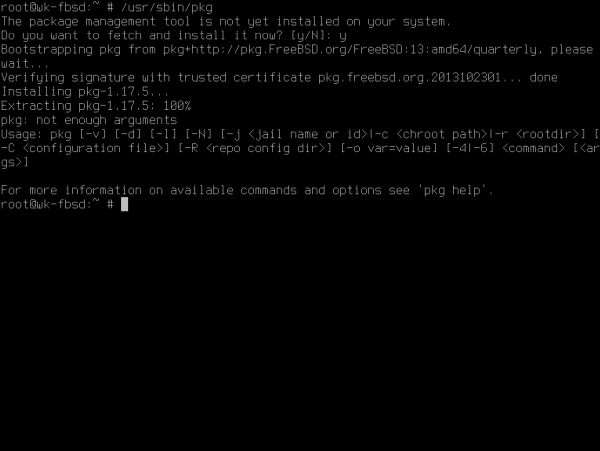
To install the new software, we will need the FreeBSD package manager pkg. On my FreeBSD 13.0, it was not installed
with the installation DVD. To install it, just run the commands
su
/usr/sbin/pkg
where the first line gives you super-user rights and the second invokes pkg and as the system does not find it, asks you if you want to
install it.
|
We continue with the installation of Open VM Tools. As root, run the command:
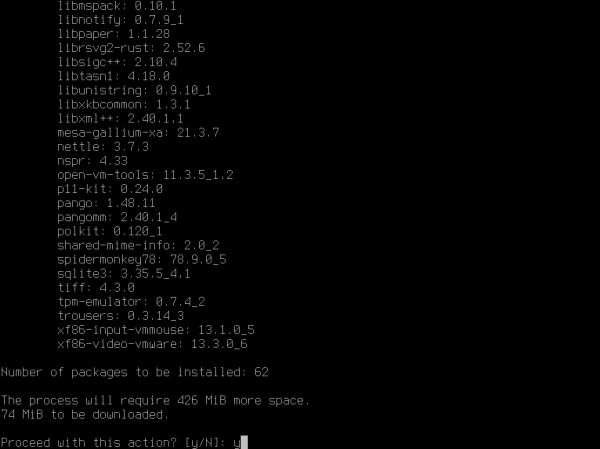
pkg install open-vm-tools xf86-video-vmware xf86-input-vmmouse
The screenshot shows that on my system 62 packages had to be installed.
|
Now, we have to manually edit some system files. To edit a text file in FreeBSD, type:
edit <filename>
This will start the default FreeBSD text editor ee. You can move around in the editor window using the arrow keys, inserting, replacing
or deleting text and performing editor commands after having pressed CTRL+C. After having pressed these keys, the text "command:" will be displayed in the last line
of the screen and you can enter any of the commands that are supported by ee. Here, two of them, just enough to do what we have to do here:
use exit to exit the editor with saving the actual file; use quit to exit the editor without saving the actual
file.
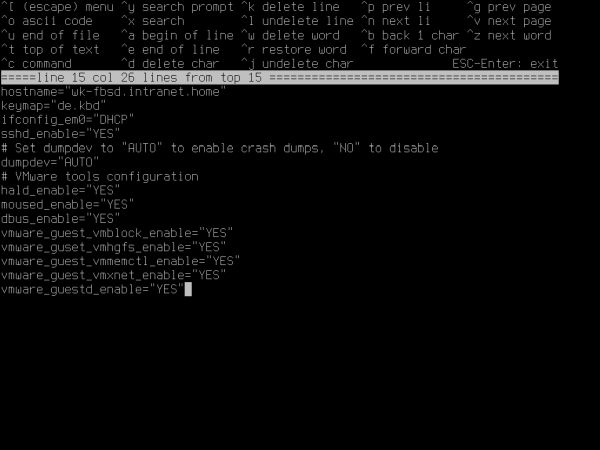
The first file to be modified is /etc/rc.conf. Make sure that the following lines exist, are not commented out and that the different keys
have the values as shown below:
hald_enable="YES"
moused_enable="YES"
dbus_enable="YES"
vmware_guest_vmblock_enable="YES"
vmware_guest_vmhgfs_enable="YES"
vmware_guest_vmmemctl_enable="YES"
vmware_guest_vmxnet_enable="YES"
vmware_guestd_enable="YES"
|
The second file to edit is /boot/loader.conf. Add the following line (on my system it's the only line in this file):
fuse_load="YES"
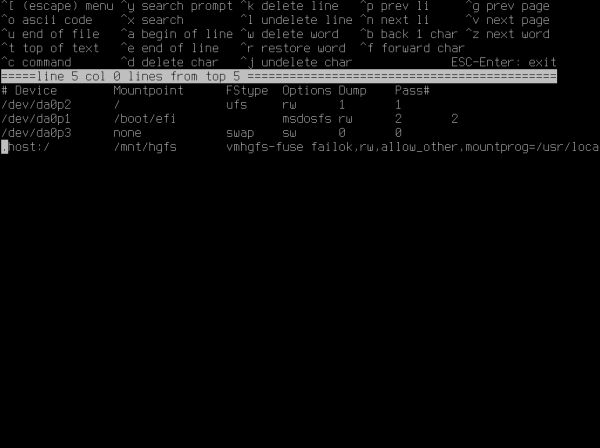
The third file to be modified is /etc/fstab. Add the following line at the end of the file:
.host:/ /mnt/hgfs vmhgfs-fuse failok,rw,allow_other,mountprog=/usr/local/bin/vmhgfs-fuse 0 0
|
And finally, create the directory /mnt/hgfs and reboot the system:
mkdir /mnt/hgfs
shutdown -r now
Note: To shutdown the system, use the command shutdown -h now.
Configuring Xorg.
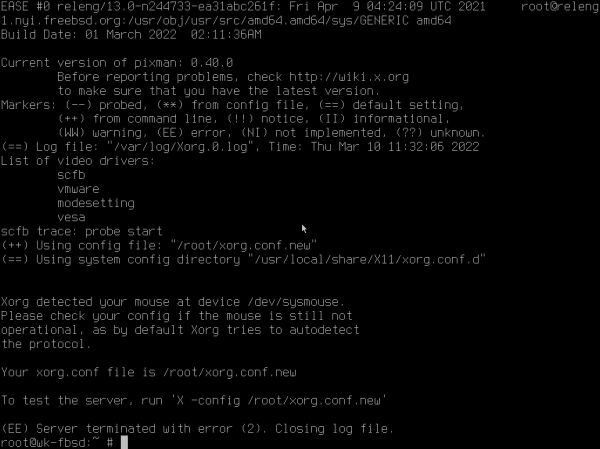
We continue by generating a new Xorg configuration file. As root, run the command:
Xorg -configure
|
The newly generated file is called xorg.conf.new and has been placed in the /root directory. Edit this file.
- Search for Driver "mouse" and replace it with
Driver "vmmouse" - Make sure that in the Section "Device", the following lines do exist:
Identifier "Card0"
Driver "vmware"
BusID "PCI:0:15:0" - Make sure that in the Section "Screen", Device for "Screen0" is set to
"Card0":
Identifier "Screen0"
Device "Card0"
![Installing FreeBSD on VMware: Editing the file '/root/xorg.conf.new' [1] Installing FreeBSD on VMware: Editing the file '/root/xorg.conf.new' [1]](../screenshots/fbsd_vmware15a.jpg)
|
![Installing FreeBSD on VMware: Editing the file '/root/xorg.conf.new' [2] Installing FreeBSD on VMware: Editing the file '/root/xorg.conf.new' [2]](../screenshots/fbsd_vmware15b.jpg)
|
Now move the new Xorg Configuration file to /usr/local/etc/X11/xorg.conf.d/xorg.conf:
mv xorg.conf.new /usr/local/etc/X11/xorg.conf.d/xorg.conf
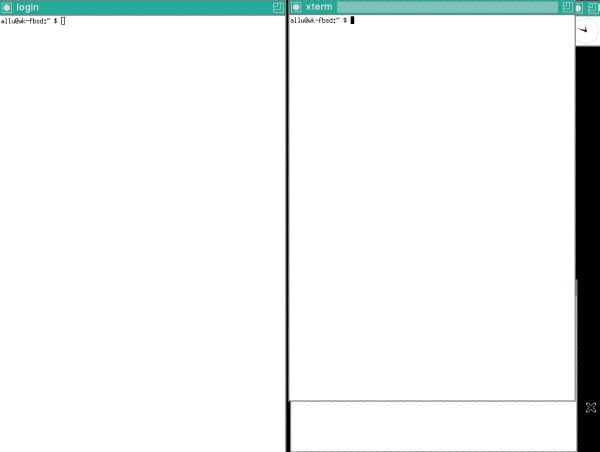
And finally, lets try if Xorg starts up correctly: Exit the root account (becoming "allu") and start the server:
exit
startx
|
Surprised of what you see? Did you expect a graphical desktop? So far, we have installed Xorg; if we want to have a desktop, we'll have to install it. In the following paragraphs, I show how to install the KDE Plasma 5 desktop. This part of the tutorial is based on the FreeBSD handbook.
Installing KDE Plasma 5.
We install the KDE desktop, using the FreeBSD package manager pkg:
su
pkg install x11/kde5
The screenshot on the left shows that on my system 646 packages were installed. The screenshot on the right shows that in order to make correctly work given applications, additional installs or configuration will be required...
![Installing FreeBSD on VMware: Installing the KDE Plasma 5 desktop [1] Installing FreeBSD on VMware: Installing the KDE Plasma 5 desktop [1]](../screenshots/fbsd_vmware17a.jpg)
|
![Installing FreeBSD on VMware: Installing the KDE Plasma 5 desktop [2] Installing FreeBSD on VMware: Installing the KDE Plasma 5 desktop [2]](../screenshots/fbsd_vmware17b.jpg)
|
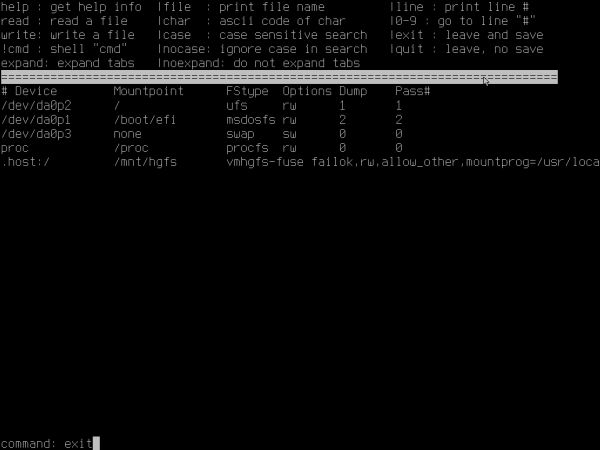
KDE requires /proc to be mounted. Add the following line to /etc/fstab in order to mount this file system automatically when the
system starts up (maybe that the line is added automatically when installing KDE?):
proc /proc procfs rw 0 0
|
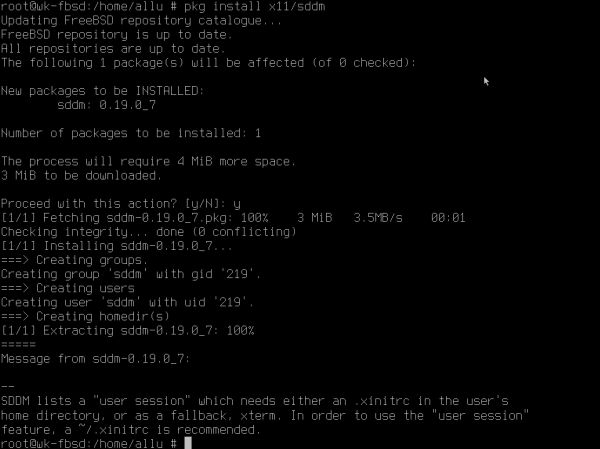
Since KDE Plasma 5, the KDE Display Manager, KDM is no longer developed. A possible replacement is SDDM. We can install it using pkg:
pkg install x11/sddm
|
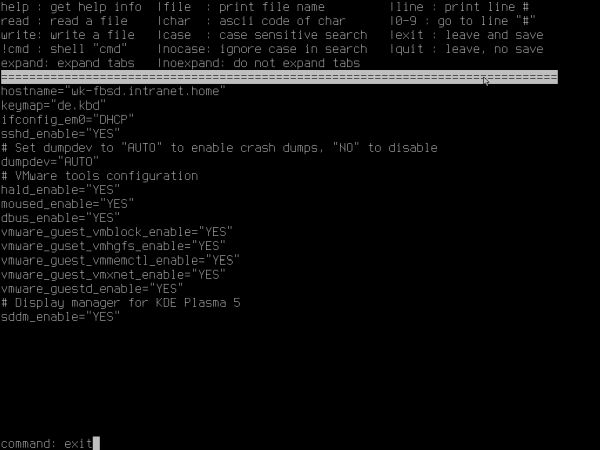
In order to start Xorg and display the KDE login screen automatically at system boot, add the following line to /etc/rc.conf
sddm_enable="YES"
|
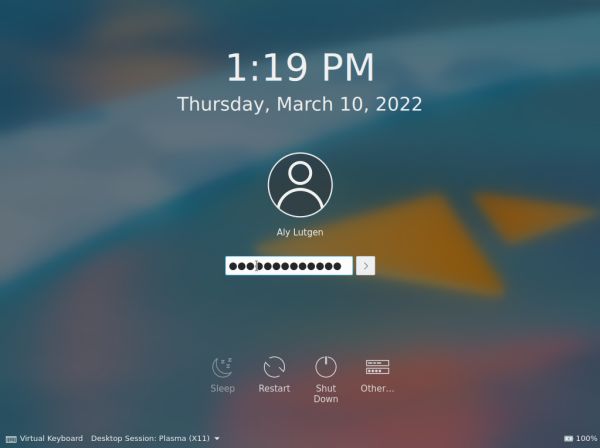
That's it! Finally... Rebooting the machine starts FreeBSD with the KDE login screen. Be sure that Plasma (X11) is selected as desktop session. And (when entering the password) be aware that the login screen uses the US keyboard layout (and not the one that you selected during install)!
|
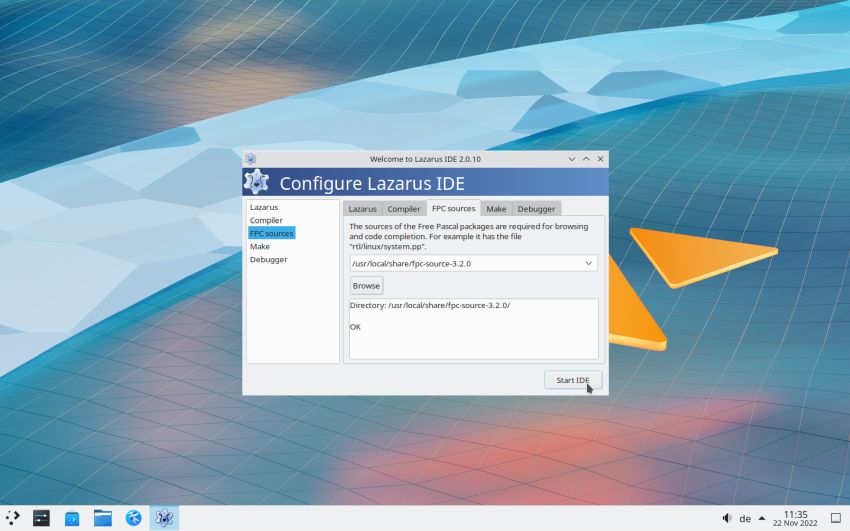
With Open VM Tools installed, no problem to set the desired screen resolution. Just go to System settings > Display and Monitor > Display configuration and in the Resolution, select the value that you like (I chose 1440x900, as for all my virtual machines which support this resolution). The screenshot shows my FreeBSD desktop with the new resolution, actually with the Configuration window of Lazarus (that did correctly install, but unfortunately fails to build any applications).
|
If you find this text helpful, please, support me and this website by signing my guestbook.