Installing OS/2 1.x and OS/2 2.x on VMware.
Installing old operating systems on a virtual machine is always tricky, partially because most virtualization software does not or only incompletely support these OS. This tutorial is about the installation of the first versions of IBM OS/2 on VMware Workstation 16, running on Windows 10. There is no guaranty that it will work with other versions of VMware, or with Workstation 16 running on a different platform. Concerning the versions of OS/2, that I use, there might be better choices. A fact is, that those that I use, run well on my system. However, do not expect to much: This "well" means with VGA display resolution, no sound and (at least for now) no network.
1. Creating the VMware virtual machines.
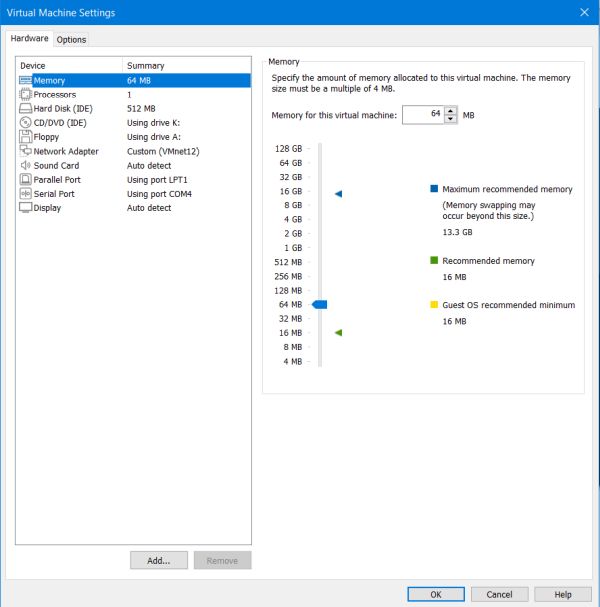
I created identical machines for both OS/2 versions, choosing Windows > Windows 3.1 as operating system (VMware does not support OS/2) and with the configuration as shown on the screenshot. To note, that I'm not sure if it is possible to use networking on these OS and that I didn't try out LPT and COM ports. The important point is: To avoid problems, limit the size of the harddisk to 512 MB! Also, make sure that the CDROM is an IDE device (what should normally be the case by default).
 |
2. Installing OS/2 1.3 Extended Edition.
Some important notes, you should read before beginning.
- IBM had their own floppy image format called DSK. Some modern software will read it, some won't. I did not try if such files work on VMware; they are told not to work on Virtualbox. This means, that if you want to use the original diskettes (this tutorial will not), you'll have to convert the DSK files to regular IMG files or write them in IMG format onto a floppy diskette.
- OS/2 1.x will crash on any modern system unless you patch some files. In short, this consists in extracting some files from the original floppy diskettes, patch them, and put them back in again.
- You can find details (and further links) concerning these two issues on the OS/2 on Virtualbox Guide webpage. It's actually this webpage that I used as base for writing this tutorial.
- There exist prepatched versions of OS/2 1.x on the Internet, in particular on the webpage mentioned above. Of course, using these is not really using the original files, but the evident advantage is that you just have to extract the ZIP download and start the installation.
This tutorial is about the installation of the prepatched version of OS/2 1.3 Extended Edition on VMware. I guess that the procedure is quite the same with other virtualization software. No guaranties at all, if you use another version of OS/2 1.x or the original OS/2 1.3 diskettes. The prepatched version of OS/2 1.3 Extended Edition can be downloaded from the OS/2 on Virtualbox Guide webpage.
Before starting the installation, make sure that the BIOS boot sequence is set with first boot device = removable devices!
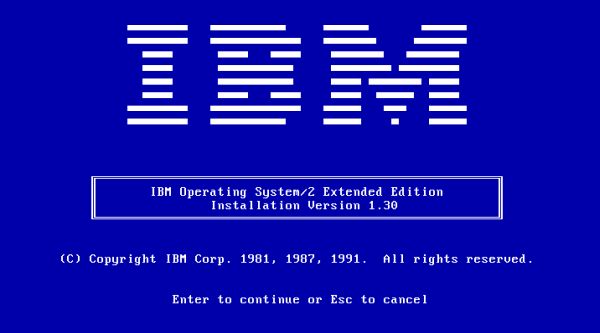
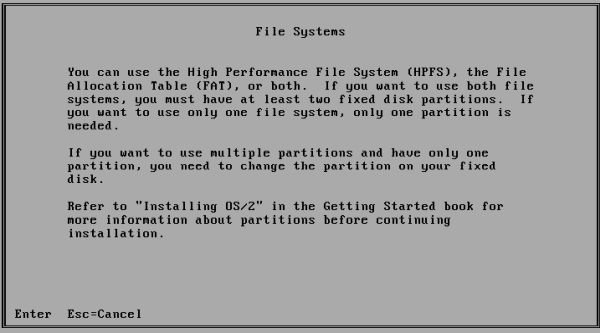
Boot from the diskette labeled "install". After a screen, that displays the OS/2 1.3 copyright notice, you get a blue screen with the IBM logo (screenshot on the left), where you have to hit ENTER to continue, then a "Welcome" screen, describing the possibility of dual boot installations, followed by an "Introduction" screen, describing the keyboard keys to use during the installation, and a "File systems" screen, describing the two possible file systems HPFS and FAT (screenshot on the right). As for the "IBM" screen, always hit ENTER to continue. You should note, that one or the other of these introductory screens may take time to react on your ENTER key; just be patient, it's not that the system hangs...
|
|
The screenshot below shows the "FDisk unsuccessful" error screen that I got during my first trial to install OS/2 1.3. None of the suggestions, mentioned on this screen, does help to correct the error; simply not possible to start FDisk! I finally figured out, that the problem was the size of the harddisk. With 2 GB as initial choice, too large to be accessible by FDisk!
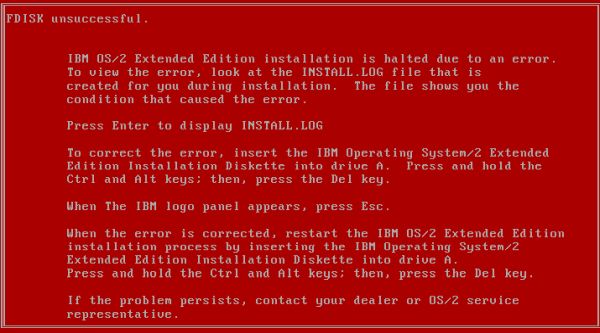 |
I finally choose to use a 512 MB harddisk (I think that's the maximum, that works, without being sure) and with this change of my VM's settings, partitioning, as the rest of the installation process, was successful.
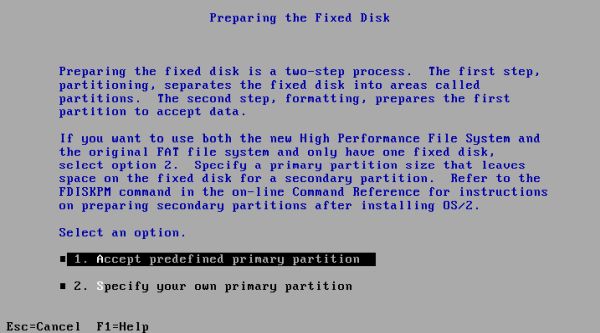
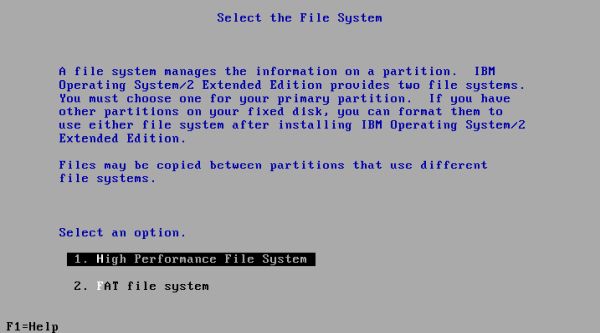
Preparing the fixed disk consists of two steps. 1. Partitioning: Except if you want to do something special (double boot, creation of a data or work partition), select Accept predefined primary partition (screenshot on the left); in this case, the entire disk will be used for OS/2. 2. Formatting: HPFS is typically used as filesystem for OS/2, thus the most obvious choice here is High Performance File System (screenshot on the right). Please, note that after having created the partition, you will have to reboot. And, before formatting it, you will be asked to insert the "disk01" diskette.
|
|
You can now choose between a default or a custom system configuration. This concerns the features that will be installed, as well as settings like country, keyboard layout, etc. The best choice here surely is Select base operating system configuration (screenshot on the left). On the following screen, I checked all configuration options (screenshot on the right), thus choosing to install the "whole package".
![OS/2 1.3 installation on VMware: Base operating system configuration [1] OS/2 1.3 installation on VMware: Base operating system configuration [1]](../screenshots/vmware_osii1x2x5a.jpg)
|
![OS/2 1.3 installation on VMware: Base operating system configuration [2] OS/2 1.3 installation on VMware: Base operating system configuration [2]](../screenshots/vmware_osii1x2x5b.jpg)
|
On the following screens you have the possibility to change the default system configuration settings. You can choose if you want to install the OS/2 documentation, you can choose which fonts to install, you have to choose a country (I chose United Kingdom, estimating that formats would be closer to those being used in Luxembourg than if I let United States). On the Country Information screen, you can choose a keyboard layout (German, in my case) and a code page (best choice here: "Multilingual").
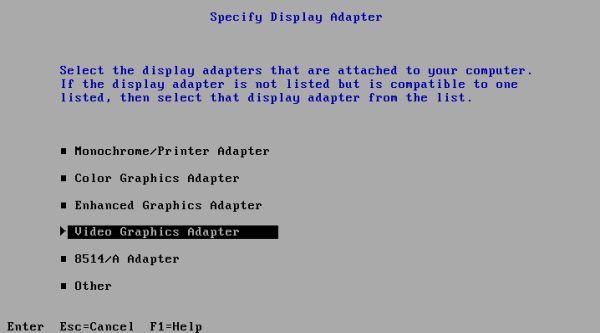
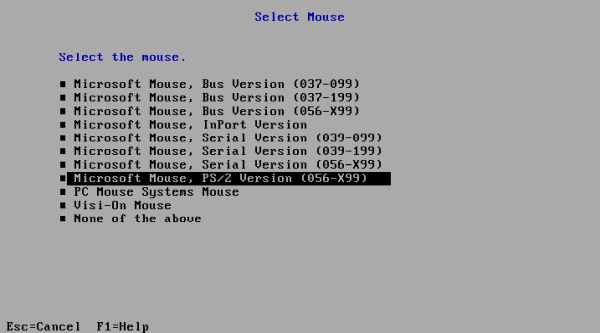
On the next screens, you have to configure display adapter and mouse. The default setting is an IBM PS/2 Display Adapter. Do not use this default (choose No on the Select Display Adapter screen), and on the Specify Display Adapter screen, choose Video Graphics Adapter (screenshot on the left). On the Select mouse screen, choose Microsoft Mouse, PS/2 version (056-X99) (screenshot on the right).
|
|
To terminate system configuration, choose Accept configuration on the Select configuration screen. The operating system files are now copied to the harddisk. Switch diskettes as you are told to do.
On the Select default printer screen, I chose (as suggested on the OS/2 on Virtualbox Guide webpage) Do not install default printer and answered No to both of the questions about the device support diskette and the custom install diskette.
On the Select basic configuration services, answer No to the question if you want to create a basic configuration file (this also, following the suggestion on the OS/2 webpage). The following screen lets you install or remove components. Push F3 to continue with the components actually installed (i.e. no further install, no removal either). That's it: Installation complete!
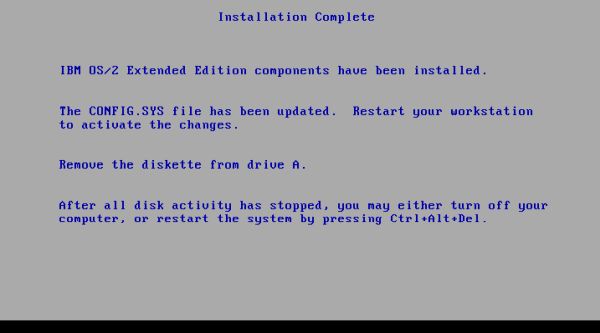 |
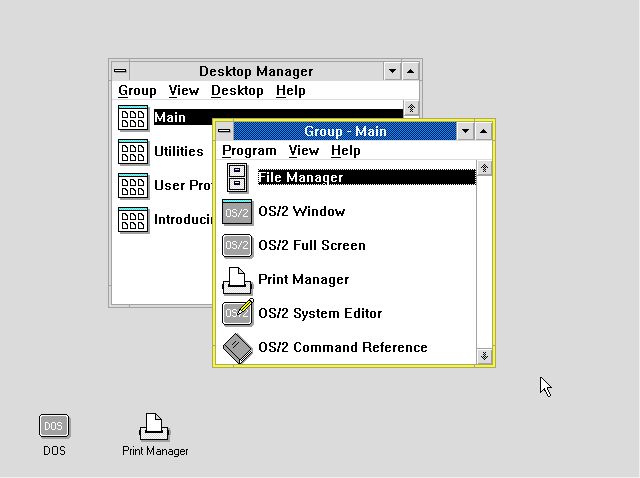
You should now shutdown your computer and change the BIOS boot sequence to 1. HDD; 2. CD; 3. removable devices. When re-powering on the machine, OS/2 should properly boot from the harddisk. The GUI consists of a Desktop Manager, also called Presentation Manager that includes several program groups and separate icons for launching MS-DOS resp. the Print Manager. The Main Group includes a File Explorer, where you can manipulate files and folders, and a System Editor. It also allows to start the OS/2 shell (windowed or full screen) and to view help concerning the OS/2 commands. The Utilities Group contains some useful disk, diskette and picture tools. The Introducing OS/2 Group gives access to the documentation.
 |
Some hints:
- To shutdown the system, use Desktop Manager > Desktop > Shutdown. After confirmation, the computer is set into an "inactive state", similar as what you have with Windows NT. To complete shutdown, just turn the machine off; to reboot, push CTRL+ALT+DEL.
- Right-clicking the desktop opens a window with the list of all open groups, allowing you to switch between them
3. Installing OS/2 2.11.
There are several versions of OS/2 2.x available on the Internet. If you got a CD version, don't be surprised if your computer does not boot. At the time of OS/2 2.x, CDs normally weren't bootable and you need a boot diskette to start up the computer. If you got a floppy diskettes version, it may be that your virtualization software can't read the diskettes. The reason in this case is that IBM had their own floppy image format called DSK, that's not commonly readable. You can find details (and further links) concerning the possible issues on the OS/2 on Virtualbox Guide webpage. It's actually this webpage that I used as base for writing this tutorial. If you have read the section about OS/2 1.x, you may perhaps wonder, if OS/2 2.x must also be patched in order to run it on modern hardware. It does not; you can use the installation diskettes as they are.
This tutorial is about the installation of OS/2 2.11 (French version) on VMware. I guess that the procedure is quite the same with other versions of OS/2 2.x (on the webpage mentioned above, they use the English version 2.1) as well as with other virtualization software (on the OS/2 webpage they use Virtualbox). On the other side, no guaranty that all versions will install correctly. You can download the French OS/2 2.11 (or another version) from the WinWorld OS/2 webpage. It's available as a set of 3.5" floppy images.
Before starting the installation, make sure that the BIOS boot sequence is set with first boot device = removable devices!
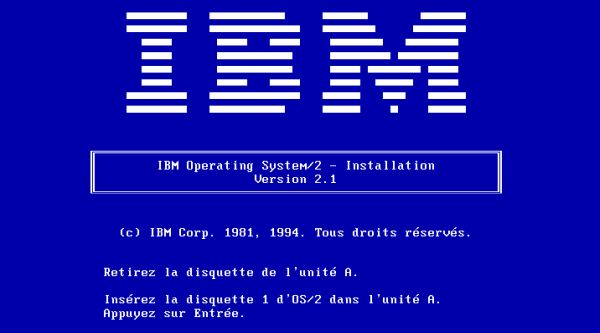
Boot from the diskette labeled "install". The screen with the IBM logo shows up. Before continuing, you have to insert diskette "disk01".
 |
After some introductory screens, similar to those we saw before with OS 1.3, you come to the Préparation du disque dur (Preparing the fixed disk) screen. Except if you want to do something special (double boot, creation of a data or work partition), select Validation de la partition d'installation par défaut (Accept predefined primary partition) (screenshot on the left), what will use the entire disk for your OS/2 system. After the partition has been created (if, instead, you get an FDisk error as described with OS/2 1.3, the reason is that your harddisk is to large to be recognized by FDisk), you have to re-insert the "install" diskette, as the system needs to reboot (screenshot on the right).
![OS/2 2.11 installation on VMware: Starting setup - HDD preparation - Partionning [1] OS/2 2.11 installation on VMware: HDD preparation - Partionning [1]](../screenshots/vmware_osii1x2x10a.jpg)
|
![OS/2 2.11 installation on VMware: Starting setup - HDD preparation - Partionning [2] OS/2 2.11 installation on VMware: HDD preparation - Partionning [2]](../screenshots/vmware_osii1x2x10b.jpg)
|
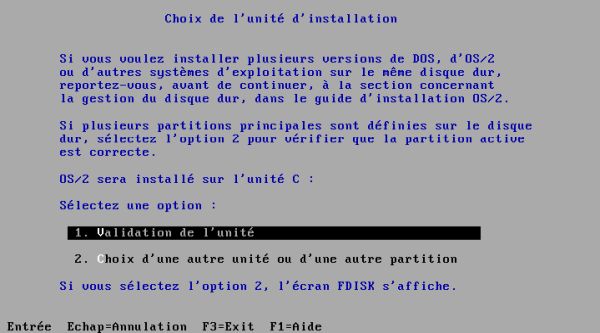
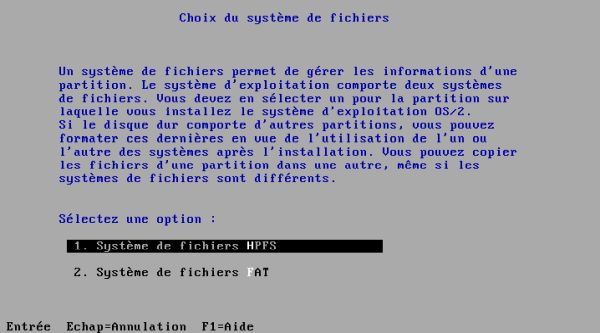
After the system has rebooted, you must select the partition, where OS/2 should be installed. The default is drive C: (what is normally the only partition available). Choose drive C: by selecting Validation de la partition de l'unité (Accept the drive) (screenshot on the left). Continuing with diskette "disk2", the setup program asks what filesystem should be used to format the C: drive. Choose Système de fichiers HPFS, what is the typical filesystem to be used with OS/2 (screenshot on the right).
|
|
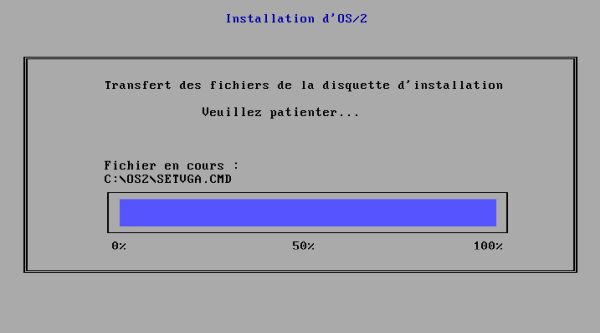
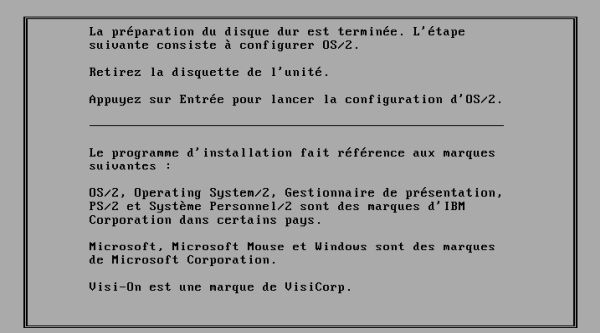
After formatting has completed, the setup program asks several diskettes to copy the OS/2 files to the harddisk (screenshot on the left). When this is finished, it asks you to remove the diskette in drive A: (in VMware, you can simply disconnect the floppy drive) and then hit ENTER to start system configuration (screenshot on the right).
|
|
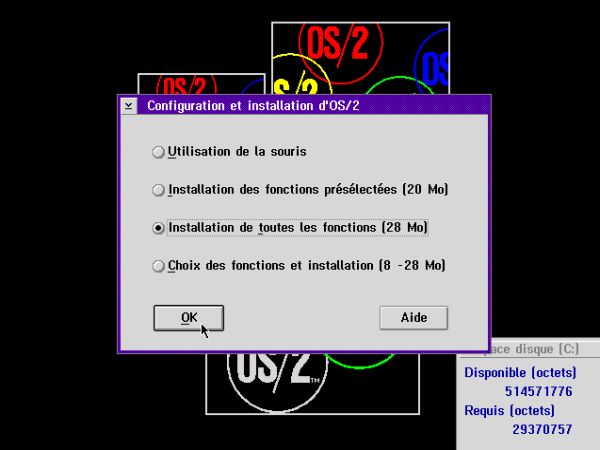
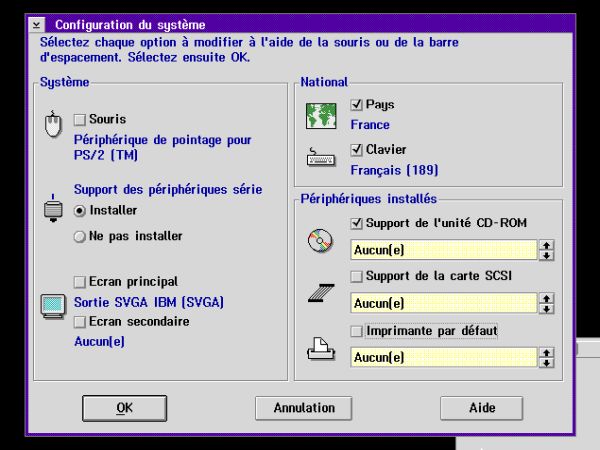
On the first configuration screen, select Installer toutes les fonctions (28MB) to install the "whole package" (screenshot on the left). The next screen allows you to make more detailed choices and to configure the settings. This screen is misleading, because you will not have to select the features that you want to install, but the features that you want to change, i.e. configuring something else than what's actually the default (screen on the right). Lets have a look at the different features one by one:
- Souris (Mouse): The default mouse used is Périphérique de pointage pour PS/2 and this is ok; thus, no need to change it, let the checkbox unselected.
- Support des prériphériques série (Serial port support): The default option is to install it, thus if you intend to use the COM ports, let the checkbox selected.
- Ecran principal (Primary display): The default display driver used is Sortie SVGA IBM [SVGA] and this is ok; thus, no need to change it, let the checkbox unselected. No secondary display by default; thus, except if you use one, let the checkbox unselected
- Pays (Country) and Clavier (Keyboard): Select the checkboxes if you want to change the default settings (France, French keyboard).
- support de l'unité CD-ROM, support de la carte SCSI and Imprimante par défaut (default printer): The default is not to use any of these features (the French word "aucun" meaning "none"), thus only select those that you intend to use. A remark concerning CDROM support: There isn't any CDROM driver included with the OS/2 2.11 installation disks, but it is possible to use a CD drive (I'll publish a separate tutorial about this in a near future). In order to "prepare" this installation, select the CDROM checkbox.
|
|
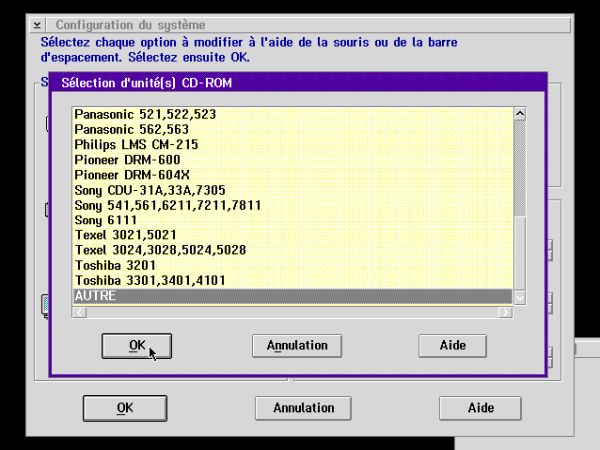
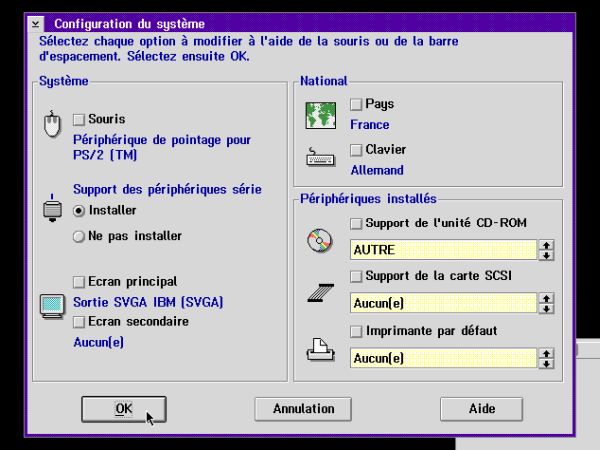
As Luxembourg is not listed (funny, this remembers me when I was in Canada in 1999, lots of people thought that Luxembourg is a part of Belgium or France; for some of them a part of Switzerland, because of the banks, I guess), I let "France", with the checkbox "Multilingue" (Multilingual) selected on the country selection page. AS I bought my laptop in Germany, it has a German keyboard, so on the keyboard selection page, I changed it from "French" to "German". On the CDROM selection page, there is a whole list of devices listed. Scroll down to the end of the list and select "AUTRE" (Other) (screenshot on the left). Display comes back to the system configuration page, with the changes, you made, listed. Except for the installation of the COM port (if you want so), all checkboxes have to be cleared now (screenshot on the right). Push OK to apply the settings.
|
|
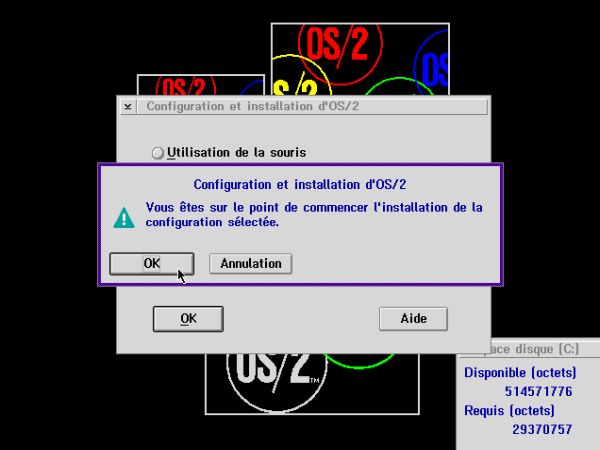
The system is now ready to be installed. On the last Configuration and Installation screen, click OK to start the installation (screenshot). During file copy, insert the floppy diskettes as you are asked to.
 |
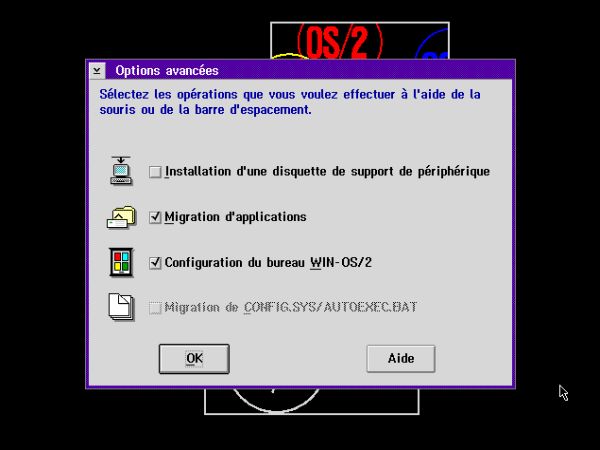
After the system has been transferred to the harddisk, the setup program displays the Options avancées (Advanced Options) screen. Accept the options selected by default Migration d'applications (Migrate applications) and Configuration du bureau WIN-OS/2 (Configure WIN-OS/2 desktop). Push the OK button to perform these operations.
 |
In the Configuration du bureau WIN-OS/2 window, accept the default selection Installation du bureau WIN-OS/2 standard (Install the default WIN-OS/2 desktop) (no screenshot). In the Recherche de programmes (Find programs) window, be sure that all 3 checkboxes are selected, then push the Recherche (Search) button (screenshot on the left). The Migration de programmes window opens. Let all applications be selected and push the Migration button (screenshot on the right).
![OS/2 2.11 installation on VMware: Application migration [1] OS/2 2.11 installation on VMware: Application migration [1]](../screenshots/vmware_osii1x2x17a.jpg)
|
![OS/2 2.11 installation on VMware: Application migration [2] OS/2 2.11 installation on VMware: Application migration [2]](../screenshots/vmware_osii1x2x17b.jpg)
|
After the application migration is finished, you return to the Find programs window; click Exit. Then you return to the Advanced Options window; with all options unselected, click OK.
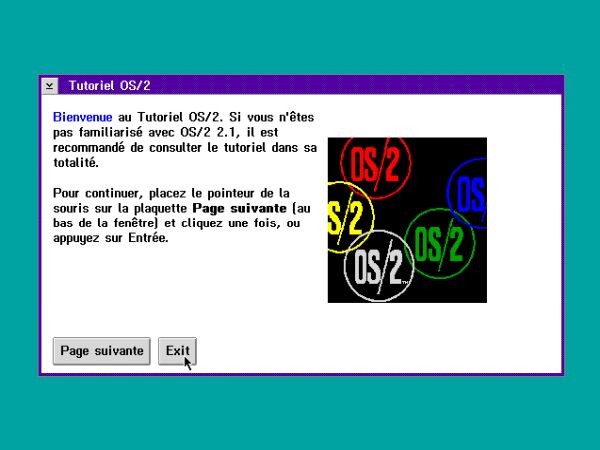
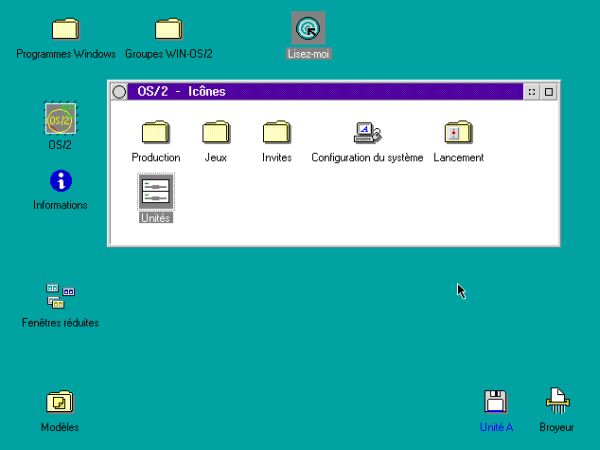
To terminate the installation, you are asked to insert printer driver diskette 1 (that is the one labeled "PMDD1") and the display driver 1 diskette (that is "Disp01"). Installation is finished now. You are asked to remove the actual diskette and to hit ENTER to reboot the system (from the OS/2 installation on the harddisk). At the first startup of OS/2 2.11, you have the possibility to follow an OS/2 tutorial (screenshot on the left). When you quit the tutorial, you'll see the entire OS/2 2.11 desktop (screenshot on the right).
|
|
The Desktop Manager of OS/2 1.x is no more present in OS/2 2.x, that has a desktop layout very similar to the one of Windows 3.1. There are multiple program groups, that appear as icons on the desktop and when double-clicking them open a window with icons that are either folder icons themselves, or application icons that may be double-clicked to launch the corresponding program. The OS/2 group (somewhat corresponding to the Main group in Windows 3.1), contains the included OS/2 applications (production applications and games), the OS/2 and DOS command line launchers ("Invites"), a folder with the auto-start applications ("Lancement"), another one with system configuration tools and "Unités" (Drives), that actually is the OS/2 file manager.
Among the other icons on the desktop, note the Programmes Windows group. It contains one single application, called Gestionnaire de programmes (Program Manager), that actually is a Windows 3.x Program Manager. This means that, when launching it, you are in a Windows 3.x environment, where you can use Windows applications the same way, as you would on a native Windows 3.x platform.
To terminate this tutorial, some hints:
- The key combination CTRL+ESC opens a window with a list of all groups actually open and allows you to switch between them.
- There are two ways to shut down the system: 1. Using OS/2 group > System configuration > Shutdown; 2. right-clicking the desktop and choosing Shutdown from the context menu, that is opened by the right-click.
- To change system configuration, use OS/2 group > System configuration > Selective Install, that allows you to change device settings as well as to add applications not yet installed (I think that the "Informations" icon on the desktop just opens an empty folder after installation of the OS, but when running Selective Install with the "Documentation" option selected to be installed, will contain launchers for the OS/2 documentation).
- During Selective Install, display settings are reconfigured. On the Monitor configuration page, you have to use the default setting Moniteur pris en charge en standard par OS/2 (Default OS/2 monitor) as the second option would need a custom driver disk (left screenshot below). This setting, however, will not work, as shows the warning on the following page, telling that the actual configuration does not support high resolution. Please, make sure that you do not continue installation by answering Non (no) to the question if you really want to continue (right screenshot below). In fact, if you continued, after rebooting the system, your VM's screen would be nothing else but an empty white window!
- It happened several times on my OS/2 2.11 VM that the system hung when booting (in particular when rebooting after installing new software). Using CTRL+ALT+DEL (sometimes to be pushed twice or three times) to reboot another time, made the system start up normally.
![OS/2 2.11 installation on VMware: Selective install - Monitor configuration [1] OS/2 2.11 installation on VMware: Selective install - Monitor configuration [1]](../screenshots/vmware_osii1x2x19a.jpg)
|
![OS/2 2.11 installation on VMware: Selective install - Monitor configuration [2] OS/2 2.11 installation on VMware: Selective install - Monitor configuration [2]](../screenshots/vmware_osii1x2x19b.jpg)
|
If you find this text helpful, please, support me and this website by signing my guestbook.