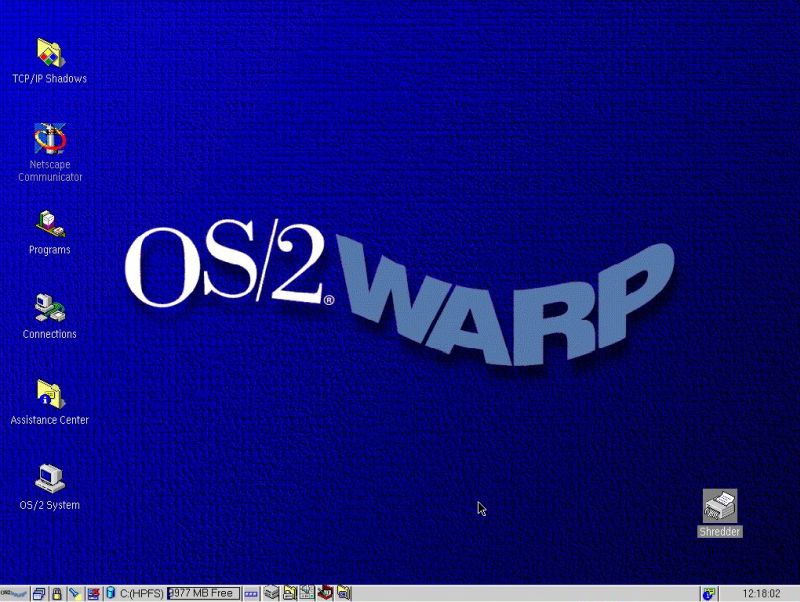
Installing OS/2 Warp 4.52 workstation.
The installation of OS/2 Warp 4.52 on a VMware virtual machine (I actually use VMware Workstation 16, running on Windows
10) is rather straight forward. However, not to exclude that the correct configuration of the VM and the chance to have chosen the "best" available installation
files are the conditions of an installation without complications. Here are the settings of my VM:
- Virtual machine type: Other > eComStation
- Memory: 256 MB
- Harddisk: Bus Logic, IDE, 10 GB
- Other devices: floppy disk drive, network card, sound card
You can download the software from the OS/2 Warp 4.52 page of the WinWorld website. The download contains 2 CDROM images, named "mcp2-refresh-boot-en.iso" and "mcp2-refresh-install-en.iso". Please, note that
the OS/2 setup program references these CDROMs as "OS/2 Installation CDROM" and "OS/2 Warp CDROM" respectively. Also, note that the installer will (probably) not
notice when you just switch the ISO; cf. CD switching not recognized in (some) virtual machines for
help.
Be aware that this tutorial is about the installation of OS/2 Warp 4, and does not apply as such to other releases of the operating system. And it's about the
installation on VMware; no idea, how far it applies to other virtualization software.
Before starting the installation, boot into the BIOS and change the boot sequence to: CDROM > HDD > removable devices!
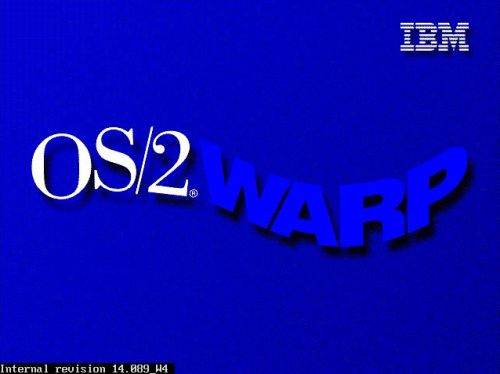
Insert the "boot" CDROM and power on the virtual machine. The blue screen with the IBM logo is displayed for some seconds.
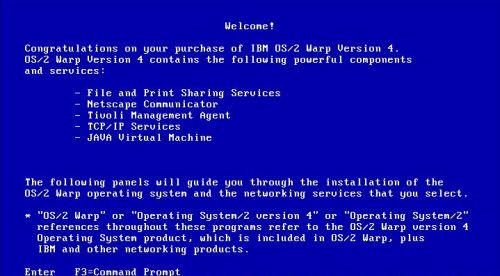
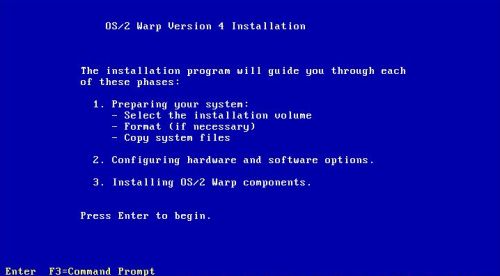
When invited to insert the "OS/2 Warp CDROM", switch the ISO (i.e. mount the "install" CDROM). After the "Welcome" screen (screenshot on the
left), the description of the three phases installation process is displayed (screenshot on the right).
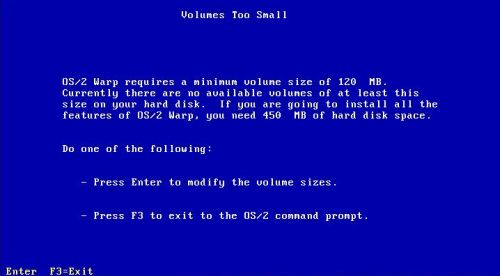
The next screen tells you that the volumes are too small to install OS/2 Warp 4 (screenshot on the left). This is a normal situation. In fact,
the harddisk doesn't contain any partition thus the only volume (device) available is the CD-drive. Hit the ENTER key in order to modify the volume
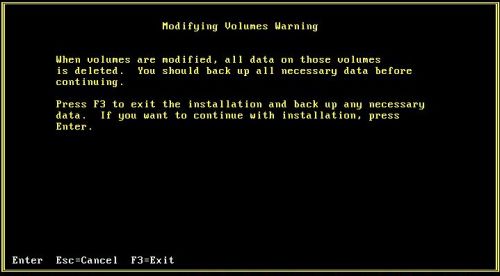
sizes (this actually means the creation of the disk partition, where OS/2 will be installed); the message, shown on the screenshot on the right, warns you that
all data on the volume will be deleted (no importance, as there is no data on the new empty disk). Hit ENTER to start the partitioning tool.
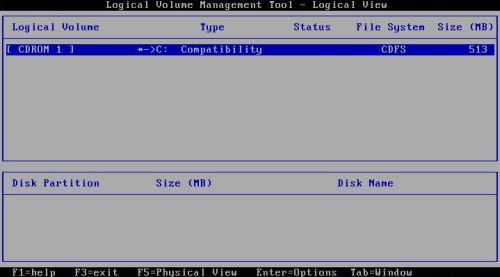
The logical volumes management tools has two views: The logical view (showing the harddisk partitions) and the physical
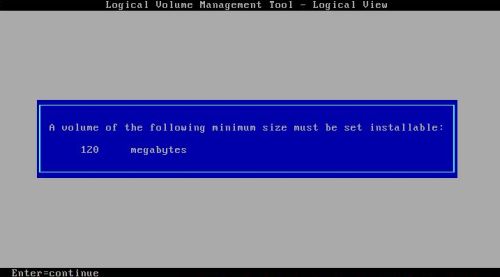
view (showing the harddisk devices). It's the first of these that is opened when the tool is started. On a first screen, it warns a second time that a volume
with minimum size = 120 MB is needed to install OS/2 Warp 4 (screenshot on the left). Then, the logical volumes are displayed (screenshot on the right). As the harddisk
isn't partitioned at this stage, the lower tab (harddisk volumes) is empty.
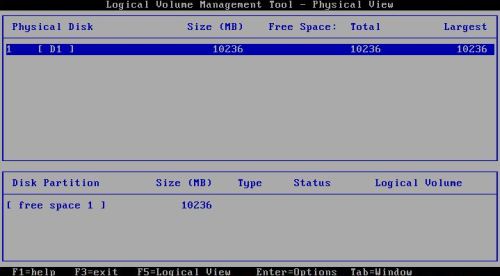
Hit the F5 key on the keyboard to display the physical view. The 10 GB harddisk is shown in the upper tab, and in the lower tab, a
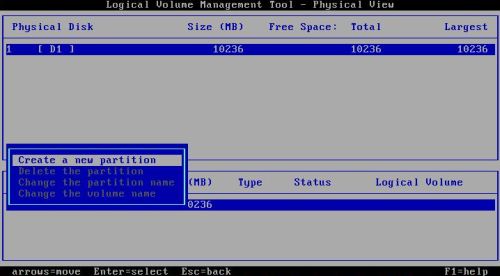
free space area of the same size is displayed (screenshot on the left). Use the TAB key to navigate to the lower tab. This selects the free space
area. Hit ENTER to display the possible actions. One single available: Create a new partition (screenshot on the right).
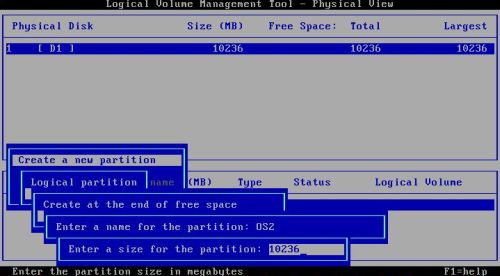
Create the logical volume as a primary partition at the beginning of the free space area. Enter a partition name
(I chose "OS2"), and set the partition size to the entire space available (this value is filled in by default) (screenshot on the left).
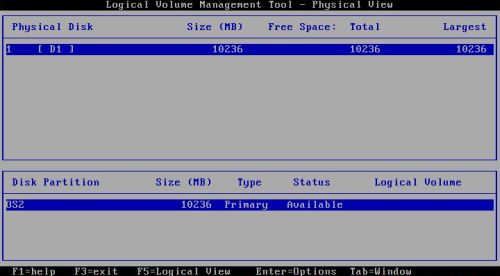
On the screenshot on the right, you can now see, in the lower tab of the physical view, the new partition that will be created.
If you go back to the logical view, you can't yet see the volume that will only be created after having rebooted. Push the F3 key to exit the partitioning tool. In the
opening dialog window, be sure that Save the changes and exit is selected.
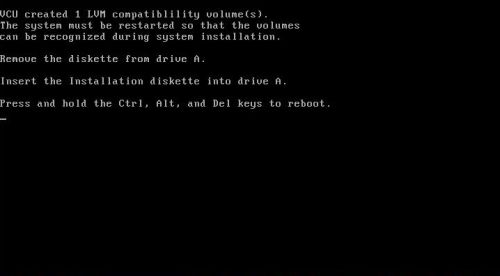
Now, change the CD (insert the "boot" CDROM) and press CTRL+ALT+DEL to reboot. The new partition will be created at startup of the system,
as shown on the screenshot below.
No need to change the CD here; the "installation diskette" referred to here is well our "boot" CDROM. Press CTRL+ALT+DEL to reboot.
After the CTRL+ALT+DEL, the system restarts showing the IBM logo screen, and after having switched the CDROM, the "Welcome" and the "phases description" screens. Then,
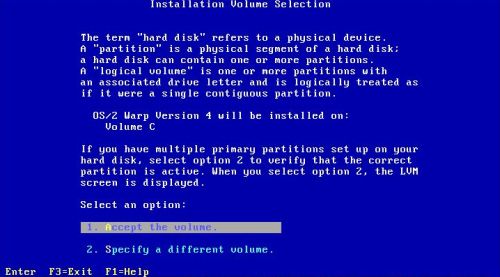
the Installation volume selection screen is displayed; accept the C: volume (screenshot on the left). On the next
screen (no screenshot), you are asked if you want to perform a long or quick format (I changed the default option and did a quick format), and finally, you have to choose
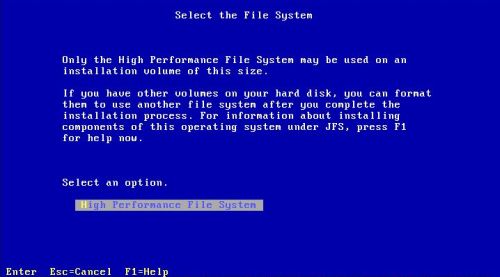
a file system. Normally, you would have the choice between FAT and HPFS. But, as FAT is limited to 4 GB and my disk has a size of 10 GB, only High
Performance File System is available (screenshot on the right).
The setup program now starts copying the files from the CDROM to the harddisk. It then checks the computer's configuration (hardware detection), and finally reboots
into the graphical installer.
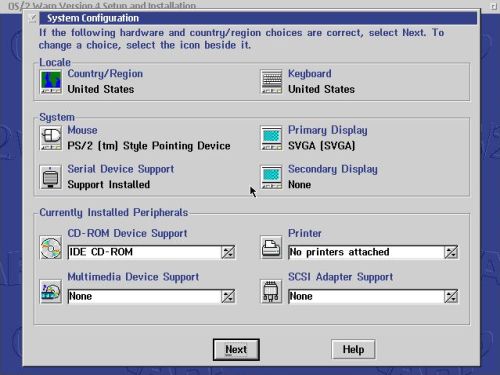
Most of the settings shown are ok, in particular the IDE CDROM, the PS/2 mouse and the SVGA display. I did not install any multimedia
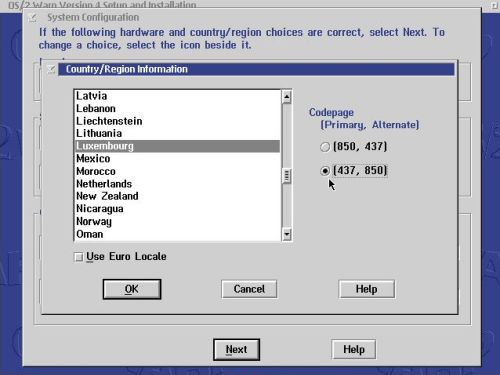
device (audio card) here; I think that this could cause problems. Also, do not install any printer. The only changes that I made on this page were setting the locale
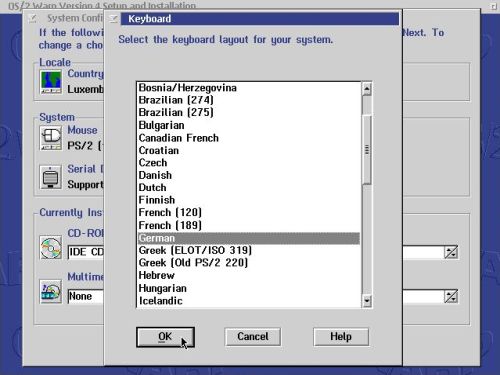
to Luxembourg (the primary codepage should be 850, and not 437 as on the screenshot on the left), and the keyboard layout to German (screenshot on the right).
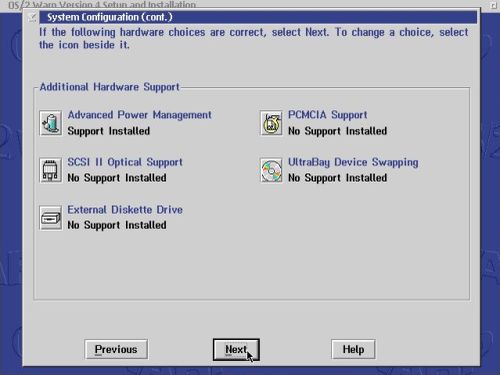
On the next screen, you can install additional hardware support (screenshot on the left). Default values are ok, with the only install being advanced power management.
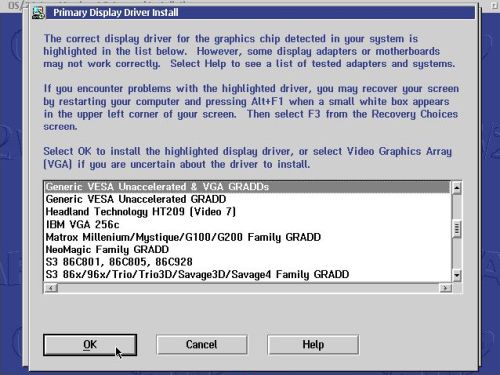
Then, you have to select a default printer: "Do not install default printer" is selected and ok (no screenshot). Finally, you must choose the primary display driver.
The default selection is Generic VESA Unaccelerated & VGA GRADDS and is ok (screenshot on the right).
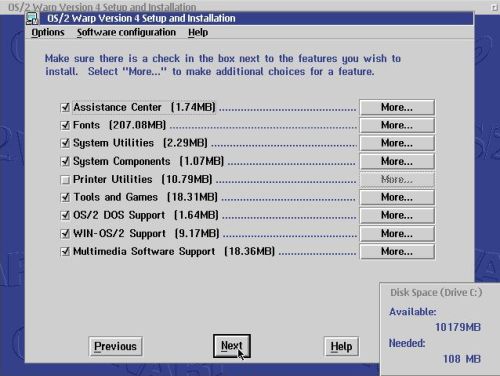
On the software selection screen, I accepted the defaults: all checkboxes selected, except for "Printer utilities".
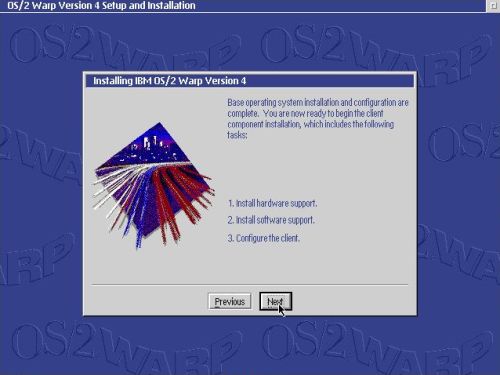
Basic operating system setup and configuration are now finished (screenshot on the left), and the setup program continues with the installation of the client component
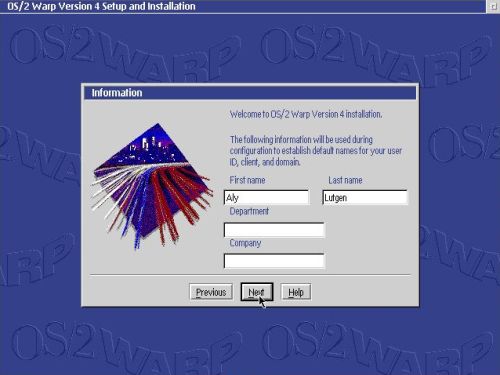
(essentially the network setup). The first information to enter are your first and last name; I let the "Department" and "Company" fields empty (screenshot on the right).
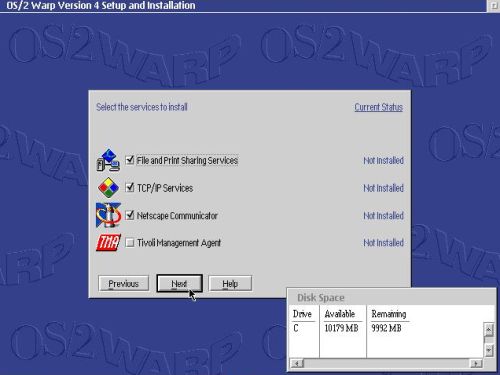
Then, you have to select the services that you want to install (screenshot on the left): File and Printer Sharing, TCP/IP, and Netscape Communicator are selected by default;
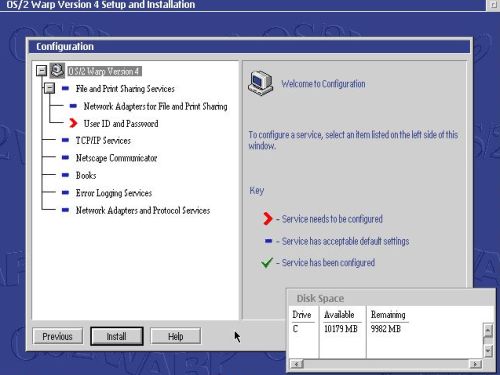
I did not install Tivoli Management Agent. The screenshot on the right shows the Service Configuration page. Even though, all features, except
"User ID and Password" have acceptable default settings, you should review them all, and some settings actually have to be changed!
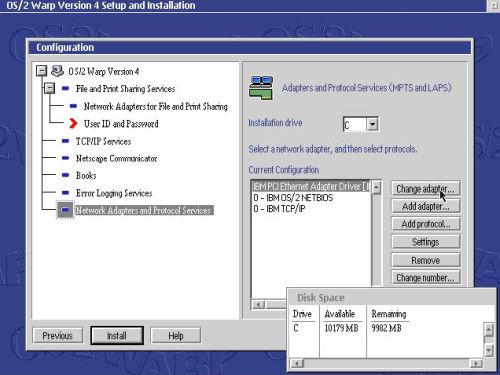
First, select Network Adapters and Provided Services. IBM OS/2 NetBIOS and IBM TCP/IP are ok, but the listed IBM PCI
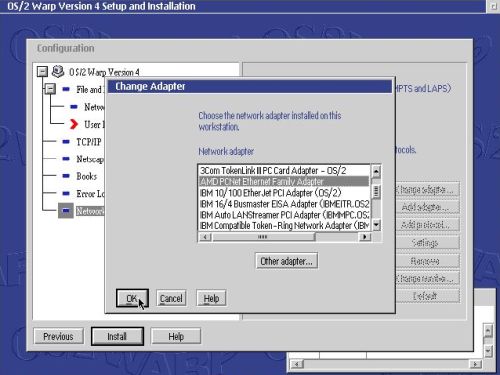
Ethernet Adapter Driver might not work correctly. Select it and click the Change adapter... button (screenshot on the left). In the
opening Change Adapter window, select the AMD PCNet Ethernet Family Adapter (screenshot on the right).
I changed TCP/IP Services (screenshot on the left), selecting DHCP server is available on the LAN. As I haven't
actually running a DHCP server in this part of my virtual network, this was not the best idea. Not that something goes wrong, just that the machine will take a rather
long time to boot (OS/2 waiting for an IP lease that it will never get). Also, if I configure the presence of a DHCP server, I suppose that I also have to configure
the presence of the DDNS server. Anyway, I haven't yet tested the network connection, thus no idea if it works correctly. I suggest that for now you simply let the
default settings.
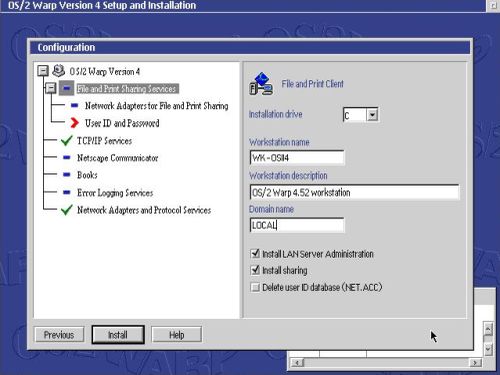
Configuration of File and Print Sharing Services: In the main window (screenshot on the left), you can set a host
name (I use WK-OSII4), and add an optional description for your machine. Concerning the domain name, I think that this is not the
TCP/IP name (as I thought when installing my virtual machine), but what in Windows is called "Workgroup". Anyway, I haven't yet tested file sharing, thus no idea if it
works correctly. Let the default domain name, or set it to the workgroup name of the Windows machines present in your network (you can do this later, too). On the other
hand, be sure that Install LAN Server Administration and Install sharing are selected. In the
Network adapters for File and Print Sharing window (no screenshot), the AMD PCNet Ethernet Family Adapter should be listed and selected.
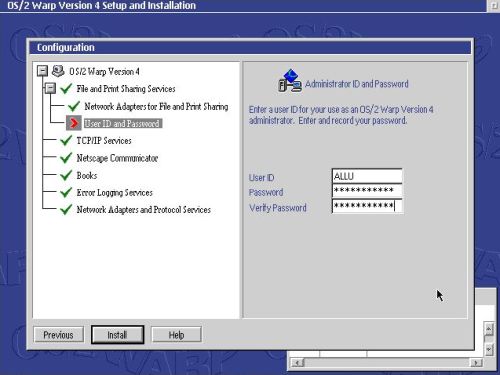
Finally in the User ID and password window (screenshot on the right), enter the credentials necessary to access files and printers on other
workgroup machines (or just enter any user name and password, and set the correct one later, if you need it).
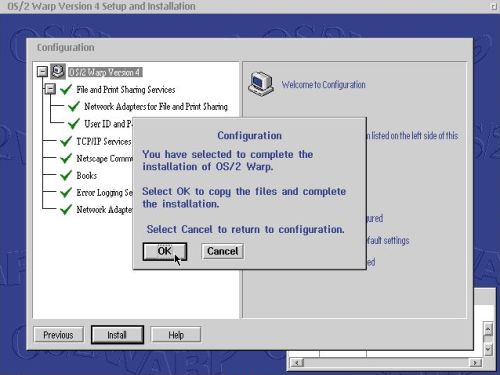
You can let the default values for the other settings. Push the Install button to start installation. Before beginning, the setup program will
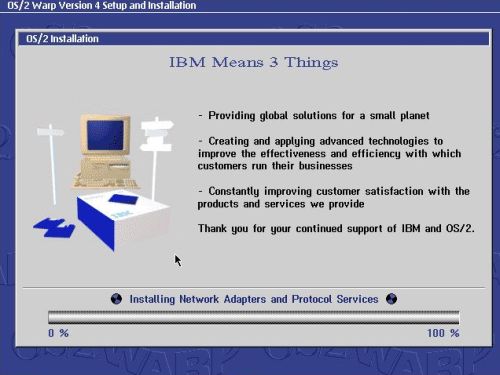
ask your confirmation (screenshot on the left). The screenshot on the right has been taken during the installation process.
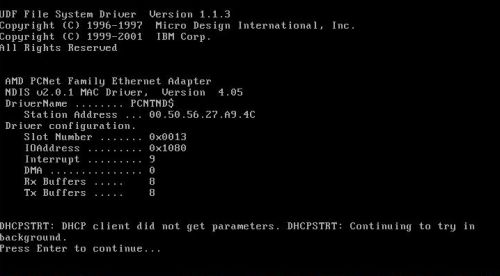
During installation of the client component, OS/2 Warp 4 reboots at least one time. As I said before, waiting for a DHCP lease makes the startup process lasting
a rather long time, and even if you use manual network settings, booting may take time. So, if it seems that the machine hangs (with the network settings displayed),
be patient and wait until the desktop shows up.
Note: It sometimes happens that OS/2 hangs at the beginning of the boot process (before the blue IBM screen shows up). In this case,
use CTRL+ALT+DEL to reboot and this time all should work normally.
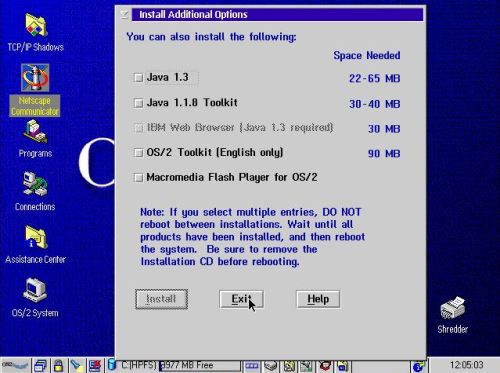
When installation is finished, the system should boot into the OS/2 desktop. At the first startup of the operating system, you are asked if you want to select some
further software packages to be installed. I did not install any of these at this stage.
OS/2 Warp 4 is now installed. The next time, that you boot the system, OS/2 should have automatically increased screen resolution to 1024x768
pixels. If not, you can change display settings by right-clicking the desktop, choosing System setup from the opening context menu,
and in the System setup window, double-clicking the System icon.
If you find this text helpful, please, support me and this website by signing my guestbook.
