Installing Windows 3.0 with Multimedia Extensions 1.0.
Windows 3.0 with Multimedia Extensions 1.0 (Multimedia Windows) is a special, multimedia-centric OEM-only release of Windows 3.0. It was released on 20 October 1991 by various OEMs, including an English and German release by Tandy, an English release by Creative Labs (both for the PC), and Japanese releases for NEC PC-98 and Fujitsu FM-Towns. It's the first version of Windows to support sound output and includes new programs for audio and video playback, including the first version of Media Player, new drivers for CDROM drives, sound cards, displays and joysticks, and screensavers. The multimedia improvements were later incorporated into Windows 3.1. Though it still supports running in Real Mode, the new functionality is only available in Standard and 386 Enhanced modes.
This tutorial describes the installation of Microsoft Windows 3.0a Multimedia Edition (Creative Labs OEM) on a VMware Workstation virtual machine. The procedure should be similar for other versions of Windows, as well as for other virtualization software. Important note before we start: I did not succeed to make sound work...
Windows 3.0a Multimedia Edition (Creative Labs OEM) can be downloaded from the Winworld Windows 3.0 page. The download is a CD ISO, containing the Windows 3 files, without containing MS-DOS, thus is not bootable and you'll have to download and install DOS, before installing Windows. I used MS-DOS 6.22, that you can download from the Winworld MS-DOS 6.22 page. The best choice is to download the 3.5" 1.4mb version.
Installing MS-DOS 6.22.
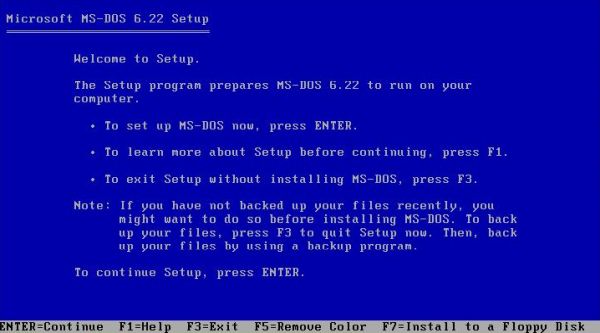
Boot from the first MS-DOS floppy diskette: The MS-DOS 6.22 Setup wizard is launched.
|
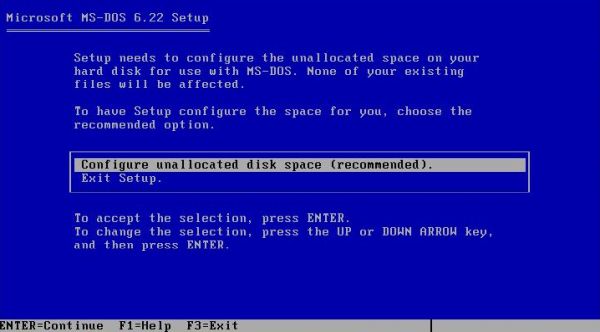
Partitioning is all automatic: You've just to choose the Configure unallocated disk space option (in fact, the only option beside exiting setup). This will result in the creation of a primary partition (C:) using the entire disk and formatted with the FAT16 filesystem (this implies a maximum partition size of 2 GB, I think).
|
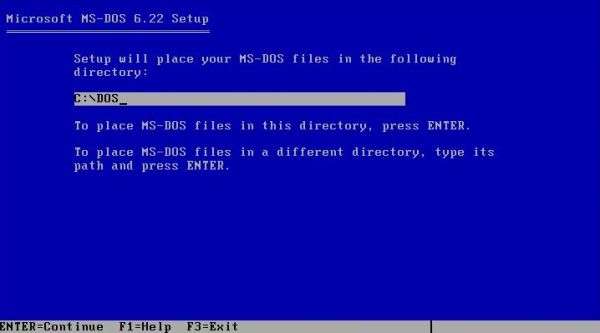
The computer is rebooted at this stage, then setup continues with asking you for date and time (normally correct), the installation language (International English is fine) and the keyboard layout. You then are asked for the installation directory for MS-DOS; default is C:\DOS.
|
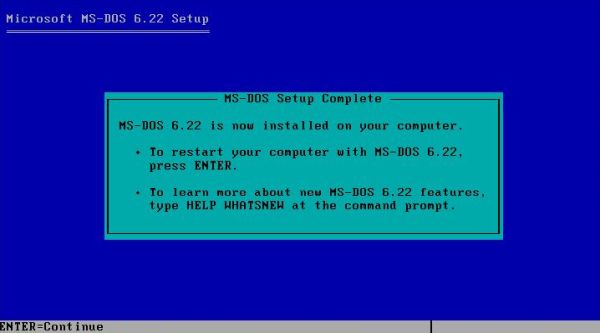
Now the files are copied from the diskettes to the harddisk. Switch the diskettes as you are asked for. When done, the "Setup complete" message is displayed.
|
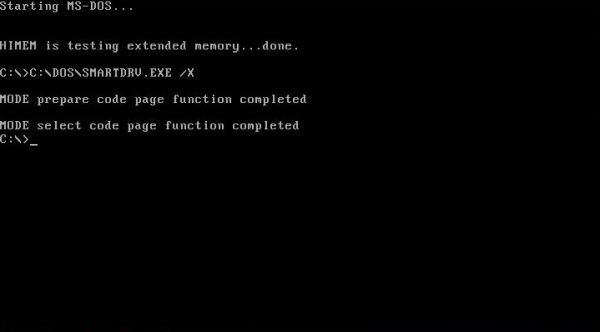
Note that, when restarting the computer, you will get an error message. In fact, the system tries to boot from the floppy diskette, and this one being a simple data diskette, startup of the computer is not possible. Just shut the machine down and boot into BIOS Setup (you can do this in VMware Workstation, or by holding down the F2 key during boot of the VM). In BIOS Setup, change the boot sequence, setting the harddisk as first boot device, followed by the CD drive and the removable devices and the network. Now, you can boot into your new MS-DOS 6.22 installation.
|
Installing a CDROM driver.
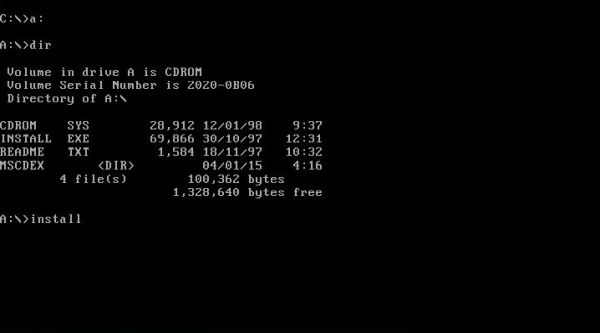
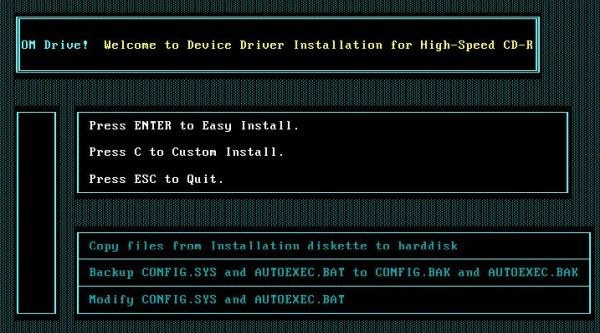
Our Windows 3.0 is on a CDROM and MS-DOS 6.22 has no CD-support by default, so we'll have to install a CDROM driver before we can start with Windows setup. HXCD-ROM Drive (High-Speed CDROM Drive), available at Zamba's VMware page works well with all versions of Windows 3. Unpack the downloaded ZIP file and copy the files onto a diskette. On your DOS machine, cd to your floppy drive and start setup by running INSTALL.EXE (screenshot on the left). The setup wizard lets you choose between Easy install and Custom install (screenshot on the right). The first of these options works well, doing all automatically: copy the files to the harddisk, backing up the system files and making the necessary modifications to CONFIG.SYS and AUTOEXEC.BAT.
|
|
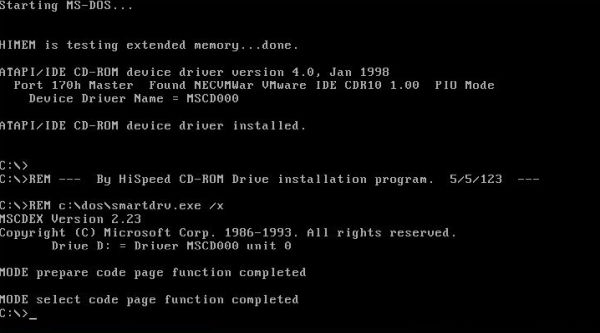
The screenshot below shows the boot messages when we start the MS-DOS machine with the CDROM driver installed. As you can see, the CD drive will now be accessible as drive D: (A: being the floppy drive, and C: the harddisk).
|
Installing Windows 3.0.
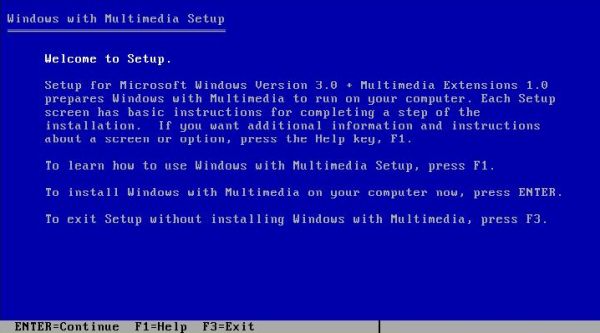
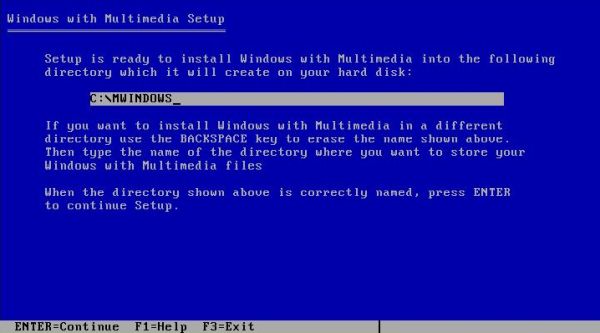
With the Windows 3.0 with Multimedia Extensions CDROM mounted, cd to your CD drive and start setup by running SETUP.BAT. The screenshot on the left shows the Welcome screen, the screenshot on the right shows the default installation directory that actually is C:\MWINDOWS (and not C:\WINDOWS as usual).
|
|
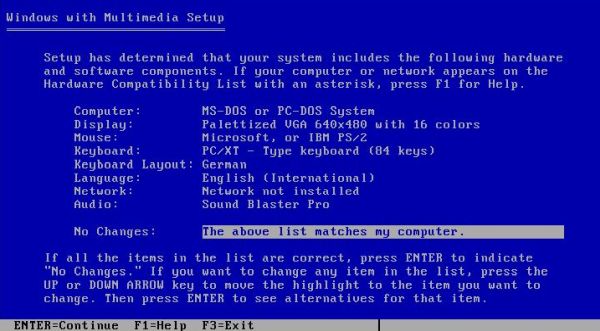
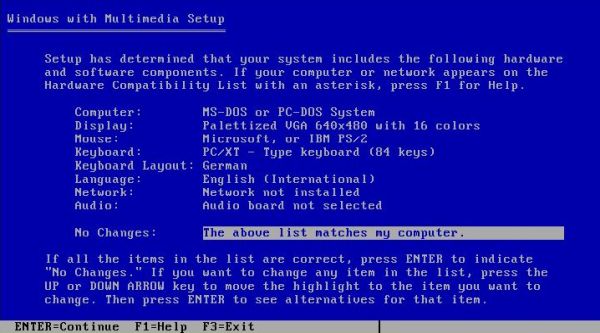
On the next screen, the setup program lists the detected components. To change one of them select it (by moving to it using the array keys) and hit ENTER. On the screenshot below, you can see that I choose English (International) as language (as I did on MS-DOS) and the German keyboard layout. The VMware network card has not be detected, and as sound card, Setup proposes the first on the list, the Sound Blaster Pro. Please, note that with the configuration, as shown here, setup will fail!
|
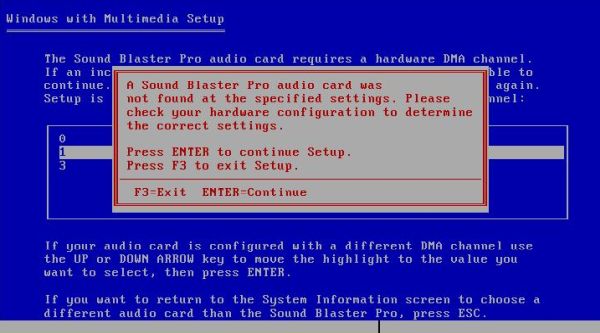
After confirming that the list matches the actual components of the computer, Setup asks for the sound card parameters. I did not put any screenshots about this here, because, anyway, Windows 3.0 does not find the VMware sb16 sound card, neither when you choose the Sound Blaster Pro, nor when you choose one of the other cards from the list. After the card parameters have been entered, setup always fails with the error message that the sound card has not been found at the specified settings.
|
None of the drivers included with Windows 3.0 with Multimedia Extensions, nor any sound card driver working with Windows 3.1, will work with the VMware sound device. All we can do here is to choose Audioboard not selected. With the result, of course, that our machine will have no sound...
|
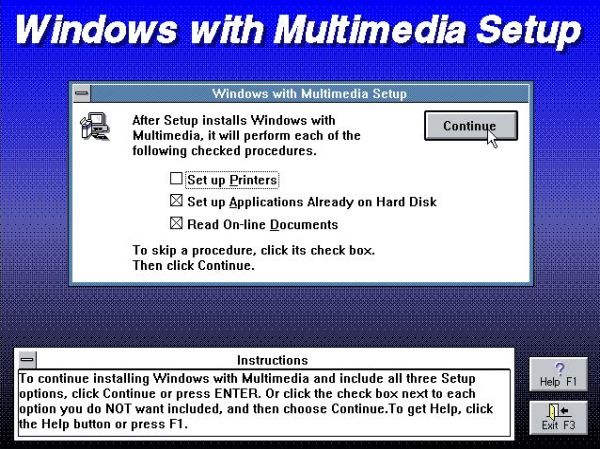
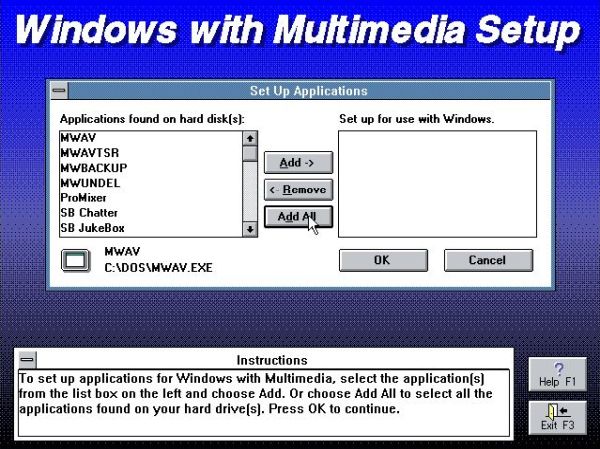
You can choose now if you want to set up a printer, and if you want to set up the applications already present on the computer for Windows. I deselected the printer and, of course (because this includes not only the programs that have been installed with DOS, but also the multimedia programs on the CD) kept selected the applications (screenshot on the left). After you have selected where to search for applications (you should let the default: All drives) (no screenshot), you can individually choose the applications that you want to set up for Windows. Pushing the Add all button is the simplest way to do and also the best choice, I would say (screenshot on the right).
|
|
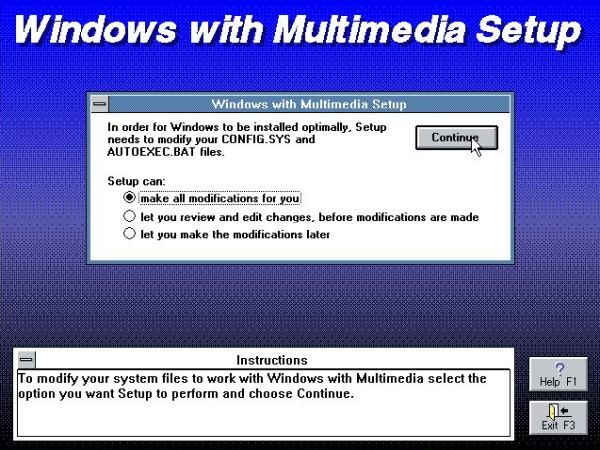
Setup has now all it needs to continue and finish the installation. CONFIG.SYS and AUTOEXEC.BAT will have to be modified. Just choose to let the setup program do this for you (screenshot). After you have pushed the Continue button, the modifications to the system files are done, you are told that the old files have been saved with the file extension .OLD. Then you can choose to either return to DOS, or to reboot the machine.
|
When you restart the computer, you'll boot into MS-DOS, not in Windows. You can launch Windows (just the way you launch any other DOS
application), by entering
win
To boot directly into Windows 3.0 with Multimedia Extensions, add this "win" as the last line of your AUTOEXEC.BAT file. Launching Windows
from DOS is more secure, because if Windows encounters a problem and doesn't boot anymore, you can still access the system. On the other hand, it's somewhat annoying
to have to launch Windows manually each time that you want to use it. And, using the MS-DOS setup disk, you can anyway boot the system and accessing all files on the C: drive.
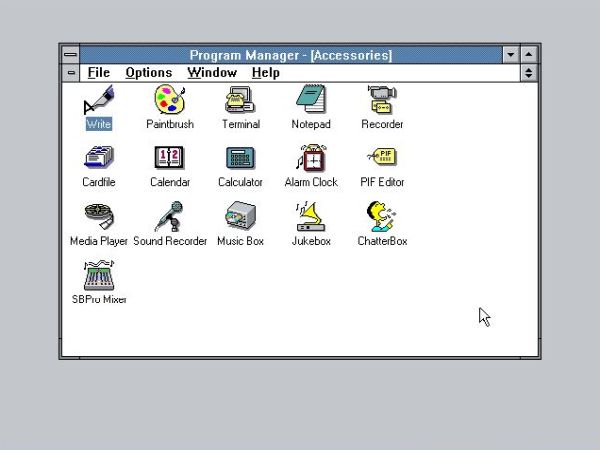
The screenshot below shows the desktop of Windows 3.0 with Multimedia Extensions, with the Accessories program group open. You can see several multimedia applications, among them the very first Windows Mediaplayer. Nice all that, unfortunately, none of these applications make a sound on my VMware virtual machine, and I think that there is no way to change this (apart from writing a driver, of course...).
|
Windows 3.0 and the SoundBlaster 16 Windows 3.x Driver.
In my tutorial Adding sound support to Windows 3.1 and 3.11, I describe how I gave my Windows 3.1/3.11 sound by installing the SoundBlaster 16 Windows 3.x Driver. The driver does install on Windows 3.0 with Multimedia Extensions as it did install on the original Windows 3.0. However, just as on this one, this isn't a solution: after having installed the driver, Windows will not boot anymore (all you get is a black screen).
Windows 3.0 and the Internal Speaker driver.
The first releases of Microsoft Windows had no sound and it was only with Windows 3.0 with Multimedia Extensions that it became possible to really use sound on Windows, in particular to play wave and midi audio files, but also to play audio CDs (and AVI videos, I think?). However, at the time, where these Windows with sound (all Windows 3.1x releases supported sound) came onto the market, lots of computers didn't have a sound card. A little bit of a paradox: People having now an operating system with sound support, but they couldn't play any sounds because their computer hadn't the hardware to do so.
Microsoft reacted to this situation by releasing a freely available driver that allowed to direct the audio output to the PC's internal speakers. The possibility to play wave (.WAV) files without having an audio card. However, this driver played exclusively, so Windows could not run other programs or respond to user input while the sounds were playing. But, isn't it better to have a possibility to play sounds exclusively than to play no sounds at all?
John Ridjes wrote his own version of the driver. Unlike the Microsoft driver, interrupts are not disabled, so you don't have to worry about losing COM port data or network connections. This is nice, but if you do something that causes a lot of interrupts (such as moving the mouse) the sound quality will significantly suffer. Beside these two drivers, there is a more recent speaker driver, for Windows 3.1/3.11 only; this driver may be used to play midi (.MID) files with sound directly output to the internal PC speakers.
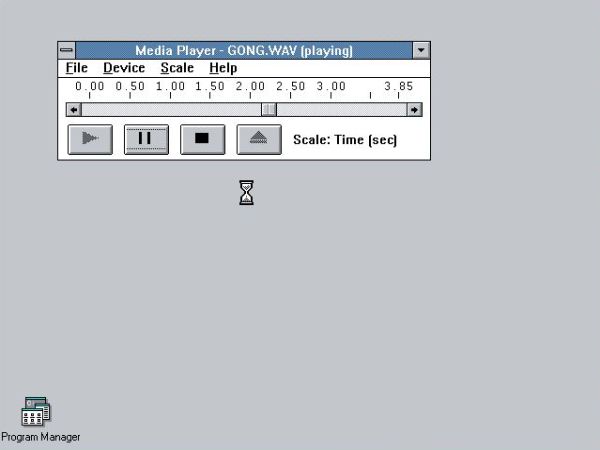
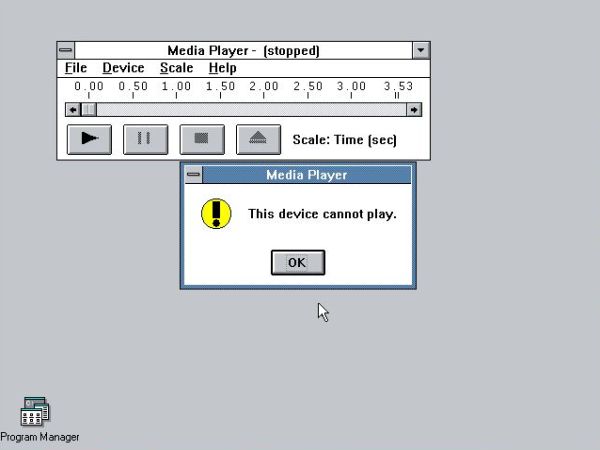
The drivers are available for download at several Internet sites: Winworld, Vetusware, Win3x.Org. I succeeded to install them on my Windows 3.0 with Multimedia Extensions and they seem to work correctly, as show the screenshots below: On the left, Windows Mediaplayer playing a wave file thanks to the presence of the internal speaker driver; on the right, without the driver installed, an error message telling that this device cannot play.
|
|
Bad news however: Even though wave audio files are played on my machine, there is no sound! I suppose that this is due to the fact that I run my Windows 3 in a VMware virtual machine and that VMware does not emulate the internal PC speakers. So, there is no "link" between the internal speakers of the VM and the physical speakers of the host, and therefore there can't be any sound. On a physical Windows 3 computer, all would very probably work well. Maybe, it also works on some emulator (?).
If you find this text helpful, please, support me and this website by signing my guestbook.