Secure web server access using HTTPS.
This tutorial shows how to install HTTPS on a local Apache web server running on MS Windows (Windows 10). The installation is based on a self-signed certificate created with FireDaemon OpenSSL 3.
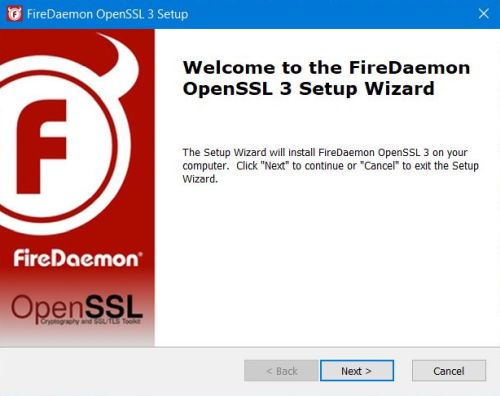
OpenSSL is a cryptographic SSL/TLS tool kit, which provides a wide range of solutions for those who work on Digital Certificates, SSL/TLS testing, application development or implementation, application testing, and security testing. There are several free OpenSSL distributions available for Windows. I actually use FireDaemon OpenSSL 3.2.1, that you can download from firedaemon.com. I downloaded the x64 installer, that allows a quick and easy setup of the software.
 |
To be able to run openssl.exe from any directory, be sure that in the Additional Options window, the checkbox Adjust PATH system environment is selected.
Installing HTTPS on our local Apache requires several steps:
- Generating a self-signed certificate using FireDaemon OpenSSL.
- Copying the certificate files onto the Apache web server.
- Enabling HTTPS in the Apache configuration file httpd.conf.
- Configuring HTTPS in the Apache configuration file httpd-ssl.conf.
Generating a self-signed certificate.
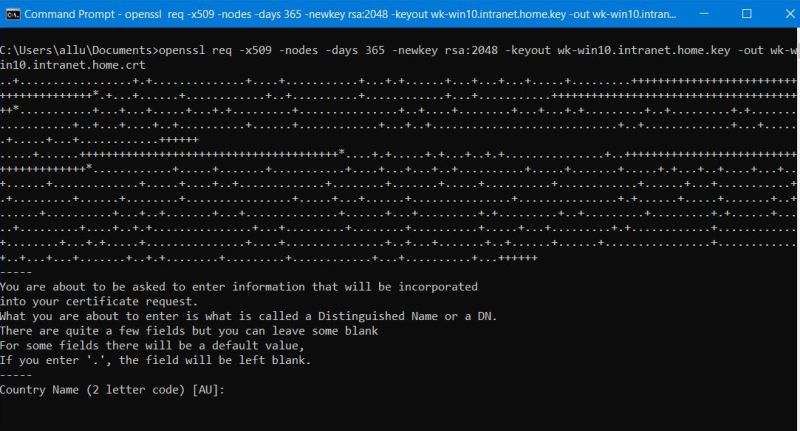
To generate a 2048 bit RSA private key file and a self-signed certificate file valid for a year, you can run the following in Windows Command Prompt (for details about
the commands and options available with openssl.exe, please, search the Internet):
openssl req -x509 -nodes -days 365 -newkey rsa:2048 -keyout wk-win10.intranet.home.key -out wk-win10.intranet.home.crt
where "wk-win10.intranet.home" is the name of my Apache web server, as specified with the ServerName directive in the Apache configuration
files (cf. below).
 |
It's not really important what you enter as information for the certificate to be generated. I entered "LU" as country, a dot (= leave empty) as state/province, "Echternach" as city, "Informatics for everyone" as organization, a dot as organization unit, "wk-win10.intranet.home" as common name, and "admin@wk-win10.intranet.home" as email.
Copy the two files to a place where Apache can find them, for example to the Apache \conf directory (in my case: C:\Programs\Apache24\conf, by default C:\Apache24\conf).
Enabling HTTPS in Apache.
Server name and server administrator email for unsecured HTTP access are configured in the file httpd.conf, that you find in the
\conf directory. In my case:
ServerName wk-win10.intranet.home:80
ServerAdmin admin@wk-win10.intranet.home
The configuration of HTTPS is not included in this file, but in the file httpd-ssl.conf, that you find in the
\conf\extra directory. To make Apache load the directives in this file, you'll have to uncomment the corresponding
Include directive:
# Secure (SSL/TLS) connections
Include conf/extra/httpd-ssl.conf
Also, make sure that the following modules are loaded (uncomment the line, if necessary):
LoadModule log_config_module modules/mod_log_config.so
LoadModule setenvif_module modules/mod_setenvif.so
LoadModule ssl_module modules/mod_ssl.so
LoadModule socache_shmcb_module modules/mod_socache_shmcb.so
Configuring HTTPS in Apache.
The configuration of HTTPS is done in the file httpd-ssl.conf, that you find in the \conf\extra directory. Here is
the (partial) content of my httpd-ssl.conf, the lines that I modified (to adapt the settings to my actual system) are displayed in bold.
Listen 443
SSLCipherSuite HIGH:MEDIUM:!MD5:!RC4:!3DES
SSLProxyCipherSuite HIGH:MEDIUM:!MD5:!RC4:!3DES
...
SSLSessionCache "shmcb:${SRVROOT}/logs/ssl_scache(512000)"
SSLSessionCacheTimeout 300
...
##
## SSL Virtual Host Context
##
<VirtualHost _default_:443>
# General setup for the virtual host
DocumentRoot "${SRVROOT}/htdocs"
ServerName wk-win10.intranet.home:443
ServerAdmin admin@wk-win10.intranet.home
ErrorLog "${SRVROOT}/logs/error.log"
TransferLog "${SRVROOT}/logs/access.log"
# SSL Engine Switch:
# Enable/Disable SSL for this virtual host.
SSLEngine on
# Server Certificate:
SSLCertificateFile "${SRVROOT}/conf/wk-win10.intranet.home.crt"
# Server Private Key:
SSLCertificateKeyFile "${SRVROOT}/conf/wk-win10.intranet.home.key"
# Access Control:
<FilesMatch "\.(cgi|shtml|phtml|php)$">
SSLOptions +StdEnvVars
</FilesMatch>
<Directory "${SRVROOT}/cgi-bin">
SSLOptions +StdEnvVars
</Directory>
# SSL Protocol Adjustments:
BrowserMatch "MSIE [2-5]" \
nokeepalive ssl-unclean-shutdown \
downgrade-1.0 force-response-1.0
# Per-Server Logging:
CustomLog "${SRVROOT}/logs/ssl_request.log" \
"%t %h %{SSL_PROTOCOL}x %{SSL_CIPHER}x \"%r\" %b"
</VirtualHost>
Trying to access my Apache, entering the URL https://wk-win10 in Firefox leads to the warning Potential security risk ahead and Firefox suggests to go back to the previous page (i.e. not to visit the page on my server).
![Firefox security risk warning when trying to access a site with a self-signed certificate [1] Firefox security risk warning when trying to access a site with a self-signed certificate [1]](../screenshots/https_install3.jpg) |
This problem is due to the fact that actual web browsers do not accept self-signed certificates by default. If such a certificate is detected, the browsers display a warning and we have to explicitly allow access to the page by pushing the Advanced... button, followed by the Accept the risk and continue button (on Firefox...).
![Firefox security risk warning when trying to access a site with a self-signed certificate [2] Firefox security risk warning when trying to access a site with a self-signed certificate [2]](../screenshots/https_install4.jpg) |
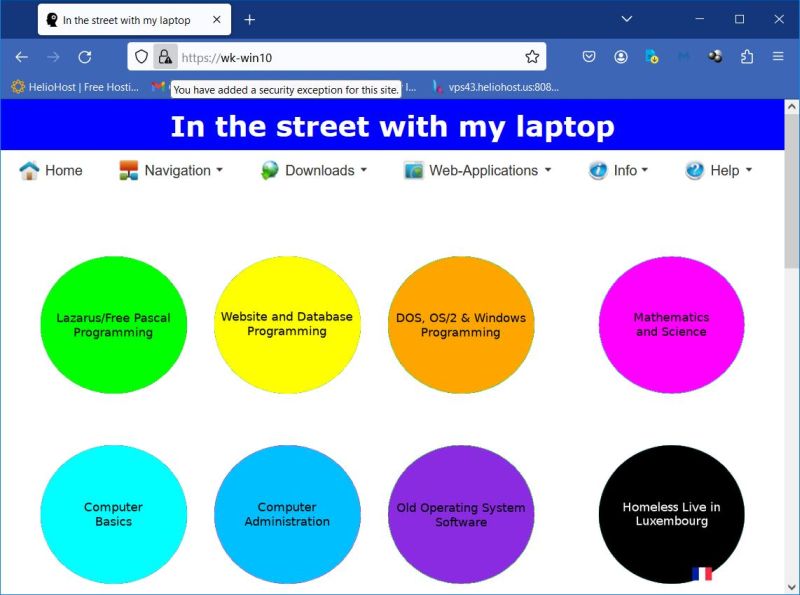
Doing so will temporarily add the certificate to the browser's certificates and we can continue to the site and browse its pages using secure HTTPS. Note the exclamation mark near the "secure connection" icon in the Firefox address field. It means that this connection is not as it should be, and if it has been allowed then only because the user had added a security exception.
 |
This is not as it should be. But, in a real life situation, you would probably have installed a certificate signed by some authority, and on a development machine, you either do not use HTTPS, or you just do the two (somewhat annoying, but for the rest, what importance?) button pushes...
Note: There are dozens of websites with articles about how to make a security exception permanent in Firefox, Chrome, Edge, Opera..., or about how to permanently add a self-signed certificate to a given web browser. I tried several of these methods, always ending up with the certificate being removed when closing the browser, or the warning message being displayed despite the certificate being shown in the browser's certificate management. If I remember well, I succeeded with Firefox, but only in standard browsing mode. When launching Firefox in private browsing mode (as I do by default), the self-signed certificate was removed (as I said, if I remember well...). If one day I find a solution that works with one of the major browsers, I will write a tutorial about...
If you find this text helpful, please, support me and this website by signing my guestbook.