Resizing and moving a partition on MS Windows.
In my tutorial Creating a work partition on MS Windows, I explained, how Windows Disk Management can be used to create, delete and shrink a partition. This tutorial shows how to proceed to extend a partition and how to move a partition to another location on the disk.
The tutorial applies to Windows 10; on earlier versions of Windows, Disk Management might not include all of the features described here. Also note, that the tutorial is about a real life scenario on my own system. Playing actually around with VMware, I had the following partitions on my USB disk: "Data 3" (F:), "Virtual Disks" (V:), "Work 2" (X:) and "Work 3" (Y:). Considering that I'd need more space for my virtual machines, I decided to delete partition Y: and to take 200GB of the space becoming available to extend partition V: from 800GB to 1TB (the remaining free space being added to partition X:). I also decided to change the drive letter of the "Work" partition on my SSD from W: to X: and the drive letter of "Work 2" from X: to Y:.
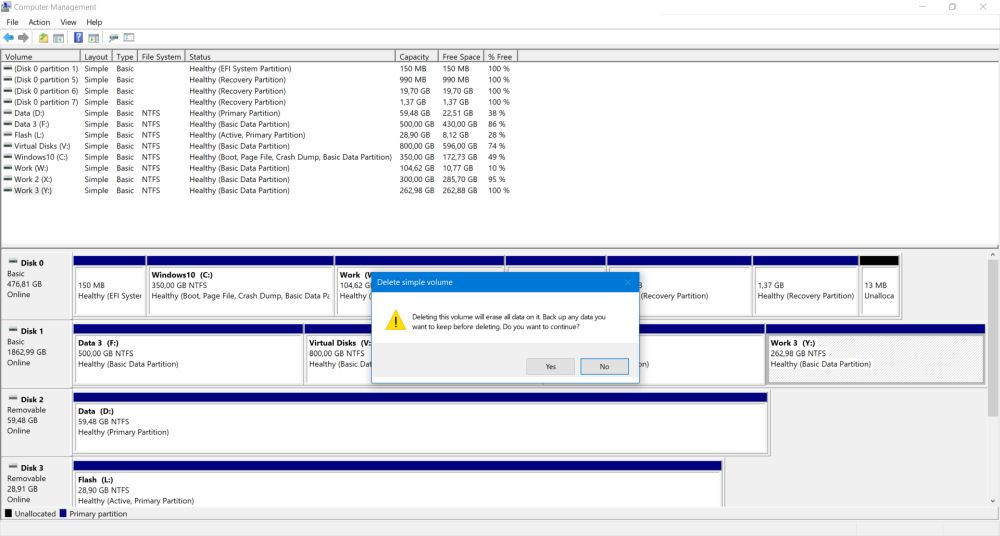
Deleting the "Work 3" partition.
This can be done in Windows Disk Management (to run this utility, right-click the Start button and choose Disk Management). Before deleting a partition, be sure, you backed up all of its data!. When the partition is removed, there will be no way to recover any data that it contained! No issue in my case: the partition "Work 3" was actually empty.
 |
Extending the "Work 2" partition.
Please, note that there is another way, that the one described here, to partition the disk as I wanted: Backing up the content of "Work 2", deleting the partition, extending partition V:, recreating the "Work 2" partition and restoring the data. Especially in my case, where "Work 2" only contained some 15GB of data, this had been not only lots simpler, but also faster. But, sometimes it's worth to choose the complicated way. Because, it may be a great opportunity to learn new things.
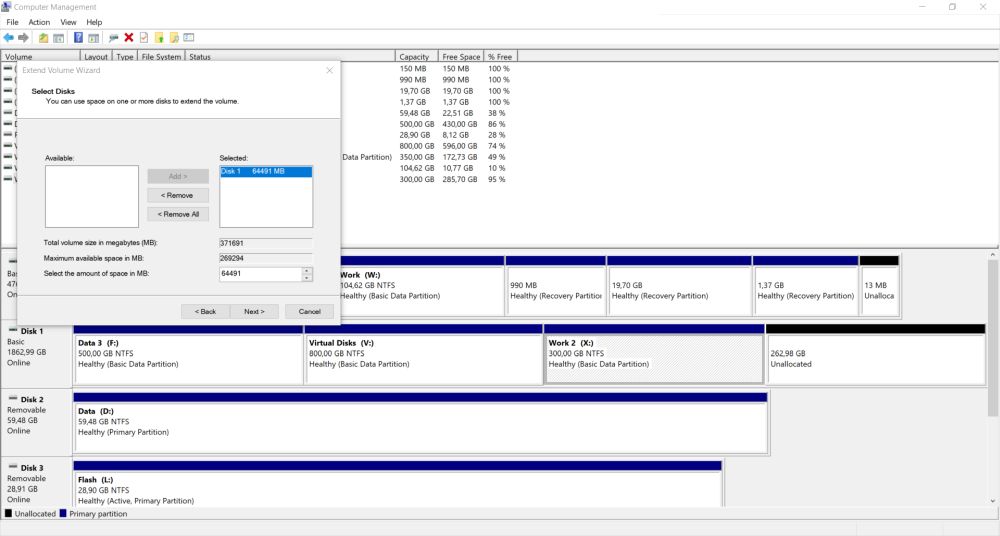
If you look at the screenshot above, you see that Windows talks about deleting a volume (and not about deleting a partition). What's the difference? Partitions are physically defined and physically separated storage areas of a disk. Volumes are logical entities, corresponding to some storage areas somewhere on one or several disks. In the simplest case (and I guess that most of you never used something else), a volume is made of one single partition. Volume and partition refer to the same physical storage area and the two terms are interchangeable in practice. However, Windows 10 (no idea, how other Windows versions do) allows to span a volume over one disk (i.e. defining a volume as a logical storage area composed of several non-contiguous parts of the disk) and even to span it over several disks (the volume containing physical areas on several disks). I was surprised to discover this feature of Windows 10 disk management, that seems to be very similar to LVM in Linux. "Seems", I say, because I never tried it out, so, no idea, how exactly it looks like in practice, how well it works or how sure you can be not to go searching problems, when using it. Anyway, we don't need it here to expand the "Work 2" partition (that after the removal of "Work 3" has a large area of unallocated space directly behind it). Extending the volume will in fact be nothing more than resizing the partition.
Wanting to extend V: from 800GB to 1GB and the unallocated space area after the removal of Y: being 262.98GB, we'll have to extend X: by 62.98 x 1024 = 64,491GB. That's what you can see on the screenshot below, where you can also guess, how the extend selection would look like, if there were other unallocated space areas on X: or on another drive.
 |
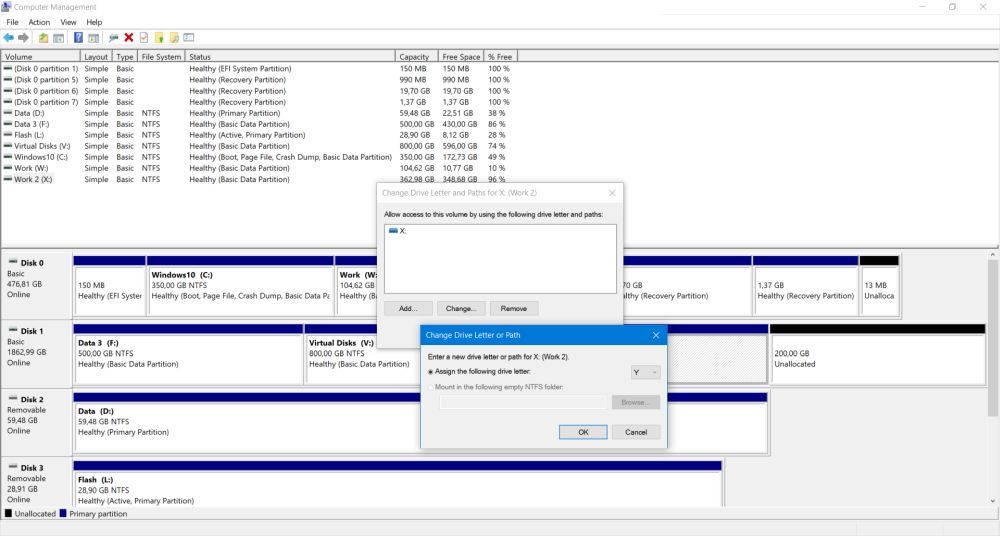
Changing the work partitions' drive letters.
This is of course not necessary at all; I just did it because X: and Y: "looks nicer" than "W:" and "X:"...
 |
When you try to change the drive letter of a partition, Drive Management pops up the following warning message:
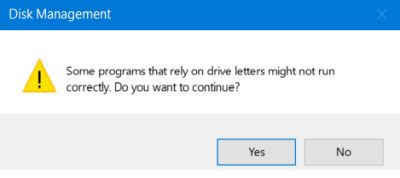 |
Is this a real issue? Yes and no; it may cause problems. Any program, that for any resource, that it needs, refers to this resource with a full path, including the drive letter, will no longer find this resource and will not be able to execute correctly. The classic case, that I had long years ago, when you had to install Windows from a CDROM, was that after having changed the drive letter and Windows needed some additional stuff from the CD, an error message, saying that these files couldn't be found, popped up, Not really a problem, because there was the possibility to indicate the path to the files, what was nothing more than changing the drive letter within the old path displayed. What happens, if a program doesn't find its files, depends on the program. Web browsers simply use the default save location, if the custom one does not exist and I suppose that lots of other applications do the same. Other applications might display an error message, with or perhaps without giving the possibility to change the path (in this latter case, you'll have to change the application's settings or, if this isn't possible, to reinstall it). Surprising behavior of Microsoft's FilmForth, that changed the drive letter by itself in its application settings.
Moving the "Work 2" partition.
The aim of my repartitioning was to get a bigger "Virtual disks" partition, extending V: from 800GB to 1TB. Two possibilities at this state to do so:
- The classic way: Moving X: at the end of the disk and extending V: in the now adjacent unallocated space.
- Taking advantage of the logical volume management and extending V: by creating a volume, that spas over the actual partition and the unallocated space at the end of the disk.
This means, that we need a third-party partition manager to move the partition. Click the following link to download MiniTool Partition Wizard, a really amazing partitioning tool (plus extras: data recovery, disk benchmark, space analyzer; not tried out myself), free of charge for private use. There are others, of course. Search Google if you shouldn't like the one I work with... The screenshot below shows how Partition Wizard shows the partition layout on my storage media, after the modifications, described above, had been made to the USB disk, containing the "Virtual Disks" partition.
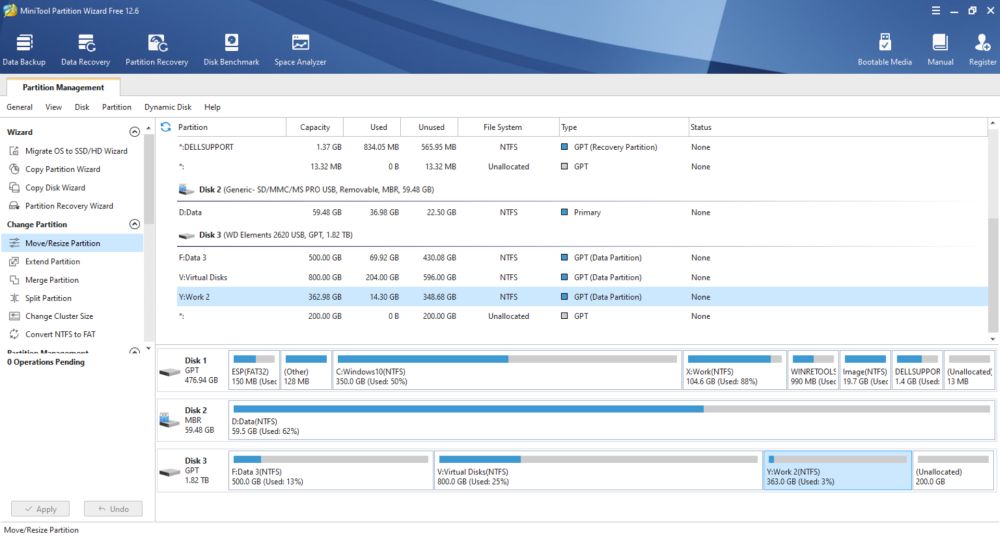 |
Moving a partition is normally not a big deal, but don't forget that manipulating partitions may result in unrecoverable data loss!, so, the only possibility to be sure that nothing happens to your data, is to make a backup (I didn't do here and normally don't do, but that's taking my own risk). Moving the "Work 2" partition with Partition Wizard to the end of the disk is quite simple. With partition Y: selected, choose Move/Resize Partition in the left pane to open a window, where you can use the mouse to manipulate the partition's size and location. If you wanted to resize it, drag one of the move handles (arrows) until you get the size, you want. To move the partition, position the mouse over it until the cursor changes into a cross-hair, click the partition and drag it to the location on the disk, where you want it to be.
![MiniTool Partition Wizard: Moving a partition [1] MiniTool Partition Wizard: Moving a partition [1]](../screenshots/win_partitioning5a.jpg)
|
![MiniTool Partition Wizard: Moving a partition [2] MiniTool Partition Wizard: Moving a partition [2]](../screenshots/win_partitioning5b.jpg)
|
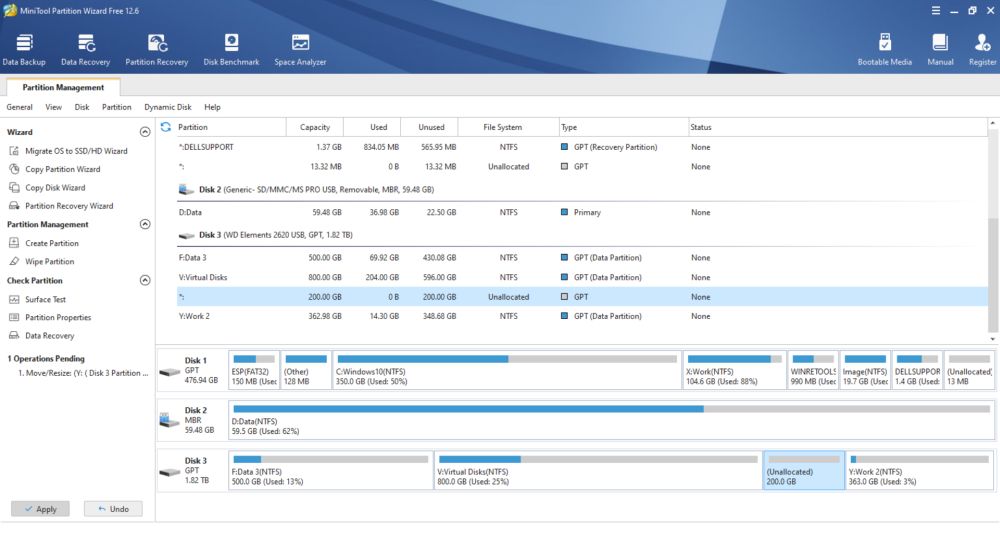
After having pushed the OK button in the Move/Resize Partition window, the disk layout is changed in the main Partition Wizard window and the move operation is added to the list of Operations pending in the left pane. You have now the possibility to physically perform these operations by pushing the Apply button or to revert them (i.e. not making any changes to the disk) by pushing the Undo button. Note, that moving a partition may take a really long time.
 |
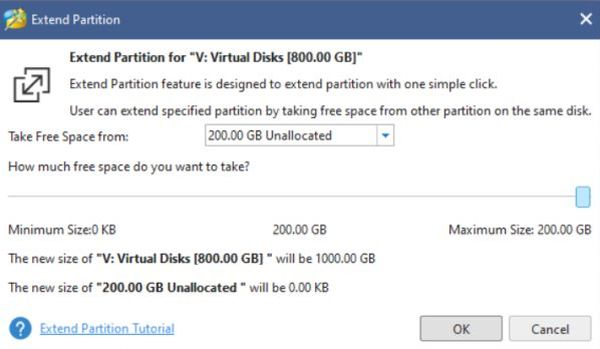
Last operation to do: Changing the size of the "Virtual Disks" partition from 800MB to 1TB. You can see this as a partition resize and do it using the Move/Resize Partition feature of Partition Wizard. Or, you can see it as a volume extent and do it either with Windows disk management, or using the Extend Partition feature of Partition Wizard. The screenshot below shows this last way to proceed. As the operation is a volume extension, you can add a storage area from any location on any disk.
 |
If you find this text helpful, please, support me and this website by signing my guestbook.