| 3. |
MySQL database server. |
| |
3.1. |
MySQL distributions. |
| |
|
|
MySQL is without any doubt the most used database server on the Web. Beside the commercial editions (standard, enterprise, cluster...)
there is a completely free MySQL community edition. On their site,
they describe this product as follows: "MySQL Community Edition is the freely downloadable version of the world's most popular open source
database. It is available under the GPL license and is supported by a huge and active community of open source developers. Available on
over 20 platforms and operating systems including Linux, Unix, Mac and Windows." MySQL is developed, distributed, and supported by Oracle
Corporation.
|
To work with databases, you not only need a database server, but also a client, connectors and administration tools. The MySQL community
edition may be downloaded as an all-in-one binary distribution, called MySQL Installer, including the following:
- MySQL Server and clients
- MySQL Connectors
- MySQL Workbench and sample models
- MySQL Notifier
- Sample Databases
- MySQL for Excel
- MySQL for Visual Studio
- Documentation
|
|
Note that MySQL Installer itself is 32 bit, but it may be used to install both 32 bit and 64 bit binaries.
|
|
Note: The MySQL database server, that I used, when writing this tutorial, was version 5.7.22 (x64). For some
considerations, concerning the actual (January 2021) version 8.0.22 (x64), cf. Actual MySQL distribution.
|
|
| |
3.2. |
MySQL Workbench. |
| |
|
|
"MySQL Workbench is a unified visual tool for database architects, developers, and DBAs. MySQL Workbench provides data modeling,
SQL development, and comprehensive administration tools for server configuration, user administration, backup, and much more.
MySQL Workbench is available on Windows, Linux and Mac OS X."
|
|
The paragraph above is how the MySQL developers themselves describe
MySQL Workbench on their website. It's not mandatory to have MySQL Workbench installed to work with MySQL databases; you can need
other applications, such as phpMyAdmin (cf. part 4 of this tutorial) instead. But there's no real reason not
to install it: first there is a community edition, that is entirely free and second, it is included in the MySQL Installer package described
above.
|
|
MySQL Workbench for Windows prerequisites.
|
|
To be able to install and run MySQL Workbench (recent version is 6.3) on Windows, your system needs to have the libraries listed
below installed. On Windows 10 (and I guess on Windows 8.1 with all updates done, too) this should be the case. If not, MySQL
installer will issue a message; use the links below to download the libraries from Microsoft, install them and retry installing MySQL.
|
|
| |
3.3. |
Installing MySQL. |
| |
|
|
The following text concerns the installation of the MySQL community edition database server (version 5.7.22 64bit, MySQL
"all-in-one" Installer package) on MS Windows (Windows 10 Pro). On Linux platforms, MySQL is often installed by default, or may be selected during
the OS installation.
|
|
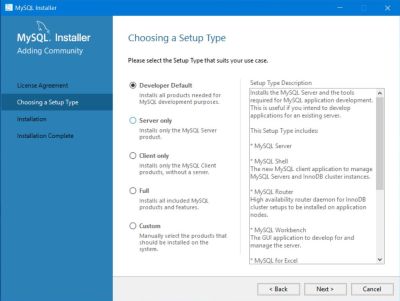
Double-click the setup file (actually mysql-installer-community-5.7.22.1.msi, 363MB) to start the installation process. After the license agreement,
choose an installation type. Developer Default will suit in most cases.
|
|
|
|
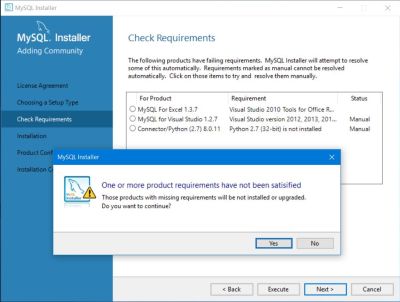
The installer checks the requirements and you probably will have some failures. This only matters if you need the components mentioned. For some of them
(as MySQL for Excel), you may use the Execute button in order to make the installer try to download and install the component. In
other cases , marked as "manual" (as the Python connector), you have to do the installation manually. In my case, as none of them is needed, I just clicked
Next to proceed.
|
|
|
|
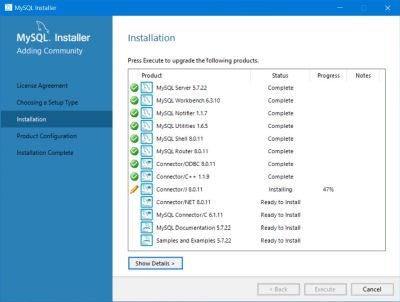
The package components, being part of the installation type chosen or selected by yourself if you choose Custom, will now be installed. Normally, this will be smooth and without any problems.
|
|
|
|
When installation is complete, the installer proceeds with the MySQL server configuration; the default options suit in most
cases. Be sure not to forget your MySQL root password (I suppose that most Linux users know that this one is not identical with
their system administrator, also called root), otherwise you will not be able to access your databases nor to create new ones! If you intend connecting
to MySQL using a named pipe, you have to enable this feature here. If you intend to run several MySQL servers, you will have to change service name and port;
you also have to use different server ids (set in Advanced Options). In Advanced Options, you may also
enable special logfiles (mostly used for debugging purposes). Configure the document store, if you need it (not enabled by default). The only thing I did
change, is to set the MySQL service not to start automatically with the start of Windows.
|
|
|
|
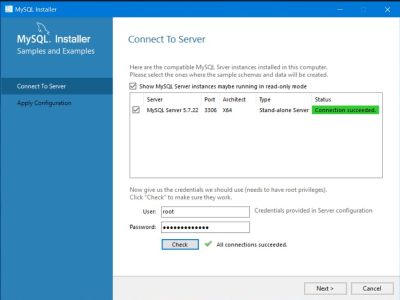
After the configuration of the MySQL server, it's the turn of the MySQL router and the sample databases. During this step the installer has to connect
to the newly installed server to create the sample databases. You will have to enter the MySQL root password. If this step succeeds, you should be able to
run your MySQL server without any problems...
|
|
|
|
Note: To uninstall a component or completely remove the MySQL package, run MySQL Installer and choose
what you want to remove. Backing up your databases, before doing so, wouldn't be a bad idea!. After a complete uninstall, there will be some files left in
C:\Program Data (you must select to view hidden folders to see this one in Windows File Explorer): Look for a folder called MySQL and delete it.
|
|
| |
3.4. |
Running the MySQL database server. |
| |
|
|
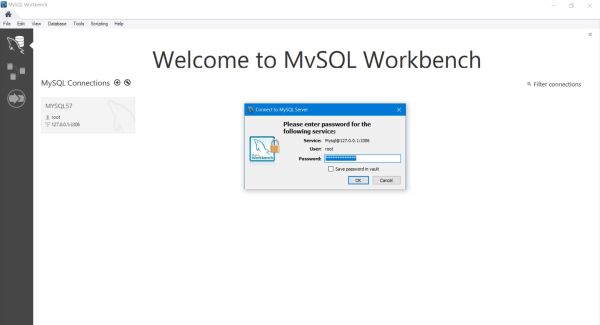
I sometimes experienced problems when trying to start/stop the MySQL server from within MySQL Workbench or to use my databases when connecting
with MySQL Workbench before the server was started. Simple work-around: There is an application, called MySQL notifier,
that similar to ApacheMonitor with Apache, allows to start/stop, monitor and manage one ore more MySQL server instances. Using this application (or
the Windows Services feature) to start the service, then launching MySQL
Workbench always worked well for me. Click on the gray area, referencing the MYSQL57 service, running on localhost.
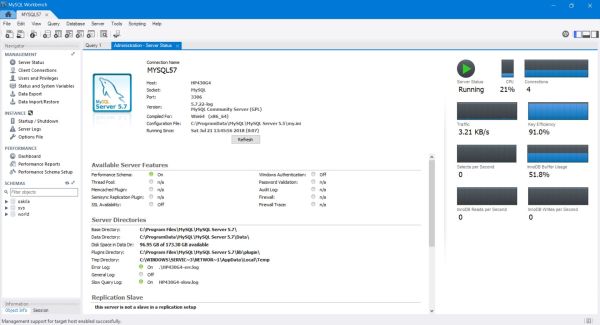
A dialog box pops up, asking for the root password; enter it and push the OK button. MySQL Workbench opens and you have access to your databases,
as well as to the server management features.
|
|
|
|
| |
3.5. |
MySQL schemas, users and privileges. |
| |
|
|
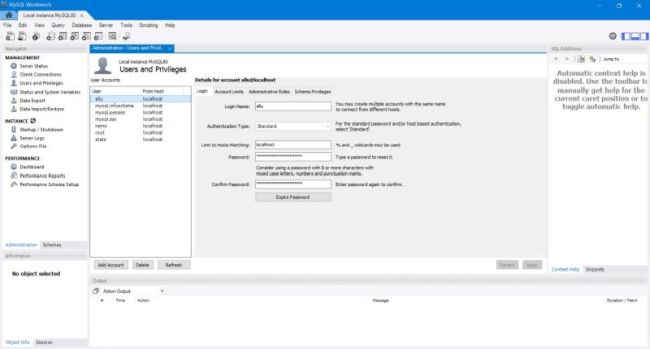
A schema may be viewed as a database, privileges may be viewed as the permissions a given user has when accessing the MySQL server. Accessing
the MySQL server from a given place, more exactly. If you create a new MySQL account, you not only define a user name
and password, but also the computer (IP address) or network (IP address range) from where this user has the right to connect. In most cases,
this will be localhost. To allow a user to connect from anywhere, enter "%". The screenshot below shows the login
settings of my custom user "allu".
|
|
|
|
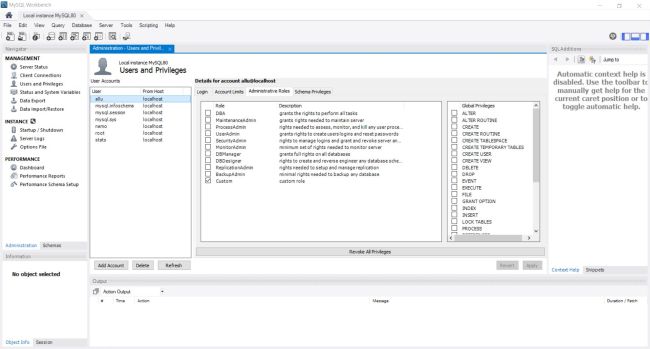
Global privileges are the permissions a user has to access all databases on the server. There are predefined "sets"
of global privileges grouped as so-called roles: DBA, BackupAdmin... A custom role can be any combination of available privileges. On the other
side there are database privileges, that apply to a given database or some given databases only. The screenshot below
shows how I grant the global privileges Show databases, Select and Show
view to the newly created user allu. Thereby, he gets the permission to view what databases exist on this server and to view (read) the data
stored in any of these databases.
|
|
|
|
The following two screenshots show how I give allu the permission to insert, update and delete records and execute stored procedures in the "world" database.
What finally means: allu may read everything, may manipulate data of the "world" database as he wants, but has no permission to create, alter, delete databases,
tables, indexes, etc (I always use root to do this).
|
|
|
|
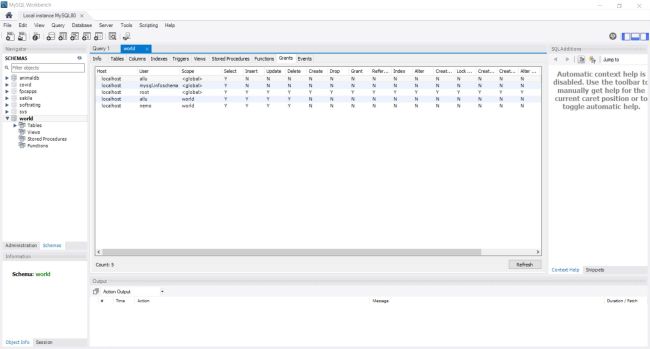
In MySQL Workbench, the schemas defined on the server are listed in the left pane. Moving the mouse over a schema name shows
two icons: an "i" for information and a screwdriver for configuring. If you click the "i" icon corresponding to the "world" schema, a summary of this
database is displayed. In the last pane of this display (called Grants), you can see all users who actually have privileges for
this given database. The screenshot below shows the privileges for my "world" database, in particular those of "allu" and "nemo". I use this latter one as
read-only user for custom databases, i.e. he has no global privileges and I gave him Select and Show
view privileges for "world" (as I do for my other personal databases).
|
|
|
|
| |
3.6. |
Querying the database using MySQL Workbench. |
| |
|
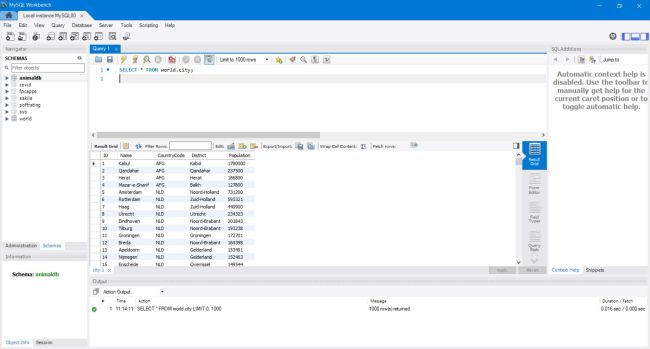
When "opening" a database in the Schemas pane in MySQL Workbench, you can see its tables, views and stored procedures. When moving
the mouse over a table name, three icons are displayed: a "i" for information, a screwdriver for configuration (i.e. modifying the table structure) and a table
for showing its content. In fact, clicking this icon for the "city" table of the "world" database is nothing else than executing the query:
SELECT * FROM world.city;
that is the SQL statement for displaying all records of this table.
|
|
|
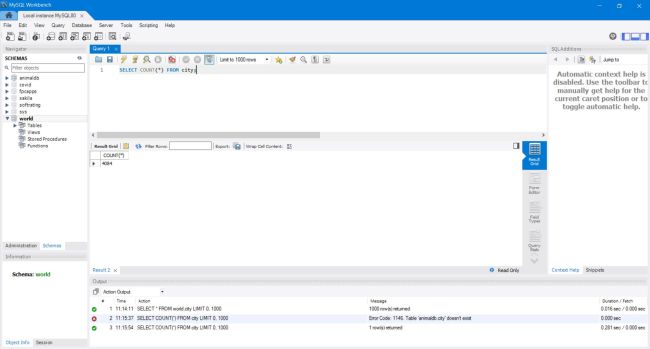
In the SQL tab of the main Workbench window, you can enter any SQL statement. Terminate it with ";" and click the Execute icon to run it. This way, you can use MySQL Workbench to manage the database itself (creating it or its tables, granting
privileges...), to manage the database's records (insert, update or delete them) or to display records based on any criteria allowed by the Structured Query Language (SQL). A simple example (the same as used in the PHP, Perl and Free Pascal programs below): Displaying
the number of cities in the "world.city" table:
SELECT COUNT(*) FROM city;
|
|
In this example, I omit the name of the database. This only works if you connected to the correct database before. If you have a look at the messages on
the screenshot below, you see that when connected to the databse "animaldb", the query resulted in an error message (because there is no table "city" in
"animaldb"), and when connected to "world", it returned the table record count. To connect to a given database in MySQL Workbench, just double-click it in
the left pane; when its name becomes highlighted (bold), the connection is done and you may reference the database objects without explicitly specifying
its name.
|
|
|
|
| |
3.7. |
Accessing MySQL with PHP scripts. |
| |
|
|
Access to a MySQL database form a PHP script is done by using the MySQL-specific PHP extension mysqli or pdo_mysql
(cf. part 2 of this tutorial). Which one of these extensions you use, is up to you. The usage syntax is quite different; with both extensions
enabled in php.ini, you may choose the one that suits you best.
|
mysql.php is a simple script to test MySQL access, using the mysqli extension and intended to do the same as we did in Workbench before: Displaying
the number of records in the world.city table. There are 3 steps to do so:
- Connecting to the "world" database (doing so with the "nemo" user created above).
- Running the query (SQL statement, just as above).
- Retrieving the query result (and display it).
Here's the code of mysql.php:
|
<html>
<head>
<title>PHP-MySQL test</title>
</head>
<body><p>
<php
$host= '127.0.0.1'; $database='world'; $user = 'nemo'; $passwd = 'nemo';
$mysqli = new mysqli($host, $user, $passwd, $database);
$sql = "SELECT count(*) AS _count FROM city";
$uresult = $mysqli->query($sql, MYSQLI_USE_RESULT);
$count = 0;
if ($uresult) {
$row = $uresult->fetch_assoc(); $count = $row['_count'];
}
echo "Number of cities in database 'world' = $count";
?>
</p></body>
</html>
|
|
Placing the script in the /php server directory and entering localhost/php/mysql.php in the web browser address field will
result in something similar to what's shown on the screenshots below. The first one shows a situation, where the MySQL server is stopped, the second
one, when it is running.
|
|
|
|
| |
3.8. |
Accessing MySQL with Perl scripts. |
| |
|
|
A description of how to access a MySQL server from Perl (including a simple test script doing exactly the same as we did with PHP here) is
given in part 5 of this tutorial.
|
|
| |
3.9. |
Accessing MySQL with Python scripts. |
| |
|
|
A description of how to access a MySQL server from Python (including a simple test script doing exactly the same as we did with PHP here) is
given in part 6 of this tutorial.
|
|
| |
3.10. |
Accessing MySQL with Free Pascal applications. |
| |
|
|
| |
3.11. |
Actual MySQL distribution. |
| |
|
|
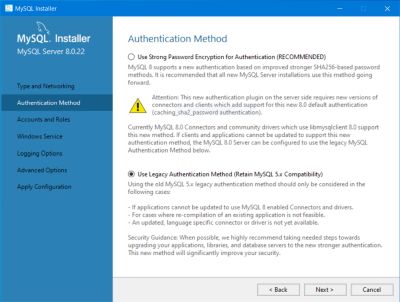
The actual (March 2023) version is MySQL 8.0.32. The application is build with Visual Studio 2015-2019 (VC16) and needs .NET
framework 4.5.2 (installed by default on Windows 10). Concerning the installation of the all-in-one package, the component list is somewhat different from
the one shown above; in particular MySQL Notifier isn't anymore included (no more available?). One of the big differences with previous versions is a
new authentication method, with improved stronger SHA256-based password encryption. However, during setup, the user has the
possibility to choose between this new method and legacy (MySQL 5.x compatible) authentication. As I run my database locally and
access it only locally, I chose the legacy method (making sure to have no problems with possibly not updated drivers).
|
|
|
|
There seems to be a problem with the configuration of the "world" database (at least this was the case with MySQL 8.0.22, that I am actually using). The
tables being created with some Latin character set, accentuated characters appear as "garbage". The probably best and easiest to do is to drop the database
and recreate it, using the SQL of the "world" database download file.
|
|
![MySQL installation: Server configuration [1] MySQL installation: Server configuration [1]](../screenshots/mysql4a.jpg)
![MySQL installation: Server configuration [2] MySQL installation: Server configuration [2]](../screenshots/mysql4b.jpg)
![MySQL installation: Server configuration [3] MySQL installation: Server configuration [3]](../screenshots/mysql4c.jpg)
![MySQL Workbench: Granting database privileges [1] MySQL Workbench: Granting database privileges [1]](../screenshots/mysql7c.jpg)
![MySQL Workbench: Granting database privileges [2] MySQL Workbench: Granting database privileges [2]](../screenshots/mysql7d.jpg)
![Accessing MySQL with PHP [1] Accessing MySQL with PHP [1]](../screenshots/mysql9a.jpg)
![Accessing MySQL with PHP [2] Accessing MySQL with PHP [2]](../screenshots/mysql9b.jpg)
