| 3. |
MySQL database server setup. |
| |
In my tutorial Web development environment setup on MS Windows: MySQL database server, I showed how
to install and configure MySQL on Microsoft Windows. In this tutorial, you will learn, how to run a local database on macOS. The tutorial is about the
installation of MySQL 8 on macOS 11 Big Sur, but I suppose that it applies to other (newer) versions, too.
|
| |
3.1. |
Installing MySQL. |
| |
|
|
The version of MySQL server used in this tutorial is MySQL Community Server 8.0.31, 64bit, downloaded as DMG file
(mysql-8.0.31-macos12-x86_64.dmg) from the MySQL website. The archive contains a single
file, with the same name, but with a .pkg extension. Double-click this file to install the package.
|
|
A warning pops up, telling you that you only should install software from trusted sources. Push the Allow button to confirm that
you want to do the installation. The MySQL setup wizard is started; it will not only copy the new files, but also asks you for all information that is needed
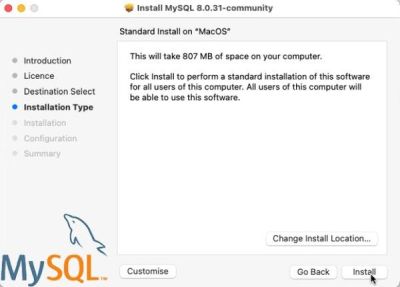
to configure the database server. After the Welcome and License agreement windows, you have to define the
installation type. To use all default values, accept the Standard install on macOS type by simply pushing
the Install button (If you want to make changes to the default setup, use the Customize button instead).
|
|
|
|
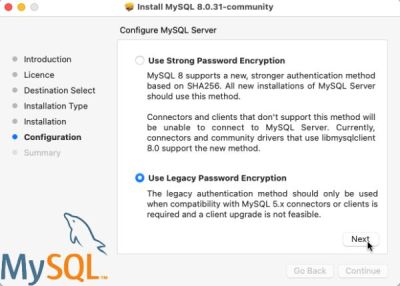
Files are copied, then, the wizard continues with the server configuration. The first decision, you have to make, is if you want
to use strong or legacy password encryption. The advantage of using the latter one is that it will allow the connection of older
clients (as for example MySQL 5 clients), too. And on a local server, there is not really the need to use enforced security settings (I think).
|
|
|
|
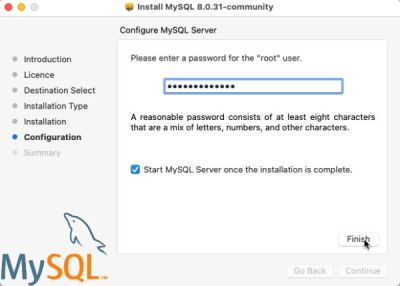
In the next window, you are asked to enter the root password and if you want to start the server
automatically (screenshot). The configuration settings, selected by the user, are saved, and the wizard ends with a
Thank you window.
|
|
|
|
| |
3.2. |
Installing MySQL Workbench. |
| |
|
|
MySQL Workbench is a GUI application that may be used for SQL development, as well as for server configuration, user administration, backup, and other
administration tasks. It is not mandatory to install it. You can use phpMyAdmin instead, and you
could even work with the only MySQL command line tools, if you wanted so.
|
|
You can download the application from the MySQL Workbench website. The download is
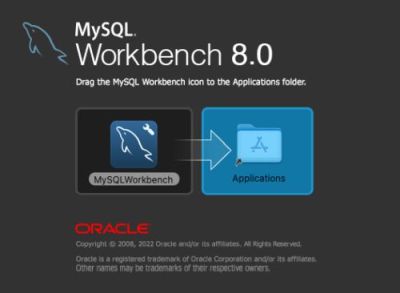
a DMG archive (in my case named mysql-workbench-community-8.0.31-macos-x86_64.dmg). Double-clicking it, opens one of these installation windows, that I would
call "typical for macOS". Beside information concerning the software, it contains 2 icons: On the left the application, on the right the macOS
Applications folder. Really easy to start setup: Just drag the application icon onto the Applications folder (the one within this window). That's it!
|
|
|
|
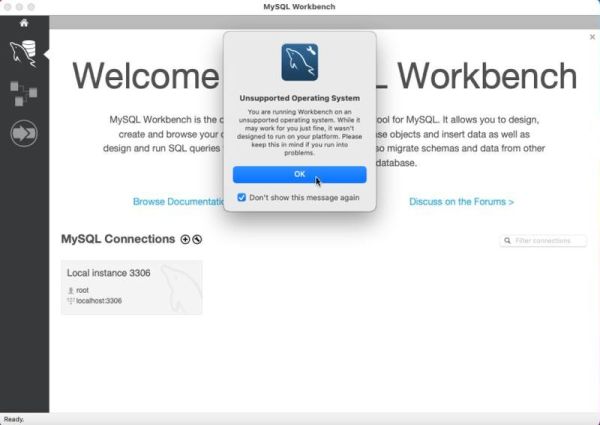
When I launched Workbench, a window popped up, telling me that my mac is an unsupported operating system and that this could
lead to problems when working with it. I don't know what the reason for this could be. Version 8.0.31 is said requiring macOS 11.1 or higher, what with
Big Sur 11.3 being installed on my computer should be ok. Anyway, I did not have any problems, when installing the sample database, configuring the users,
and trying some SQL queries... MySQL Workbench starts with a Welcome screen, showing the available MySQL
connections. With default settings, one local instance, running on localhost, port 3306. Click the instance to establish
the connection.
|
|
|
|
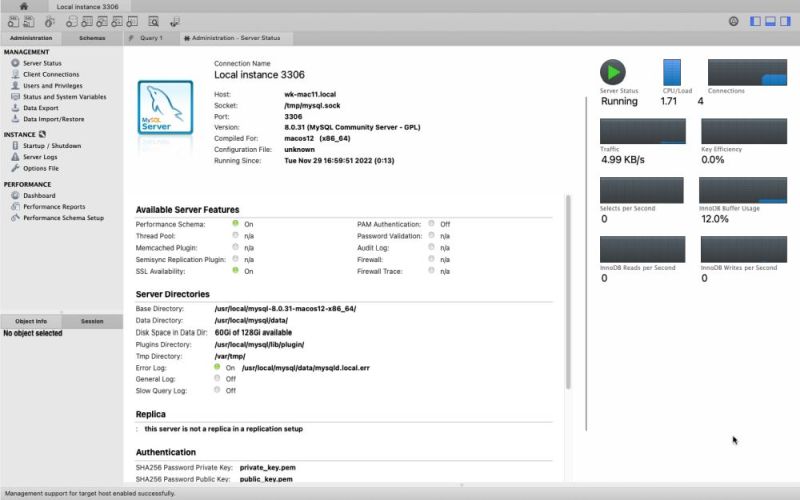
As a difference with phpMyAdmin, MySQL Workbench does not include the possibility to choose a user to log in. It's always the MySQL root user who is used,
and after having clicked onto the MySQL instance, you'll be asked to enter the password that you set for root during the installation of the server. The default
window displayed at startup is the server status page, as shown on the screenshot below.
|
|
|
|
| |
3.3. |
Installing the "world" sample database. |
| |
|
|
I did not check if the sample database "world" is included with MySQL 8 on macOS, as it is on Windows (and could perhaps be installed, using a customized
installation type). In fact, the tables of the Windows database use some Latin character set, and accentuated characters appear as "garbage" in the query output.
So I think that the best and easiest to do is to create the database manually, using the SQL of the
"world" database download file (I actually used the file that I had downloaded when recreating the
database on my Windows 10). I set up the database step by step (creating the database, creating the tables, filling the tables) by copying the corresponding
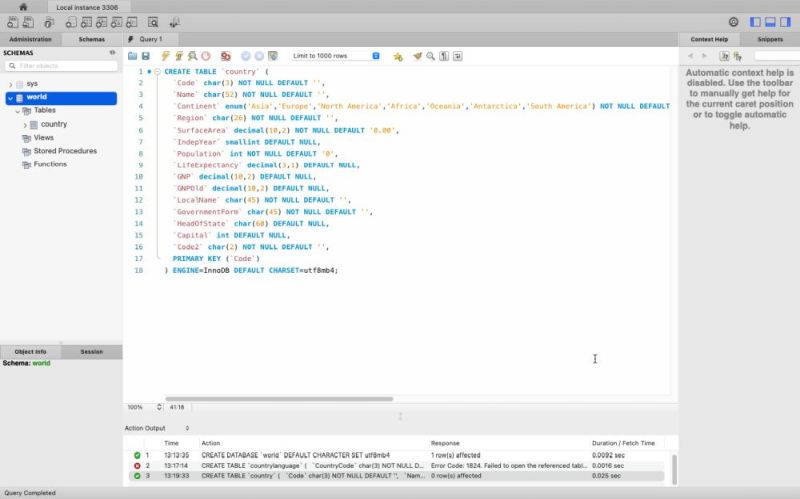
lines of the downloaded SQL code into a Query tab in MySQL Workbench and executing the statements. The screenshot shows the successful
creation of the "country" table.
|
|
|
|
If you have a closer look at the screenshot, you can see that there is an error message in relationship with the creation of the table "country_language". The
reason for this is that "country_language" contains a foreign key that references a field in the "country" table. Thus, the "country_language" table has to
be created after the "country" table.
|
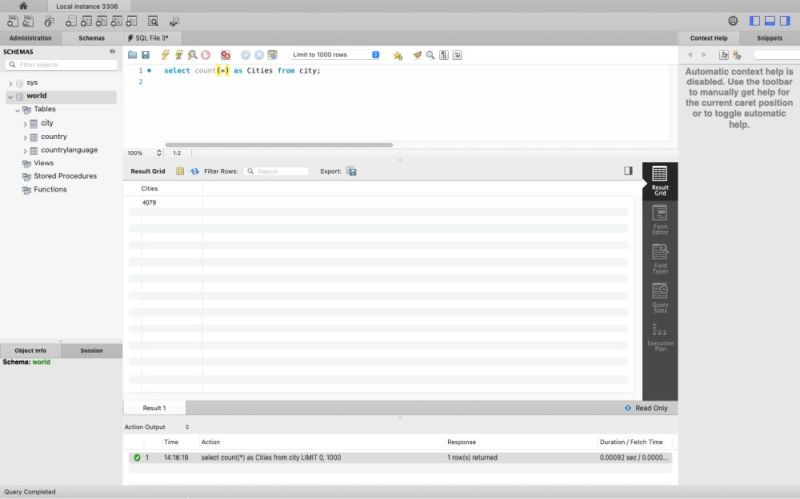
When all tables have been created and filled, we can run SELECT queries on it. Here the SQL to display the number of records in the "city" table:
select count(*) as Cities from city;
The screenshot shows the result returned by this query.
|
|
|
|
| |
3.4. |
MySQL schemas, users and privileges. |
| |
|
|
Even on a local server it's highly recommended not to use root (but a user with limited permissions) to access MySQL from your applications. The root user has
full read-write access to all tables in all databases, thus, not difficult to imagine what could happen if your program has a bug...
|
|
The concepts of MySQL schemas and privileges are explained in part 5 of my Web development environment setup
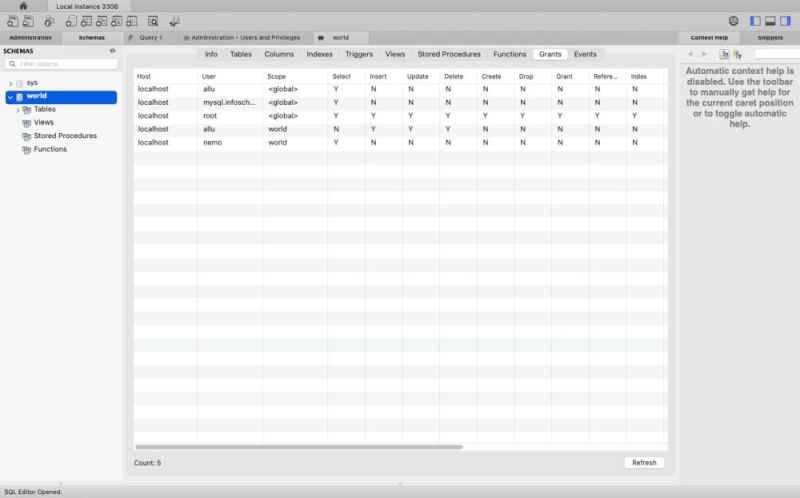
on MS Windows - MySQL database server tutorial. It also describes my two standard MySQL users "allu" and "nemo", the first one having read (select) access to
all databases and write (insert, update, and delete records) and execute access to individual databases (as, for example, "world"); the second one having no global
privileges at all and only select access to individual databases (limited read-only user). With these permissions, root will be the only one who has
administration privileges (such as creating, altering or dropping databases or tables). The screenshot below shows the global and database-specific grants for the
"world" database for all MySQL users on my macOS Big Sur.
|
|
|
|
| |
3.5. |
Accessing MySQL from PHP and Perl. |
| |
|
|
I described setup of PHP and Perl in my Web/Database environment on macOS: Dynamic webpages with
PHP and Perl tutorial. Using MySQL with PHP is even simpler than on Windows; using it with Perl ... I failed so far!
|
Concerning PHP (I'm actually using PHP 7.3, that came with the original installation of macOS Big Sur): On macOS, the MySQL related
extensions are enabled by default in php.ini, so if you succeed to run my hello.php script, you should also succeed to run mysql.php (without having to do any
further configuration steps). Here the code of my sample script, placed in the /Library/WebServer/Documents directory:
<html>
<head>
<title>PHP-MySQL test</title>
</head>
<body><p>
<?php
$host= '127.0.0.1'; $database='world'; $user = 'nemo'; $passwd = 'nemo';
$mysqli = new mysqli($host, $user, $passwd, $database);
$sql = "SELECT count(*) AS _count FROM city";
$uresult = $mysqli->query($sql, MYSQLI_USE_RESULT);
$count = 0;
if ($uresult) {
$row = $uresult->fetch_assoc(); $count = $row['_count'];
}
echo "Number of cities in database 'world' = $count";
?>
</p></body>
</html>
|
|
To run the script, type localhost/mysql.php in your web browser address field. Here the result in Safari:
|
|
|
|
Concerning Perl: As a difference with Windows, the Perl modules for database access (cf. part 5 of my
Web development environment setup on MS Windows: Perl tutorial) are not (or at least
not all) included with the macOS default Perl installation (Perl 5.30 on macOS Big Sur). Thus, you'll need to install them, using CPAN
(cf. part 6 of the Web development environment setup on MS Windows: Perl tutorial).
|
To launch the CPAN client, open a terminal and enter the command:
sudo perl -MCPAN -e shell
|
The CPAN commands to install the required modules are the following:
install Data::Dumper
install DBI
force install DBD::mysql
where the "force" is used because some of the tests will fail due to an invalid MySQL root password; using "force", these failures will be simply ignored.
|
|
I failed to make Perl access to MySQL work on my Mac. The installation of Data::Dumper took a long time, but finally succeeded.
DBI was already installed. But, during the installation of DBD::mysql, lots of errors and warnings were displayed, and the installation finally failed with
return status 512. I hope that I'll find a solution to this issue in order to update this document...
|
|
| |
3.6. |
Accessing MySQL from Lazarus/Free Pascal. |
| |
|
|
